Asus K43U Support Question
Asus K43U Support Question
Find answers below for this question about Asus K43U.Need a Asus K43U manual? We have 1 online manual for this item!
Question posted by chrestamaellagas on May 16th, 2014
Reset Hole In Asus K43u
Current Answers
Answer #1: Posted by seemeagain on May 16th, 2014 10:53 PM

Member since:
May 2nd, 2014 Points: 139,390

Answer #2: Posted by BusterDoogen on May 17th, 2014 9:13 AM

Member since:
October 30th, 2011 Points: 28,565,427
Using Recovery Partition
The Recovery Partition quickly restores your Notebook PC's software to its original working state. Before using the Recovery Partition, copy your data files (such as Outlook PST files) to USB storage devices or to a network drive and make note of any customized configuration settings (such as network settings).
About the Recovery Partition
The Recovery Partition is a reserved space on your hard disk drive used to restore the operating system, drivers, and utilities installed on your Notebook PC at the factory.
IMPORTANT!
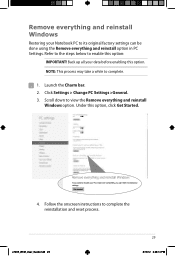
DO NOT delete the partition named RECOVERY. The Recovery Partition is created at the factory and cannot be restored if deleted. Take your Notebook PC to an authorized ASUS service center if you have problems with the recovery process.Method One
Using the Recovery Partition(on selected models)1. Press < F9 > during bootup.
2. Press [Enter] to select Windows Setup [EMS Enabled].
3. Select the language you want to recover and click Next.
4. Read the ASUS Preload Wizard messages and click Next.
5. Select a partition option and click Next. Partition options:
Recover Windows to first partition only.
This option deletes only the first partition and allows you to keep other partitions, and to create a new system partition as drive "C".
Recover Windows to entire HD.
This option deletes all partitions from your hard disk drive and creates a new system partition as drive "C".
Recover Windows to entire HD with two partitions.
This option deletes all partitions from your hard drive and creates two new partitions "C" (25%) and "D" (75%).
Method Two
Using Recovery DVD (on selected models)Creating the Recovery DVD:
1. Double-click the AI Recovery Burner icon on the Window desktop.
2. Insert a blank writable DVD into the optical drive and click Start to start creating the Recovery DVD. 3. Follow the onscreen instructions to complete creating the recovery DVD.
Prepare enough blank writable DVDs as instructed to create the Recovery DVD.
IMPORTANT!
Remove the external hard disk drive before performing system recovery on your Notebook PC. According to Microsoft, you may lose important data because of setting up Windows on the wrong disk drive or formatting the incorrect drive partition.Using the Recovery DVD:
1. Insert the Recovery DVD into the optical drive. Your Notebook PC needs to be powered ON.
2. Restart the laptop. Press ESC when you see ASUS logo and then select the optical drive (may be labeled as "CD/DVD") from ODD. Press [Enter] to boot from the Recovery DVD.
3. Select OK to start to restore the image.
4. Select OK to confirm the system recovery.
Restoring will overwrite your hard drive. Ensure to back up all your important data before the system recovery.
5. Follow the onscreen instructions to complete the recovery process.
WARNING: DO NOT remove the Recovery disc during the recovery process unless instructed to do so. Or else your partitions will be unusable. Ensure to connect the power adapter to your Notebook PC when performing system recovery. Unstable power supply may cause recovery failure.
I hope this is helpful to you!
Please respond to my effort to provide you with the best possible solution by using the "Acceptable Solution" and/or the "Helpful" buttons when the answer has proven to be helpful. Please feel free to submit further info for your question, if a solution was not provided. I appreciate the opportunity to serve you!
Related Asus K43U Manual Pages


Similar Questions


