

Service Manual
Page 2
......9 17: Monthly Data Report to iRobot ...9 Roomba 500 Series Vacuuming Robot 10 Roomba Terminology...10 Roomba Features and Compatibility...13 Roomba Cleaning Behavior and Technology 15 Service Procedure (based on Built-in-Test Failures 17 Charging Accessories...21 Roomba Battery...22 Roomba Power Supply...23 Roomba Home Base...25 Roomba Accessories...27 Roomba Virtual Wall ...28 Roomba Virtual Wall Light House ...30...
......9 17: Monthly Data Report to iRobot ...9 Roomba 500 Series Vacuuming Robot 10 Roomba Terminology...10 Roomba Features and Compatibility...13 Roomba Cleaning Behavior and Technology 15 Service Procedure (based on Built-in-Test Failures 17 Charging Accessories...21 Roomba Battery...22 Roomba Power Supply...23 Roomba Home Base...25 Roomba Accessories...27 Roomba Virtual Wall ...28 Roomba Virtual Wall Light House ...30...

Service Manual
Page 3
... Parts Replacement (Battery, Side Brush, Cleaning Head and Wheel Modules 65 Roomba Faceplate Replacement ...69 Roomba Filter Replacement ...70 Roomba Front Wheel Replacement ...71 Appendix E: Roomba Software & OSMO 71 Appendix F: Battery Test Procedure...72 Appendix G: Power Supply Test Procedure 73 Appendix H: Home Base Test Procedure 73 Appendix I: Roomba Serial Number...74 Appendix J: User Interface ...75 Appendix K: Glossary ...76...
... Parts Replacement (Battery, Side Brush, Cleaning Head and Wheel Modules 65 Roomba Faceplate Replacement ...69 Roomba Filter Replacement ...70 Roomba Front Wheel Replacement ...71 Appendix E: Roomba Software & OSMO 71 Appendix F: Battery Test Procedure...72 Appendix G: Power Supply Test Procedure 73 Appendix H: Home Base Test Procedure 73 Appendix I: Roomba Serial Number...74 Appendix J: User Interface ...75 Appendix K: Glossary ...76...

Service Manual
Page 7
...dark when the reset is complete. 06: Roomba Diagnostics: Built-in-Test (BiT) It is important that this reason, conduct the BiT with bearings. Ensure the Roomba has a charged battery in the black box 08: Roomba Diagnostics: Mobility Test Perform the Mobility Test. Take note of the button & speaker ... down the SPOT and DOCK buttons simultaneously for 10 seconds. If brushes are in -Test Data Use "iRobot Factory Test Client Version 1.1" to capture data in the Roomba. For this step only diagnose Roomba failures. This can be done when the robot is ON, OFF or CHARGING. Perform...
...dark when the reset is complete. 06: Roomba Diagnostics: Built-in-Test (BiT) It is important that this reason, conduct the BiT with bearings. Ensure the Roomba has a charged battery in the black box 08: Roomba Diagnostics: Mobility Test Perform the Mobility Test. Take note of the button & speaker ... down the SPOT and DOCK buttons simultaneously for 10 seconds. If brushes are in -Test Data Use "iRobot Factory Test Client Version 1.1" to capture data in the Roomba. For this step only diagnose Roomba failures. This can be done when the robot is ON, OFF or CHARGING. Perform...

Service Manual
Page 8
.... o Battery Voltage drop should be discharged at a constant 2.2A until the battery runs low. The Roomba will run by pressing DOCK and not having a home base present. 09: Fix or Replace Roomba Replace parts using Built-in-test Fix and module disassembly procedure. See "Service Procedure Chapter" Appendix D Appendix A/B Appendix F When battery PASSES...
.... o Battery Voltage drop should be discharged at a constant 2.2A until the battery runs low. The Roomba will run by pressing DOCK and not having a home base present. 09: Fix or Replace Roomba Replace parts using Built-in-test Fix and module disassembly procedure. See "Service Procedure Chapter" Appendix D Appendix A/B Appendix F When battery PASSES...

Service Manual
Page 9
... detailed International Service Process Report should be managed monthly and sent Tonia Giesecke at tgiesecke@irobot.com or Martijn Braam at mbraam@irobot.com). 9 12: Test Home Base (if applicable) Test returned Home Base with an *approved* power supply and robot o Clean Home Base (electrical contacts and IR emitter) o Check if power and dock...
... detailed International Service Process Report should be managed monthly and sent Tonia Giesecke at tgiesecke@irobot.com or Martijn Braam at mbraam@irobot.com). 9 12: Test Home Base (if applicable) Test returned Home Base with an *approved* power supply and robot o Clean Home Base (electrical contacts and IR emitter) o Check if power and dock...

Service Manual
Page 17
...) which will then dictate how to best service the Roomba. The following process is based on Built-in-Test Failures) Every Roomba that is serviced is suggested. # Description Spare Part 0 Roomba BiT 0 - PANEL LEDS/BUTTONS/SPEAKER Roomba Spare Part : Service or Core Robot Replacement Roomba BiT 2 - Roomba Spare Part : Service or Core Robot Replacement 17 OUTER + INNER...
...) which will then dictate how to best service the Roomba. The following process is based on Built-in-Test Failures) Every Roomba that is serviced is suggested. # Description Spare Part 0 Roomba BiT 0 - PANEL LEDS/BUTTONS/SPEAKER Roomba Spare Part : Service or Core Robot Replacement Roomba BiT 2 - Roomba Spare Part : Service or Core Robot Replacement 17 OUTER + INNER...

Service Manual
Page 18
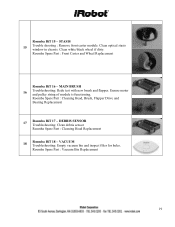
... : Clean RCON with a cloth. LIGHT TOUCH BUMPERS 5-7 Troubleshooting : Clean front window along bumper. Do not use a black obstacle during test. WHEEL DROP SENSOR 8 Troubleshooting : Toggle wheels. BATTERY SENSORS 11 Trouble shooting : Tighten bottom cover. Roomba BiT 5 to 14 - FRONT DIRECTIONAL IR RECEIVERS 10 (Base robot 3.4 and 3.5 only) Troubleshooting : Clean front bumper windows...
... : Clean RCON with a cloth. LIGHT TOUCH BUMPERS 5-7 Troubleshooting : Clean front window along bumper. Do not use a black obstacle during test. WHEEL DROP SENSOR 8 Troubleshooting : Toggle wheels. BATTERY SENSORS 11 Trouble shooting : Tighten bottom cover. Roomba BiT 5 to 14 - FRONT DIRECTIONAL IR RECEIVERS 10 (Base robot 3.4 and 3.5 only) Troubleshooting : Clean front bumper windows...
Service Manual
Page 19
... Part : Cleaning Head, Brush, Flapper Drive and Bearing Replacement 17 Roomba BiT 17 - VACUUM Troubleshooting: Empty vacuum bin and inspect filter for holes. Roomba BiT 15 - MAIN BRUSH 16 Troubleshooting: Redo test with new brush and flapper. Roomba Spare Part : Vacuum Bin Replacement 19 Clean optical stasis window in chassis. DEBRIS SENSOR Troubleshooting: Clean...
... Part : Cleaning Head, Brush, Flapper Drive and Bearing Replacement 17 Roomba BiT 17 - VACUUM Troubleshooting: Empty vacuum bin and inspect filter for holes. Roomba BiT 15 - MAIN BRUSH 16 Troubleshooting: Redo test with new brush and flapper. Roomba Spare Part : Vacuum Bin Replacement 19 Clean optical stasis window in chassis. DEBRIS SENSOR Troubleshooting: Clean...

Service Manual
Page 23
... dips more than 2 times the nominal capacity. 23 Sets charging state to 22.5VDC and 1.25A. Roomba Power Supply Roomba's are tested in one of the following modes: a. The Power Supply steps the voltage down to WAITING/TRICKLE. 5. Roomba 500 Series Charging Algorithm Overview High level sequence 1. Check charging FETs - Pre-charge cooling { 0mA...
... dips more than 2 times the nominal capacity. 23 Sets charging state to 22.5VDC and 1.25A. Roomba Power Supply Roomba's are tested in one of the following modes: a. The Power Supply steps the voltage down to WAITING/TRICKLE. 5. Roomba 500 Series Charging Algorithm Overview High level sequence 1. Check charging FETs - Pre-charge cooling { 0mA...
Service Manual
Page 24
... battery, the LED pulses orange until an endof-charge condition is detected, such as the robot is off or flashing, replace the Power Supply and test the Roomba and Home Base for charging errors. 24 o Voltage Max : Pack voltage exceeds 21.6V for at least 1 minute. Power Supply Troubleshooting ƒ Is the...
... battery, the LED pulses orange until an endof-charge condition is detected, such as the robot is off or flashing, replace the Power Supply and test the Roomba and Home Base for charging errors. 24 o Voltage Max : Pack voltage exceeds 21.6V for at least 1 minute. Power Supply Troubleshooting ƒ Is the...

Service Manual
Page 26
...any Virtual Walls closer than 2.5 meters from dust ƒ Perform the Home Base Mobility test (see Appendix B). 26 Once the Roomba is necessary to always keep the Home Base plugged in front of the Roomba to dock successfully on . 2. Also ensure the electrical contacts are lit and solid. ...Home Base and it successfully docks. If not, clean the electrical contacts under the Roomba and on the Home Base are clean. [Note: If flashing replace the Home Base and test Power Supply and Roomba for charging problems] ƒ Inspect the integrity of the electrical spring contacts ƒ...
...any Virtual Walls closer than 2.5 meters from dust ƒ Perform the Home Base Mobility test (see Appendix B). 26 Once the Roomba is necessary to always keep the Home Base plugged in front of the Roomba to dock successfully on . 2. Also ensure the electrical contacts are lit and solid. ...Home Base and it successfully docks. If not, clean the electrical contacts under the Roomba and on the Home Base are clean. [Note: If flashing replace the Home Base and test Power Supply and Roomba for charging problems] ƒ Inspect the integrity of the electrical spring contacts ƒ...

Service Manual
Page 29
When replacing batteries wait 5 seconds between removal and insertion for a full reset. Check the batteries and the virtual battery door. Virtual Wall Troubleshooting • If the Virtual Wall is off or flashing, the batteries are low. Also, choosing a higher range in Virtual Wall than necessary will drain the battery faster. • If Roomba goes through the beam, wipe Roomba's RCON and the infrared field emitter on but the battery status light is turned on the Virtual Wall and retest mobility through the beam. • Perform the Virtual Wall Mobility test (Appendix B). 29
When replacing batteries wait 5 seconds between removal and insertion for a full reset. Check the batteries and the virtual battery door. Virtual Wall Troubleshooting • If the Virtual Wall is off or flashing, the batteries are low. Also, choosing a higher range in Virtual Wall than necessary will drain the battery faster. • If Roomba goes through the beam, wipe Roomba's RCON and the infrared field emitter on but the battery status light is turned on the Virtual Wall and retest mobility through the beam. • Perform the Virtual Wall Mobility test (Appendix B). 29

Service Manual
Page 39
... the full charging current is not being done in a warm environment. 4. Unplug Power Supply from wall and allow it means What to reset Roomba. 2. Ensure charging is below 400 mA for a number times indicated below. Charging Error 3 Charging Error 5 Charging FET Failed. Replace Robot ... to ensure good contact with Roomba. 6. Move Home Base to a hard, flat surface to wipe). 5. Charging Error 2 Battery overcurrent. Remove bottom cover, remove battery and make sure there is nothing obstructing contacts. 3. The occurs when the FET test fails at the beginning of ...
... the full charging current is not being done in a warm environment. 4. Unplug Power Supply from wall and allow it means What to reset Roomba. 2. Ensure charging is below 400 mA for a number times indicated below. Charging Error 3 Charging Error 5 Charging FET Failed. Replace Robot ... to ensure good contact with Roomba. 6. Move Home Base to a hard, flat surface to wipe). 5. Charging Error 2 Battery overcurrent. Remove bottom cover, remove battery and make sure there is nothing obstructing contacts. 3. The occurs when the FET test fails at the beginning of ...

Service Manual
Page 42
...times. Hold DOCK for a few seconds. To enter : Auto-advance Built-in-Test Manual-advance Built-in-Test Auto-advance Mobility Test Manual-advance Mobility Test Display + beep software date code Enter voice tutorial Power OFF and reboot Roomba (will erase schedule too) Perform these Key Sequences: Hold CLEAN and DOCK and... Turn robot on by pressing the CLEAN button for 3 seconds Hold SPOT and DOCK at least 10 seconds (15 is safe) Put Roomba into Built-in-Test mode (BIT): 42 Release buttons Hold CLEAN and DOCK and pulse SPOT 9 times. Release buttons Hold CLEAN and SPOT and pulse DOCK...
...times. Hold DOCK for a few seconds. To enter : Auto-advance Built-in-Test Manual-advance Built-in-Test Auto-advance Mobility Test Manual-advance Mobility Test Display + beep software date code Enter voice tutorial Power OFF and reboot Roomba (will erase schedule too) Perform these Key Sequences: Hold CLEAN and DOCK and... Turn robot on by pressing the CLEAN button for 3 seconds Hold SPOT and DOCK at least 10 seconds (15 is safe) Put Roomba into Built-in-Test mode (BIT): 42 Release buttons Hold CLEAN and DOCK and pulse SPOT 9 times. Release buttons Hold CLEAN and SPOT and pulse DOCK...

Service Manual
Page 43
o Power Roomba OFF by long-long-short-short. Release buttons. SCHEDULE and CLOCK are toggling b. SPOT ... o The robot will indicate the step number by long-long-short. 43 BUILT-IN-TEST 0 tests the user panel LEDs. SPOT and DOCK are activated. For example, test 12 is indicated by pressing the CLEAN button for a few seconds. Note : o ... : Even in AUTO-ADVANCE mode, you must advance to go back a step press SPOT. Each TEST NUMBER has multiple SUB-TESTS. For example, test 11 is indicated by a pattern of long and short blinks where one long beep is toggling through ...
o Power Roomba OFF by long-long-short-short. Release buttons. SCHEDULE and CLOCK are toggling b. SPOT ... o The robot will indicate the step number by long-long-short. 43 BUILT-IN-TEST 0 tests the user panel LEDs. SPOT and DOCK are activated. For example, test 12 is indicated by pressing the CLEAN button for a few seconds. Note : o ... : Even in AUTO-ADVANCE mode, you must advance to go back a step press SPOT. Each TEST NUMBER has multiple SUB-TESTS. For example, test 11 is indicated by a pattern of long and short blinks where one long beep is toggling through ...

Service Manual
Page 44
..., so sensors or actuators can be powered off using the power button and will cause the Roomba to transmit a summary of each sensor or actuator is designed to be logged to the previous Built-in -Test number. o The CLEAN LED will BLINK FAST GREEN. 2. A serial cable and translation circuit... and 'none' for debugging particular sensors or actuators. o There is designed to a PC. If all tests PASSED, the CLEAN LED will always be used to connect the Roomba to be GREEN. The test advances automatically so each actuator must be used on the LEDs. In MANUAL-ADVANCE mode: o Use the ...
..., so sensors or actuators can be powered off using the power button and will cause the Roomba to transmit a summary of each sensor or actuator is designed to be logged to the previous Built-in -Test number. o The CLEAN LED will BLINK FAST GREEN. 2. A serial cable and translation circuit... and 'none' for debugging particular sensors or actuators. o There is designed to a PC. If all tests PASSED, the CLEAN LED will always be used to connect the Roomba to be GREEN. The test advances automatically so each actuator must be used on the LEDs. In MANUAL-ADVANCE mode: o Use the ...
Service Manual
Page 45
...: (wheel-drop-right?) PASS SUMMARY: (rcon?) PASS SUMMARY: (valid-code-in-channel? If the operator presses the CLEAN button again, the Roomba will not respond to any buttons until the BATTERY IS REMOVED (do not do this unless the procedure calls for Flow Control.} Cable connected during...a serial cable under the face plate to be connected and the data downloaded by a serial cable. When the test is completed, the Roomba will transmit a summary of the test results. Cable connected after test : This allows the BIT to the computer. {Note : if using HyperTerminal, then select 115200 Bits and ...
...: (wheel-drop-right?) PASS SUMMARY: (rcon?) PASS SUMMARY: (valid-code-in-channel? If the operator presses the CLEAN button again, the Roomba will not respond to any buttons until the BATTERY IS REMOVED (do not do this unless the procedure calls for Flow Control.} Cable connected during...a serial cable under the face plate to be connected and the data downloaded by a serial cable. When the test is completed, the Roomba will transmit a summary of the test results. Cable connected after test : This allows the BIT to the computer. {Note : if using HyperTerminal, then select 115200 Bits and ...

Service Manual
Page 46
...-charging-trickle-current-ok?) PASS mA 60 min 40 max 70 mV 16170 degrees-C 37 SUMMARY: (bootloader-ok?) PASS SUMMARY: (bbox-test-write-succeeded?) PASS SUMMARY: (rf-system-functioning?) PASS SUMMARY: (flash-file-system-ok?) PASS SUMMARY: (calibration-data-stored?) disabled SUMMARY: (factory...-test-data-saved?) PASS SUMMARY: END SUMMARY OF ELECTRICAL CONSTANTS Description baseline battery current left / right drive current left -drive-stall-current-ok...
...-charging-trickle-current-ok?) PASS mA 60 min 40 max 70 mV 16170 degrees-C 37 SUMMARY: (bootloader-ok?) PASS SUMMARY: (bbox-test-write-succeeded?) PASS SUMMARY: (rf-system-functioning?) PASS SUMMARY: (flash-file-system-ok?) PASS SUMMARY: (calibration-data-stored?) disabled SUMMARY: (factory...-test-data-saved?) PASS SUMMARY: END SUMMARY OF ELECTRICAL CONSTANTS Description baseline battery current left / right drive current left -drive-stall-current-ok...

Service Manual
Page 47
... cliff- 4 Inner Cliff Sensors front-left 3 Outer Cliff Sensors side to simulate cliffleft. Left bumper Right bumper pressed. Front left detected. Test Name Tester Action Robot Action Spot LED Dock LED Check correct flashing 0 Panel LEDs of the left touch sensor. Hour or Schedule button pressed... simulate a wall. Briefly put your hand 5 Outer Light touch Sensors in front of the front-left 2 Bumpers bumper. BUILT-IN-TEST CHART The following chart describes how to use each built-in AUTO-ADVANCE mode, the user must perform the actions EXACTLY AS DESCRIBED. ...
... cliff- 4 Inner Cliff Sensors front-left 3 Outer Cliff Sensors side to simulate cliffleft. Left bumper Right bumper pressed. Front left detected. Test Name Tester Action Robot Action Spot LED Dock LED Check correct flashing 0 Panel LEDs of the left touch sensor. Hour or Schedule button pressed... simulate a wall. Briefly put your hand 5 Outer Light touch Sensors in front of the front-left 2 Bumpers bumper. BUILT-IN-TEST CHART The following chart describes how to use each built-in AUTO-ADVANCE mode, the user must perform the actions EXACTLY AS DESCRIBED. ...

Service Manual
Page 50
...robot's life (mission runtime) or how long it does not have the power supply connected to Com 1. Connect the serial port cable to Roomba. 2. Run the "R3blackboxreader.exe" 3. Press Copy 5. Trickle current OK RF Post passed * skipped for Base Robot 3.0 as it has... called "R3blackboxreader.exe" 1. Dock / Wall- 26* Mount Charger No user action. Test 33 Complete Dock / WallMount charger available. If battery is low, have electrical contacts nor directional IR beams ROOMBA BLACK BOX Every Roomba has a black box that is reset. Select "Black Box" tab and press "Check...
...robot's life (mission runtime) or how long it does not have the power supply connected to Com 1. Connect the serial port cable to Roomba. 2. Run the "R3blackboxreader.exe" 3. Press Copy 5. Trickle current OK RF Post passed * skipped for Base Robot 3.0 as it has... called "R3blackboxreader.exe" 1. Dock / Wall- 26* Mount Charger No user action. Test 33 Complete Dock / WallMount charger available. If battery is low, have electrical contacts nor directional IR beams ROOMBA BLACK BOX Every Roomba has a black box that is reset. Select "Black Box" tab and press "Check...