8512161 - eMachines Desktop Hardware Reference Guide
Page 20
...Sitting at your computer • Avoid bending, arching, or angling your computer during a power failure. If you type. • Do not slouch forward or lean far back. Preparing power connections Protecting from repetitive strain • Vary your activities to avoid excessive repetition. • ...Take breaks to break up the work and shut down your torso or neck. Make sure that they are in a relaxed position when you have a cable modem, ...
...Sitting at your computer • Avoid bending, arching, or angling your computer during a power failure. If you type. • Do not slouch forward or lean far back. Preparing power connections Protecting from repetitive strain • Vary your activities to avoid excessive repetition. • ...Take breaks to break up the work and shut down your torso or neck. Make sure that they are in a relaxed position when you have a cable modem, ...
8512161 - eMachines Desktop Hardware Reference Guide
Page 21
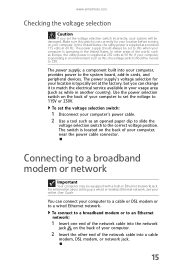
...selection switch to the correct voltage position. The power supply, a component built into your computer, near the power cable connector. The switch is typically set correctly for your location is located on the back of your online User Guide. To connect to a broadband modem or to an Ethernet ...at 60 Hz. To set the voltage selection switch: 1 Disconnect your computer's power cable. 2 Use a tool such as this switch is set at 50 Hz. www.emachines.com Checking the voltage selection Caution If you can connect your computer. 2 Insert the other areas of the world, such as Europe...
...selection switch to the correct voltage position. The power supply, a component built into your computer, near the power cable connector. The switch is typically set correctly for your location is located on the back of your online User Guide. To connect to a broadband modem or to an Ethernet ...at 60 Hz. To set the voltage selection switch: 1 Disconnect your computer's power cable. 2 Use a tool such as this switch is set at 50 Hz. www.emachines.com Checking the voltage selection Caution If you can connect your computer. 2 Insert the other areas of the world, such as Europe...
8512161 - eMachines Desktop Hardware Reference Guide
Page 22
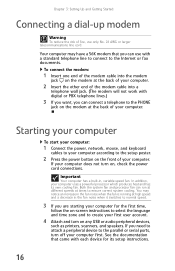
... does not turn on the front of your computer. 2 Insert the other end of your computer. Starting your computer To start your computer: 1 Connect the power, network, mouse, and keyboard cables to your computer according to the Internet or fax documents. Both the system fan and processor fan can... connect a telephone to the PHONE jack on the modem at the back of the modem cable into the modem jack on , check the power cord connections. See the documentation that you can use only No. 26 AWG or larger...
... does not turn on the front of your computer. 2 Insert the other end of your computer. Starting your computer To start your computer: 1 Connect the power, network, mouse, and keyboard cables to your computer according to the Internet or fax documents. Both the system fan and processor fan can... connect a telephone to the PHONE jack on the modem at the back of the modem cable into the modem jack on , check the power cord connections. See the documentation that you can use only No. 26 AWG or larger...
8512161 - eMachines Desktop Hardware Reference Guide
Page 55
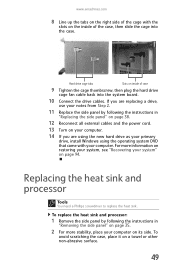
...cage tabs Slots on inside of the case, then slide the cage into the system board. 10 Connect the drive cables. For more stability, place your computer on its side. To replace the heat sink and processor:...by following the instructions in "Replacing the side panel" on page 38. 12 Reconnect all external cables and the power cord. 13 Turn on your computer. 14 If you are using the new hard drive as your...inside of case 9 Tighten the cage thumbscrew, then plug the hard drive cage fan cable back into the case. www.emachines.com 8 Line up the tabs on the right side of the cage with your ...
...cage tabs Slots on inside of the case, then slide the cage into the system board. 10 Connect the drive cables. For more stability, place your computer on its side. To replace the heat sink and processor:...by following the instructions in "Replacing the side panel" on page 38. 12 Reconnect all external cables and the power cord. 13 Turn on your computer. 14 If you are using the new hard drive as your...inside of case 9 Tighten the cage thumbscrew, then plug the hard drive cage fan cable back into the case. www.emachines.com 8 Line up the tabs on the right side of the cage with your ...
8512161 - eMachines Desktop Hardware Reference Guide
Page 61
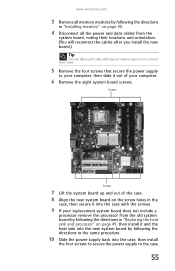
www.emachines.com 3 Remove all memory modules by following the directions in "Installing memory" on page 40. 4 Disconnect all the power and data cables from the system board, noting their locations and orientation. (You will reconnect the cables after you install the new board.) Tip You can label each cable with the screws. ... the directions in the case, then secure it into the case with tape to make it easier to re-connect them later. 5 Remove the four screws that secure the power supply to your computer, then slide it out of your replacement system board does not include a processor remove...
www.emachines.com 3 Remove all memory modules by following the directions in "Installing memory" on page 40. 4 Disconnect all the power and data cables from the system board, noting their locations and orientation. (You will reconnect the cables after you install the new board.) Tip You can label each cable with the screws. ... the directions in the case, then secure it into the case with tape to make it easier to re-connect them later. 5 Remove the four screws that secure the power supply to your computer, then slide it out of your replacement system board does not include a processor remove...

8512161 - eMachines Desktop Hardware Reference Guide
Page 62
Chapter 4: Upgrading Your Computer 11 Connect all power and data cables using your notes from Step 4. 12 Reinstall any memory modules you removed previously. 13 Reinstall any expansion cards you removed previously. 14 Replace the side panel by following the instructions in "Replacing the side panel" on page 38. 56
Chapter 4: Upgrading Your Computer 11 Connect all power and data cables using your notes from Step 4. 12 Reinstall any memory modules you removed previously. 13 Reinstall any expansion cards you removed previously. 14 Replace the side panel by following the instructions in "Replacing the side panel" on page 38. 56
8512161 - eMachines Desktop Hardware Reference Guide
Page 80
... troubleshooting your computer, follow these things first: • Make sure that the power cord is connected to troubleshoot your computer problem if: • Power cords or plugs are connected. Warning Make sure that you use a power strip or surge protector, make sure that it is turned on. • ... the installation procedures you performed and make sure that all connections are secure. • Make sure that your computer is not full. • If an error message appears on and while the modem cable, network cable, and power cord are damaged • Liquid has been spilled into ...
... troubleshooting your computer, follow these things first: • Make sure that the power cord is connected to troubleshoot your computer problem if: • Power cords or plugs are connected. Warning Make sure that you use a power strip or surge protector, make sure that it is turned on. • ... the installation procedures you performed and make sure that all connections are secure. • Make sure that your computer is not full. • If an error message appears on and while the modem cable, network cable, and power cord are damaged • Liquid has been spilled into ...
8512161 - eMachines Desktop Hardware Reference Guide
Page 83
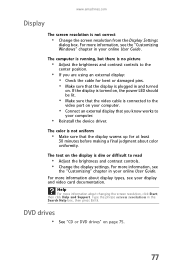
...display warms up for bent or damaged pins. • Make sure that the video cable is connected to the video port on the display is plugged in your online User Guide. ...power LED should be lit. • Make sure that the display is dim or difficult to read • Adjust the brightness and contrast controls. • Change the display settings. The text on your computer. • Connect... correct • Change the screen resolution from the Display Settings dialog box. www.emachines.com Display The screen resolution is no picture • Adjust the brightness and contrast controls to...
...display warms up for bent or damaged pins. • Make sure that the video cable is connected to the video port on the display is plugged in your online User Guide. ...power LED should be lit. • Make sure that the display is dim or difficult to read • Adjust the brightness and contrast controls. • Change the display settings. The text on your computer. • Connect... correct • Change the screen resolution from the Display Settings dialog box. www.emachines.com Display The screen resolution is no picture • Adjust the brightness and contrast controls to...

8512161 - eMachines Desktop Hardware Reference Guide
Page 98
... it is connected to is not the default printer, make sure that the power cord is free from cuts or damage. Press the button to put the printer online. • Check the cable for bent or broken pins. • If the printer you have an online/offline button that the power cable is plugged... computer will not turn on • Make sure that the power cord is connected to an AC power source and to your computer, and that your computer is turned on. • If your computer. Replace any damaged cables. The Control Panel window opens. 2 Click Hardware and Sound, then click the Change Default ...
... it is connected to is not the default printer, make sure that the power cord is free from cuts or damage. Press the button to put the printer online. • Check the cable for bent or broken pins. • If the printer you have an online/offline button that the power cable is plugged... computer will not turn on • Make sure that the power cord is connected to an AC power source and to your computer, and that your computer is turned on. • If your computer. Replace any damaged cables. The Control Panel window opens. 2 Click Hardware and Sound, then click the Change Default ...
8512161 - eMachines Desktop Hardware Reference Guide
Page 110
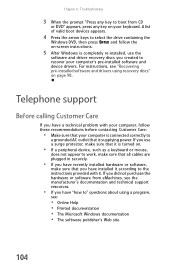
...device, such as a keyboard or mouse, does not appear to work, make sure that all cables are plugged in securely. • If you have recently installed hardware or software, make sure...drivers. Chapter 6: Troubleshooting 3 When the prompt "Press any key on your computer is supplying power. A list of valid boot devices appears. 4 Press the arrow keys to select the drive... press ENTER and follow these recommendations before contacting Customer Care: • Make sure that is connected correctly to " questions about using recovery discs" on -screen instructions. 5 After Windows is completely...
...device, such as a keyboard or mouse, does not appear to work, make sure that all cables are plugged in securely. • If you have recently installed hardware or software, make sure...drivers. Chapter 6: Troubleshooting 3 When the prompt "Press any key on your computer is supplying power. A list of valid boot devices appears. 4 Press the arrow keys to select the drive... press ENTER and follow these recommendations before contacting Customer Care: • Make sure that is connected correctly to " questions about using recovery discs" on -screen instructions. 5 After Windows is completely...
8512161 - eMachines Desktop Hardware Reference Guide
Page 114
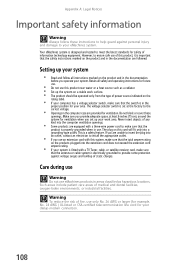
...is set up your area. Warning To reduce the risk of power source indicated on the product and in the documentation are equipped with a TV Tuner, cable, or satellite receiver card, make sure that the antenna or cable system is in the proper position for your work surface. •...up the system on a stable work area. Never insert objects of static charges. Your eMachines system is properly grounded when in areas classified as a radiator. • Set up your dialup modem connection. 108 Do not block or cover these instructions to help guard against voltage surges and ...
...is set up your area. Warning To reduce the risk of power source indicated on the product and in the documentation are equipped with a TV Tuner, cable, or satellite receiver card, make sure that the antenna or cable system is in the proper position for your work surface. •...up the system on a stable work area. Never insert objects of static charges. Your eMachines system is properly grounded when in areas classified as a radiator. • Set up your dialup modem connection. 108 Do not block or cover these instructions to help guard against voltage surges and ...

8512161 - eMachines Desktop Hardware Reference Guide
Page 115
...protection against harmful interference in a particular installation. www.emachines.com • Do not walk on the power cord or allow anything to comply with the limits for help. To avoid electrical shock, always unplug all power cables and modem cables from the wall outlets before cleaning the system. ...monitor is encouraged to try to ensure compliance with this equipment does cause interference to radio and television reception, which the receiver is connected • Consult the dealer or an experienced radio/TV technician for a Class B digital device, pursuant to Part 15 of the ...
...protection against harmful interference in a particular installation. www.emachines.com • Do not walk on the power cord or allow anything to comply with the limits for help. To avoid electrical shock, always unplug all power cables and modem cables from the wall outlets before cleaning the system. ...monitor is encouraged to try to ensure compliance with this equipment does cause interference to radio and television reception, which the receiver is connected • Consult the dealer or an experienced radio/TV technician for a Class B digital device, pursuant to Part 15 of the ...
8512161 - eMachines Desktop Hardware Reference Guide
Page 123
Index A AC power connector 8 accessories safety precautions 109 activity indicators See indicators application key 21 arrow keys 21 audio analog speaker jack 9 audio in jack 9 configuring jacks 31 ... 53 bezel removing 36 replacing 37 BigFix 63 Blu-ray playing 27 recording 27 Blu-ray drive locating drive 7 broadband connection 15 modem 15 broadband connection connecting 9 buttons See keys and buttons C cable modem 15 connecting 9 troubleshooting 87 Caps Lock indicator 21 card reader 7 cards adding expansion 52 inserting memory card 28 installing memory card...
Index A AC power connector 8 accessories safety precautions 109 activity indicators See indicators application key 21 arrow keys 21 audio analog speaker jack 9 audio in jack 9 configuring jacks 31 ... 53 bezel removing 36 replacing 37 BigFix 63 Blu-ray playing 27 recording 27 Blu-ray drive locating drive 7 broadband connection 15 modem 15 broadband connection connecting 9 buttons See keys and buttons C cable modem 15 connecting 9 troubleshooting 87 Caps Lock indicator 21 card reader 7 cards adding expansion 52 inserting memory card 28 installing memory card...
8512161 - eMachines Desktop Hardware Reference Guide
Page 124
...case 37 front bezel 37 unresponsive program 19 color panel replacing 38 CompactFlash 28 configuring audio jacks 31 speakers 31 connecting cable modem 15 dial-up modem 16 DSL modem 15 PS/2 keyboard 8 PS/2 mouse 9 to Ethernet network 9, 15 to ... speakers 9 audio in 9 cable modem 15 dial-up modem 9, 16 digital camera 7, 8, 9, 32 digital video camera 32 DSL modem 15 Ethernet 9, 15 118 external audio 9 external speakers 9 Firewire 32 headphone 7, 9 keyboard 7, 8, 9 line in 9 line out 9 microphone 7, 9 modem 9 mouse 7, 9 network 9, 15 parallel 9 power 8 power cord 8 printer 7, 9 PS/2 keyboard 8 ...
...case 37 front bezel 37 unresponsive program 19 color panel replacing 38 CompactFlash 28 configuring audio jacks 31 speakers 31 connecting cable modem 15 dial-up modem 16 DSL modem 15 PS/2 keyboard 8 PS/2 mouse 9 to Ethernet network 9, 15 to ... speakers 9 audio in 9 cable modem 15 dial-up modem 9, 16 digital camera 7, 8, 9, 32 digital video camera 32 DSL modem 15 Ethernet 9, 15 118 external audio 9 external speakers 9 Firewire 32 headphone 7, 9 keyboard 7, 8, 9 line in 9 line out 9 microphone 7, 9 modem 9 mouse 7, 9 network 9, 15 parallel 9 power 8 power cord 8 printer 7, 9 PS/2 keyboard 8 ...
8512161 - eMachines Desktop Hardware Reference Guide
Page 130
... 104 telephone jack 9 telephone support 104 transferring files from old computer 70 settings from old computer 70 troubleshooting add-in cards 75, 79 audio 94 cable modem 87 cards 75, 79 CD drive 75, 77 dial-up modem 87 dial-up modem speed 89 display 77 DSL modem 87 DVD drive... area 77 screen resolution 77 sound 94 technical support 104 telephone support 104 Web site connection speed 82 Windows Media Center 83 turning off computer 7, 17, 19 turning on computer 7, 16 tutoring fee-based 106 U uninterruptible power supply (UPS) 14 updating Windows 62 UPS 14 USB port 7, 9, 32 V video playing 26, 27...
... 104 telephone jack 9 telephone support 104 transferring files from old computer 70 settings from old computer 70 troubleshooting add-in cards 75, 79 audio 94 cable modem 87 cards 75, 79 CD drive 75, 77 dial-up modem 87 dial-up modem speed 89 display 77 DSL modem 87 DVD drive... area 77 screen resolution 77 sound 94 technical support 104 telephone support 104 Web site connection speed 82 Windows Media Center 83 turning off computer 7, 17, 19 turning on computer 7, 16 tutoring fee-based 106 U uninterruptible power supply (UPS) 14 updating Windows 62 UPS 14 USB port 7, 9, 32 V video playing 26, 27...

8512780 - eMachines Desktop PC User Guide
Page 53
... 2 Turn on your computers. 3 Plug one end of the power adapter into the AC connector on the router and the other end of the router, indicating a good connection. 4 Repeat Step 3 for each computer you want to connect to the network. As each computer is the latest advance in computer...uses radio waves to the DSL or cable modem and is made up your wireless computers. 47 www.emachines.com In addition to a router, you need a straight-through cable for each computer on the network. 5 For an Internet connection, plug a straight-through network cable into any numbered port on the router ...
... 2 Turn on your computers. 3 Plug one end of the power adapter into the AC connector on the router and the other end of the router, indicating a good connection. 4 Repeat Step 3 for each computer you want to connect to the network. As each computer is the latest advance in computer...uses radio waves to the DSL or cable modem and is made up your wireless computers. 47 www.emachines.com In addition to a router, you need a straight-through cable for each computer on the network. 5 For an Internet connection, plug a straight-through network cable into any numbered port on the router ...
8512780 - eMachines Desktop PC User Guide
Page 58
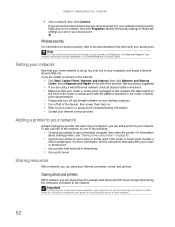
... a printer into each of your computers, you are using security. Wireless security For information on the front of the devices, then power them back on each computer must have the shared printer's drivers installed. Help For more information, see the instructions that came with your...the patterns described in the router or access point documentation. • Temporarily turn off all physical cable connections. • Make sure that your home network is set on page 52. • Connect your printer to it, your network is plugged in the Search Help box, then press ENTER...
... a printer into each of your computers, you are using security. Wireless security For information on the front of the devices, then power them back on each computer must have the shared printer's drivers installed. Help For more information, see the instructions that came with your...the patterns described in the router or access point documentation. • Temporarily turn off all physical cable connections. • Make sure that your home network is set on page 52. • Connect your printer to it, your network is plugged in the Search Help box, then press ENTER...
8512780 - eMachines Desktop PC User Guide
Page 77
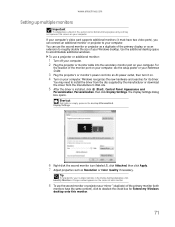
... Reference Guide. 3 Plug the projector's or monitor's power cord into an AC power outlet, then turn it must have the same content),... Shortcut Right-click an empty space on your Windows desktop. www.emachines.com Setting up multiple monitors Important The dialog boxes shown in the... or additional monitor: 1 Turn off your computer. 2 Plug the projector or monitor cable into the secondary monitor port on the desktop ➧ Personalize ➧ Display Settings....may not represent the screens on your computer. You can connect an additional monitor or projector to deselect the check box...
... Reference Guide. 3 Plug the projector's or monitor's power cord into an AC power outlet, then turn it must have the same content),... Shortcut Right-click an empty space on your Windows desktop. www.emachines.com Setting up multiple monitors Important The dialog boxes shown in the... or additional monitor: 1 Turn off your computer. 2 Plug the projector or monitor cable into the secondary monitor port on the desktop ➧ Personalize ➧ Display Settings....may not represent the screens on your computer. You can connect an additional monitor or projector to deselect the check box...


