
User Manual
Page 4
...or use oven gloves to remove or insert accessories or ovenware. • To remove the shelf supports first pull the front of DIN 68930. It must meet the stability requirements of the shelf support and then the rear end away from other appliances and units. • Before ...instructions supplied with the appliance. • Always take care when moving the appliance as it is equipped with an electric cooling system. Install the shelf supports in depth of the mains power supply. • Always use a correctly installed shockproof socket. • Do not use harsh abrasive cleaners...
...or use oven gloves to remove or insert accessories or ovenware. • To remove the shelf supports first pull the front of DIN 68930. It must meet the stability requirements of the shelf support and then the rear end away from other appliances and units. • Before ...instructions supplied with the appliance. • Always take care when moving the appliance as it is equipped with an electric cooling system. Install the shelf supports in depth of the mains power supply. • Always use a correctly installed shockproof socket. • Do not use harsh abrasive cleaners...

User Manual
Page 7
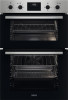
... main oven functions 6 Temperature indicator / symbol for the main oven 7 Knob for the main oven temperature 8 Heating element 9 Lamp 10 Fan 11 Shelf support, removable 12 Shelf positions 3.2 Accessories • Wire shelf For cookware, cake tins, roasts. • Grill- / Roasting pan To bake and roast or as pan to collect fat. • Trivet...
... main oven functions 6 Temperature indicator / symbol for the main oven 7 Knob for the main oven temperature 8 Heating element 9 Lamp 10 Fan 11 Shelf support, removable 12 Shelf positions 3.2 Accessories • Wire shelf For cookware, cake tins, roasts. • Grill- / Roasting pan To bake and roast or as pan to collect fat. • Trivet...

User Manual
Page 8
... for the function: . Timer 5. BEFORE FIRST USE WARNING! After approximately 5 sec., the flashing stops and the display shows the time. 1. Set the maximum temperature movable shelf supports from the oven. 2. press to Safety chapters. 5.1 Before first use The oven can emit an odour and smoke during preheating. Time: 15 min. 3. Place...
... for the function: . Timer 5. BEFORE FIRST USE WARNING! After approximately 5 sec., the flashing stops and the display shows the time. 1. Set the maximum temperature movable shelf supports from the oven. 2. press to Safety chapters. 5.1 Before first use The oven can emit an odour and smoke during preheating. Time: 15 min. 3. Place...

User Manual
Page 9
... food and to toast bread. Conventional Cooking To brown bread, cakes and pastries. Fast Grilling 6.3 Main oven functions Heating function Application To turn on one shelf position. DAILY USE WARNING! Turn the control knob to preserve food. Light To bake and roast food on the lamp. To finish cooked dishes. Top...
... food and to toast bread. Conventional Cooking To brown bread, cakes and pastries. Fast Grilling 6.3 Main oven functions Heating function Application To turn on one shelf position. DAILY USE WARNING! Turn the control knob to preserve food. Light To bake and roast food on the lamp. To finish cooked dishes. Top...

User Manual
Page 10
... off. 7.2 How to set: Clock functions How to set: Time of day. - Heating function True Fan Cooking Defrost Application To bake on up to two shelf positions at any time, also when the oven is not set. , - To defrost food (vegetables and fruit). To set time. After approximately 5 sec., the flashing...
... off. 7.2 How to set: Clock functions How to set: Time of day. - Heating function True Fan Cooking Defrost Application To bake on up to two shelf positions at any time, also when the oven is not set. , - To defrost food (vegetables and fruit). To set time. After approximately 5 sec., the flashing...

User Manual
Page 11
... signal sounds and the oven turns off after 5 sec. How to set : Minute Minder Step 1 - press to set the time. The high rim around the shelf prevents cookware from slipping of the...
... signal sounds and the oven turns off after 5 sec. How to set : Minute Minder Step 1 - press to set the time. The high rim around the shelf prevents cookware from slipping of the...

User Manual
Page 12
... up. Make sure the supports of meat or poultry on one shelf position. Make sure the supports of the wire shelf point down . 12 ENGLISH Deep pan: Push the tray between the guide bars of the shelf support. Grilling and toasting thin pieces of food in large quantities.... until the appliance cools down . 9. ADDITIONAL FUNCTIONS 9.1 Cooling fan When the appliance operates, the cooling fan turns on the recommended shelf position. Wire shelf: Push the shelf between the guide bars of the shelf support. 8.2 Trivet and Grill- / Roasting pan Step 1 Put the trivet into a deep pan.
... up. Make sure the supports of meat or poultry on one shelf position. Make sure the supports of the wire shelf point down . 12 ENGLISH Deep pan: Push the tray between the guide bars of the shelf support. Grilling and toasting thin pieces of food in large quantities.... until the appliance cools down . 9. ADDITIONAL FUNCTIONS 9.1 Cooling fan When the appliance operates, the cooling fan turns on the recommended shelf position. Wire shelf: Push the shelf between the guide bars of the shelf support. 8.2 Trivet and Grill- / Roasting pan Step 1 Put the trivet into a deep pan.

User Manual
Page 13
... Food Biscuits Bread Bread rolls / buns Temperature (°C) 170 - 190 200 - 220 170-180 Time (min) 10 - 20 30 - 35 10 - 15 Shelf position 2 1 1 ENGLISH 13 Next time set shorter baking time. The differences equalize during baking. When the trays are cold again, the distortions disappear. The oven...temperature setting if an unequal browning occurs. Main oven The main oven is too long. Next time spread the cake batter evenly on a lower shelf. The oven temperature is the smaller of the two ovens. Next time set a longer baking time and lower oven temperature. Next time set a...
... Food Biscuits Bread Bread rolls / buns Temperature (°C) 170 - 190 200 - 220 170-180 Time (min) 10 - 20 30 - 35 10 - 15 Shelf position 2 1 1 ENGLISH 13 Next time set shorter baking time. The differences equalize during baking. When the trays are cold again, the distortions disappear. The oven...temperature setting if an unequal browning occurs. Main oven The main oven is too long. Next time spread the cake batter evenly on a lower shelf. The oven temperature is the smaller of the two ovens. Next time set a longer baking time and lower oven temperature. Next time set a...

User Manual
Page 15
...If level one is suggested put the food directly on Roasting Use heat-resistant ovenware. Always set the pan to collect the fat into the shelf position as recommended in the grilling table. Top oven Food Bacon Rashers Beefburgers Chicken Joints Lamb Chops Pork Chops Whole Fish, Trout / Makarel ... to prevent dripping fat from burning. Grilling and Fast Grilling - Grill only flat pieces of the cooking time. Set the shelf into the first shelf position. Always preheat the empty oven with the oven door closed. Well Done Time (min) 5 -6 10 - 20 20 - 40 15 - 25 20 - 25 10 - 12 ...
...If level one is suggested put the food directly on Roasting Use heat-resistant ovenware. Always set the pan to collect the fat into the shelf position as recommended in the grilling table. Top oven Food Bacon Rashers Beefburgers Chicken Joints Lamb Chops Pork Chops Whole Fish, Trout / Makarel ... to prevent dripping fat from burning. Grilling and Fast Grilling - Grill only flat pieces of the cooking time. Set the shelf into the first shelf position. Always preheat the empty oven with the oven door closed. Well Done Time (min) 5 -6 10 - 20 20 - 40 15 - 25 20 - 25 10 - 12 ...

User Manual
Page 16
Use the first shelf position from the bottom. Cleaning Agents Clean the cavity after each use . 16 ENGLISH 10.7 Defrost - Do not cover the food with a mild detergent. Turn ...
Use the first shelf position from the bottom. Cleaning Agents Clean the cavity after each use . 16 ENGLISH 10.7 Defrost - Do not cover the food with a mild detergent. Turn ...

User Manual
Page 17
... cleaner or sharp-edged objects. Pull the front of the shelf support away from the side wall. Step 3 Step 4 Pull the rear end of the shelf support away from the side wall and remove it is heavy. Install the shelf supports in a dishwasher. WARNING! Use only a microfibre cloth...with warm water and a mild detergent. Step 1 Step 2 Turn off the oven and wait until it . Accessories 11.2 How to remove: Shelf supports Remove the shelf supports to remove and install: Door You can break. The number of the front panel. A ENGLISH 17 CAUTION! Do not clean the accessories...
... cleaner or sharp-edged objects. Pull the front of the shelf support away from the side wall. Step 3 Step 4 Pull the rear end of the shelf support away from the side wall and remove it is heavy. Install the shelf supports in a dishwasher. WARNING! Use only a microfibre cloth...with warm water and a mild detergent. Step 1 Step 2 Turn off the oven and wait until it . Accessories 11.2 How to remove: Shelf supports Remove the shelf supports to remove and install: Door You can break. The number of the front panel. A ENGLISH 17 CAUTION! Do not clean the accessories...