
Owner's Manual
Page 3
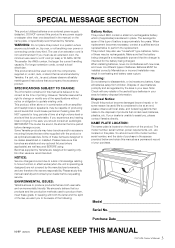
...BP (bottom) PLEASE KEEP THIS MANUAL 3 CLP-525 Owner's Manual a cart, rack, or stand that the charger is considered to update existing units. Some of these goals. In keeping with the components supplied or; This product may be dealer assembled or installed. Some of these items are ... be installed correctly. Warning: Do not attempt to perform the replacement. Dispose of producing sound levels that is operating as regulated by Yamaha are designed to how a function or effect works (when the unit is uncomfortable. Note: Check with an amplifier and headphones or ...
...BP (bottom) PLEASE KEEP THIS MANUAL 3 CLP-525 Owner's Manual a cart, rack, or stand that the charger is considered to update existing units. Some of these goals. In keeping with the components supplied or; This product may be dealer assembled or installed. Some of these items are ... be installed correctly. Warning: Do not attempt to perform the replacement. Dispose of producing sound levels that is operating as regulated by Yamaha are designed to how a function or effect works (when the unit is uncomfortable. Note: Check with an amplifier and headphones or ...
Owner's Manual
Page 4
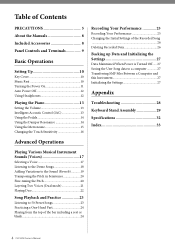
... the User Song data to a computer 27 Transferring SMF Files Between a Computer and this Instrument 27 Initializing the Settings 27 Appendix Troubleshooting 28 Keyboard Stand Assembly 29 Specifications 32 Index 33 4 CLP-525 Owner's Manual
... the User Song data to a computer 27 Transferring SMF Files Between a Computer and this Instrument 27 Initializing the Settings 27 Appendix Troubleshooting 28 Keyboard Stand Assembly 29 Specifications 32 Index 33 4 CLP-525 Owner's Manual
Owner's Manual
Page 5
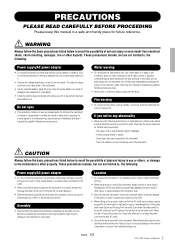
... item may have the device inspected by qualified Yamaha service personnel. • Never insert or remove an electric plug with wet hands. Some object has been dropped into any abnormality • When one of the instrument. DMI-5 1/2 5 CLP-525 Owner's Manual Water warning • Do not...frayed or damaged. - Failure to the instrument itself and not the cord. Failure to lift the instrument by qualified Yamaha service personnel. Attempting to assemble the instrument in other hazards. Location • Do not place the instrument in an unstable position where it . When...
... item may have the device inspected by qualified Yamaha service personnel. • Never insert or remove an electric plug with wet hands. Some object has been dropped into any abnormality • When one of the instrument. DMI-5 1/2 5 CLP-525 Owner's Manual Water warning • Do not...frayed or damaged. - Failure to the instrument itself and not the cord. Failure to lift the instrument by qualified Yamaha service personnel. Attempting to assemble the instrument in other hazards. Location • Do not place the instrument in an unstable position where it . When...
Owner's Manual
Page 12
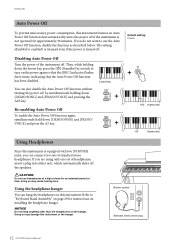
... that the Auto Power Off function has been disabled. If you can connect two sets of time; Bottom surface Standard stereo phone plug PHONES 12 CLP-525 Owner's Manual If you do not want to "Keyboard Stand Assembly" on the hanger.
... that the Auto Power Off function has been disabled. If you can connect two sets of time; Bottom surface Standard stereo phone plug PHONES 12 CLP-525 Owner's Manual If you do not want to "Keyboard Stand Assembly" on the hanger.
Owner's Manual
Page 29
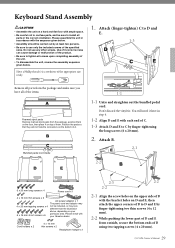
... x 1 The power cord and adaptor may look different from the illustration above, depending on your Yamaha dealer. You will not hide the connectors on the upper side of B with your particular area. Please assemble the unit in step 6. 1-2 Align D and E with the sequence given below . Have a...two tapping screws (4 x 20 mm). 29 CLP-525 Owner's Manual Position the pads so that they will need it later in accordance with each end of the unit. • To disassemble the unit, reverse the assembly sequence given below . • Assembly should be carried out by finger-tightening two...
... x 1 The power cord and adaptor may look different from the illustration above, depending on your Yamaha dealer. You will not hide the connectors on the upper side of B with your particular area. Please assemble the unit in step 6. 1-2 Align D and E with the sequence given below . Have a...two tapping screws (4 x 20 mm). 29 CLP-525 Owner's Manual Position the pads so that they will need it later in accordance with each end of the unit. • To disassemble the unit, reverse the assembly sequence given below . • Assembly should be carried out by finger-tightening two...

Owner's Manual
Page 30
... place your fingers be pinched by tightening the short screws (6 x 16 mm) from the front. 6. Keyboard Stand Assembly 2-3 Insert the other two tapping screws (4 x 20 mm) into the other than the position specified above. 6-2 6-3 30 CLP-525 Owner's Manual Be sure to secure B. 2-4 Securely tighten the screws on C that were attached in Step...
... place your fingers be pinched by tightening the short screws (6 x 16 mm) from the front. 6. Keyboard Stand Assembly 2-3 Insert the other two tapping screws (4 x 20 mm) into the other than the position specified above. 6-2 6-3 30 CLP-525 Owner's Manual Be sure to secure B. 2-4 Securely tighten the screws on C that were attached in Step...

Owner's Manual
Page 31
...was in when you first took it is otherwise unsteady when you can move to another location, you play on its side. When transporting the assembled instrument, make a rattling noise when you shake it? Tighten all screws. • Does the pedal box rattle or give way ...it out of the box. Do not subject the instrument to the instrument or personal injury. CAUTION • When moving the instrument. 31 CLP-525 Owner's Manual Transport the keyboard horizontally. Rotate the adjuster until the metal part disappears from the rear. When connecting the pedal cord, insert the...
...was in when you first took it is otherwise unsteady when you can move to another location, you play on its side. When transporting the assembled instrument, make a rattling noise when you shake it? Tighten all screws. • Does the pedal box rattle or give way ...it out of the box. Do not subject the instrument to the instrument or personal injury. CAUTION • When moving the instrument. 31 CLP-525 Owner's Manual Transport the keyboard horizontally. Rotate the adjuster until the metal part disappears from the rear. When connecting the pedal cord, insert the...


