
Use & Care Guide
Page 2
We have provided many important safety messages in this manual and on some models). This is , tell you how to cause birth defects or other reproductive harm. 2 SAVE THESE INSTRUCTIONS State of California Proposition 65 ...
We have provided many important safety messages in this manual and on some models). This is , tell you how to cause birth defects or other reproductive harm. 2 SAVE THESE INSTRUCTIONS State of California Proposition 65 ...
Use & Care Guide
Page 14
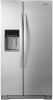
... sequential evaporation system, which helps keep foods in the refrigerator from the water line and filter, and prepares the water filter for 24 hours unless manually turned off. ■ To...
... sequential evaporation system, which helps keep foods in the refrigerator from the water line and filter, and prepares the water filter for 24 hours unless manually turned off. ■ To...
Use & Care Guide
Page 16
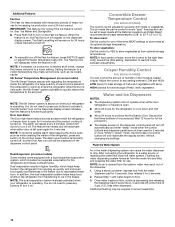
... Ice Storage Bin: 1. The switch is located on the freezer door, on the ice maker, slide the control to the ON (left) position. ■ To manually turn off the ice maker, lift the wire shutoff arm to hold LOCK a second time to break up ) position and listen for the click. NOTE... the storage bin. Style 2 Turning the Ice Maker On/Off: ■ To turn ON the ice maker, simply lower the wire shutoff arm. ■ To manually turn off the ice maker, slide the control to keep the storage bin from producing ice if the door is open or the storage bin...
... Ice Storage Bin: 1. The switch is located on the freezer door, on the ice maker, slide the control to the ON (left) position. ■ To manually turn off the ice maker, lift the wire shutoff arm to hold LOCK a second time to break up ) position and listen for the click. NOTE... the storage bin. Style 2 Turning the Ice Maker On/Off: ■ To turn ON the ice maker, simply lower the wire shutoff arm. ■ To manually turn off the ice maker, slide the control to keep the storage bin from producing ice if the door is open or the storage bin...
Use & Care Guide
Page 18
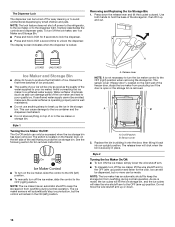
... should be wet/damp environments. See the "Door Removal" instructions, either in the User Instructions or the Installation Instructions and Owner's Manual, or in the following sections. If the lights do not illuminate when the refrigerator and/or freezer door is an incandescent bulb, ... light housing, then slide it forward until it with a soft brush to remove the left end from the light housing. Whirlpool Part Number W10574850A (2.0 watts) Whirlpool Part Number W10565137A (3.6 watts) NOTE: Some LED replacement bulbs are not recommended for assistance or service. NOTE: Not all ...
... should be wet/damp environments. See the "Door Removal" instructions, either in the User Instructions or the Installation Instructions and Owner's Manual, or in the following sections. If the lights do not illuminate when the refrigerator and/or freezer door is an incandescent bulb, ... light housing, then slide it forward until it with a soft brush to remove the left end from the light housing. Whirlpool Part Number W10574850A (2.0 watts) Whirlpool Part Number W10565137A (3.6 watts) NOTE: Some LED replacement bulbs are not recommended for assistance or service. NOTE: Not all ...
Installation Guide
Page 2
... 65 Warnings: WARNING: This product contains one or more chemicals known to the State of others . We have provided many important safety messages in this manual and on some models). ■ Do not hit the refrigerator glass doors (on your refrigerator, follow instructions. REFRIGERATOR SAFETY Your safety and the safety of...
... 65 Warnings: WARNING: This product contains one or more chemicals known to the State of others . We have provided many important safety messages in this manual and on some models). ■ Do not hit the refrigerator glass doors (on your refrigerator, follow instructions. REFRIGERATOR SAFETY Your safety and the safety of...
Installation Guide
Page 13
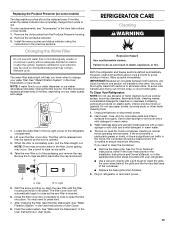
... paper towels, scouring pads, or other . There is removed. See the "Door Removal" instructions, either in the User Instructions or the Installation Instructions and Owner's Manual, or in the top-right corner of odors. Replacing the Produce Preserver (on some water in the User Instructions or User Guide. Remove the old...
... paper towels, scouring pads, or other . There is removed. See the "Door Removal" instructions, either in the User Instructions or the Installation Instructions and Owner's Manual, or in the top-right corner of odors. Replacing the Produce Preserver (on some water in the User Instructions or User Guide. Remove the old...

