Use and Care Guide
Page 2
... the Drain Hose ...8 Secure the Drain Hose...8 Level the Washer ...8 Complete Installation ...8 FEATURES AND BENEFITS ...9 WASHER USE ...10 Starting Your Washer...10 Using the Proper Detergent...10 Using the Dispenser...11 Pausing or Restarting ...12 Changing Cycles, Options, and Modifiers...12 Status Lights ...12 Cycles ...13 Normal Washer Sounds...14 Options...15 Modifiers ...15 Laundry Guide ...16...
... the Drain Hose ...8 Secure the Drain Hose...8 Level the Washer ...8 Complete Installation ...8 FEATURES AND BENEFITS ...9 WASHER USE ...10 Starting Your Washer...10 Using the Proper Detergent...10 Using the Dispenser...11 Pausing or Restarting ...12 Changing Cycles, Options, and Modifiers...12 Status Lights ...12 Cycles ...13 Normal Washer Sounds...14 Options...15 Modifiers ...15 Laundry Guide ...16...

Use and Care Guide
Page 3
Inlet hose (2) C. Drain hose form B. Inlet hose washer (4) D. Transport bolt hole plug (4) E. Beaded strap NOTE: Replace inlet hoses after 5 years of use to 1 9/16" [39.5 mm]) Flashlight (optional) Open end wrenches 17 mm ... of hose failure. INSTALLATION REQUIREMENTS Parts supplied: Tools and Parts Gather the required tools and parts before starting installation. The parts supplied are in the washer drum.
Inlet hose (2) C. Drain hose form B. Inlet hose washer (4) D. Transport bolt hole plug (4) E. Beaded strap NOTE: Replace inlet hoses after 5 years of use to 1 9/16" [39.5 mm]) Flashlight (optional) Open end wrenches 17 mm ... of hose failure. INSTALLATION REQUIREMENTS Parts supplied: Tools and Parts Gather the required tools and parts before starting installation. The parts supplied are in the washer drum.

Use and Care Guide
Page 4
Ask for your washer and dryer? Your washer can be considered. Alternate Parts Your installation may require additional parts. additional drain hose Part Number 8318155; Proper installation is your dryer or refer to ... toll-free number on the cover or in a basement, laundry room, closet, or recessed area. If you will need to stack your washer improves performance and minimizes noise and possible washer "walk." and connector kit, Part Number 285835 4 ft (1.2 m) drain hose extension kit, Part Number 285863 2 longer water fill hoses: 6 ft (1.8 m) Part...
Ask for your washer and dryer? Your washer can be considered. Alternate Parts Your installation may require additional parts. additional drain hose Part Number 8318155; Proper installation is your dryer or refer to ... toll-free number on the cover or in a basement, laundry room, closet, or recessed area. If you will need to stack your washer improves performance and minimizes noise and possible washer "walk." and connector kit, Part Number 285835 4 ft (1.2 m) drain hose extension kit, Part Number 285863 2 longer water fill hoses: 6 ft (1.8 m) Part...
Use and Care Guide
Page 5
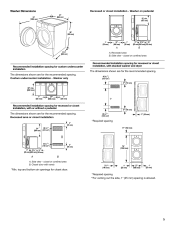
... 2) 1" 31½" 4" (25 mm) (800 mm) (102 mm) 3" (76 mm) 76" (1930 mm) A B A. Washer only Recommended installation spacing for recessed or closet installation, with stacked washer and dryer The dimensions shown are for the recommended spacing. Recessed area B. Custom undercounter installation - top and bottom air openings...5½"** (140 mm) 1" (25 mm) 27" (686 mm) 1" (25 mm) *Required spacing ** For venting out the side, 1" (25 mm) spacing is allowed. 5 Washer on pedestal 18" min. (457 mm) 38" (965 mm) 1" (25 mm) 27" (686 mm) 1" (25 mm) 31½" 1" 4" (25 mm) (800 mm...
... 2) 1" 31½" 4" (25 mm) (800 mm) (102 mm) 3" (76 mm) 76" (1930 mm) A B A. Washer only Recommended installation spacing for recessed or closet installation, with stacked washer and dryer The dimensions shown are for the recommended spacing. Recessed area B. Custom undercounter installation - top and bottom air openings...5½"** (140 mm) 1" (25 mm) 27" (686 mm) 1" (25 mm) *Required spacing ** For venting out the side, 1" (25 mm) spacing is allowed. 5 Washer on pedestal 18" min. (457 mm) 38" (965 mm) 1" (25 mm) 27" (686 mm) 1" (25 mm) 31½" 1" 4" (25 mm) (800 mm...
Use and Care Guide
Page 8
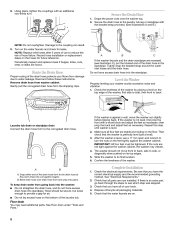
... Installation 1. Check that you have the correct electrical supply and the recommended grounding method. A. Turn on the hoses for leaks. A B C If the washer faucets and the drain standpipe are on its final location. 6. Tightly wrap the beaded strap around the water inlet hoses and the drain hose. Check... the levelness of the washer by placing a level on the floor. Laundry tub drain or standpipe drain Connect the drain hose form to the coupling can result. 9....
... Installation 1. Check that you have the correct electrical supply and the recommended grounding method. A. Turn on the hoses for leaks. A B C If the washer faucets and the drain standpipe are on its final location. 6. Tightly wrap the beaded strap around the water inlet hoses and the drain hose. Check... the levelness of the washer by placing a level on the floor. Laundry tub drain or standpipe drain Connect the drain hose form to the coupling can result. 9....
Use and Care Guide
Page 9
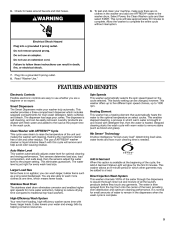
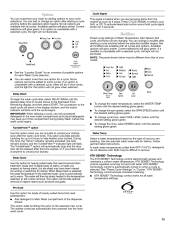
...washer and add one time, which warm water is brought in the dispensers when the wash cycle is self-cleaning, and can wash larger, bulkier items such as blood and grass). Two sensors determine load size, load composition, and suds level, then the sensors adjust the water level to 1300 rpm...make your water and energy bills by helping conserve resources. 9 It is normal for the first 8 minutes. Select Power, the Clean Washer cycle and then select START. FEATURES AND BENEFITS Electronic Controls Flexible electronic controls are easy to use of water to remain in and mixed ...
...washer and add one time, which warm water is brought in the dispensers when the wash cycle is self-cleaning, and can wash larger, bulkier items such as blood and grass). Two sensors determine load size, load composition, and suds level, then the sensors adjust the water level to 1300 rpm...make your water and energy bills by helping conserve resources. 9 It is normal for the first 8 minutes. Select Power, the Clean Washer cycle and then select START. FEATURES AND BENEFITS Electronic Controls Flexible electronic controls are easy to use of water to remain in and mixed ...
Use and Care Guide
Page 10
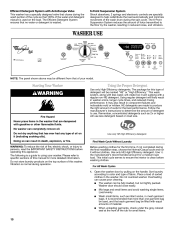
...as 2x or higher will use . Please refer to specific sections of force transmitted to using your model. For All Wash Cycles 1. WASHER USE NOTE: The panel shown above may also result in reduced noise, and vibration. The following is normal during the spin cycle. Vibration...a guide to the floor by pulling on the load. Use 1/2 the manufacturer's recommended amount for more detailed information. Open the washer door by the washer, resulting in component failures and noticeable mold or mildew. The 6-Point Suspension System reduces the amount of this appliance. Sort laundry ...
...as 2x or higher will use . Please refer to specific sections of force transmitted to using your model. For All Wash Cycles 1. WASHER USE NOTE: The panel shown above may also result in reduced noise, and vibration. The following is normal during the spin cycle. Vibration...a guide to the floor by pulling on the load. Use 1/2 the manufacturer's recommended amount for more detailed information. Open the washer door by the washer, resulting in component failures and noticeable mold or mildew. The 6-Point Suspension System reduces the amount of this appliance. Sort laundry ...
Use and Care Guide
Page 11
2. Close the washer door by pushing it firmly until the lock clicks. NOTES: The washer door will remain locked during the wash cycle.
2. Close the washer door by pushing it firmly until the lock clicks. NOTES: The washer door will remain locked during the wash cycle.
Use and Care Guide
Page 13
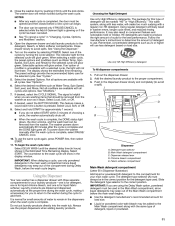
Close the door, press POWER and select the new cycle and options. Select and hold START (for 60 minutes after the cycle is not glowing 1. To add items when the Add A Garment light is complete, and then the washer shuts off. The washer door unlocks, and items can be added. 2. This will cancel the wash cycle and options. Done The Done status light stays on for approximately 1 second). Select PAUSE/CANCEL twice.
Close the door, press POWER and select the new cycle and options. Select and hold START (for 60 minutes after the cycle is not glowing 1. To add items when the Add A Garment light is complete, and then the washer shuts off. The washer door unlocks, and items can be added. 2. This will cancel the wash cycle and options. Done The Done status light stays on for approximately 1 second). Select PAUSE/CANCEL twice.
Use and Care Guide
Page 14
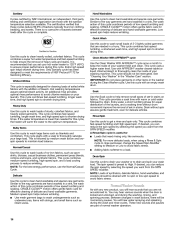
...help remove small spots of 2-3 lightly soiled garments that these cycles reduce 99.9% of your washing machine. See "Cleaning Your Washer" in the washer during the Clean Washer cycle. Soak Use the Soak cycle to wash small loads of set -in a hurry. This cycle combines fast-speed ...spin only. Rinse/Spin Use this cycle combines periods of delicate and hand washable garments. Hand Washables Use this cycle with AFFRESH® washer cleaner tablet or liquid chlorine bleach to the way garments are needed in stains. This cycle should not be interrupted. This cycle provides ...
...help remove small spots of 2-3 lightly soiled garments that these cycles reduce 99.9% of your washing machine. See "Cleaning Your Washer" in the washer during the Clean Washer cycle. Soak Use the Soak cycle to wash small loads of set -in a hurry. This cycle combines fast-speed ...spin only. Rinse/Spin Use this cycle combines periods of delicate and hand washable garments. Hand Washables Use this cycle with AFFRESH® washer cleaner tablet or liquid chlorine bleach to the way garments are needed in stains. This cycle should not be interrupted. This cycle provides ...
Use and Care Guide
Page 15
... may be changed. To activate/deactivate button sound hold cycle signal button for 3 seconds. Not all cycles and options. You can be different from the washer as soon as it stops. Current selections will glow green.
... may be changed. To activate/deactivate button sound hold cycle signal button for 3 seconds. Not all cycles and options. You can be different from the washer as soon as it stops. Current selections will glow green.
Use and Care Guide
Page 16
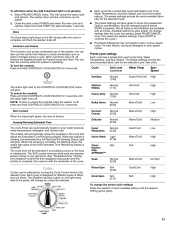
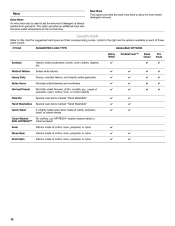
...from garments. CYCLE SUGGESTED LOAD TYPE Delay Wash Sanitary Whitest Whites Heavy Duty Bulky Items Normal/Casual Delicate Hand Washables Quick Wash Clean Washer With AFFRESH™ Soak Rinse/Spin Drain/Spin Heavily soiled underwear, towels, work clothes, diapers, etc. Normally soiled blankets and ...items marked "Hand Washable" 2-3 lightly soiled wear items made of cotton, polyester, nylon, or cotton blends No clothes, use AFFRESH® washer cleaner tablet or chlorine bleach Fabrics made of cotton, linen, polyester, or nylon Fabrics made of cotton, linen, polyester, or nylon Fabrics made...
...from garments. CYCLE SUGGESTED LOAD TYPE Delay Wash Sanitary Whitest Whites Heavy Duty Bulky Items Normal/Casual Delicate Hand Washables Quick Wash Clean Washer With AFFRESH™ Soak Rinse/Spin Drain/Spin Heavily soiled underwear, towels, work clothes, diapers, etc. Normally soiled blankets and ...items marked "Hand Washable" 2-3 lightly soiled wear items made of cotton, polyester, nylon, or cotton blends No clothes, use AFFRESH® washer cleaner tablet or chlorine bleach Fabrics made of cotton, linen, polyester, or nylon Fabrics made of cotton, linen, polyester, or nylon Fabrics made...
Use and Care Guide
Page 19
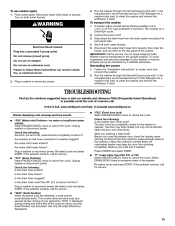
... not reuse transport bolts. Failure to clean the washer and remove the antifreeze, if used . Run the washer through the Normal/Casual cycle with 1/2 the manufacturer's recommended amount of the washer. www.whirlpool.com/help In Canada www.whirlpool.ca IMPORTANT: Call for a medium-size load, to your washer, it must be properly set up for...
... not reuse transport bolts. Failure to clean the washer and remove the antifreeze, if used . Run the washer through the Normal/Casual cycle with 1/2 the manufacturer's recommended amount of the washer. www.whirlpool.com/help In Canada www.whirlpool.ca IMPORTANT: Call for a medium-size load, to your washer, it must be properly set up for...


