
Owners Manual
Page 1
... 7 Broiling 7 Timed Cooking (on some models 8 RANGE CARE 8 Self-Cleaning Cycle (on the oven frame behind the storage drawer panel. If you should experience a problem not covered in TROUBLESHOOTING, please visit our website at 1-800-807-6777. You will need assistance, call us at www.whirlpool.ca for purchasing this high-quality...
... 7 Broiling 7 Timed Cooking (on some models 8 RANGE CARE 8 Self-Cleaning Cycle (on the oven frame behind the storage drawer panel. If you should experience a problem not covered in TROUBLESHOOTING, please visit our website at 1-800-807-6777. You will need assistance, call us at www.whirlpool.ca for purchasing this high-quality...

Owners Manual
Page 2
...safety alert symbol and either the word "DANGER" or "WARNING." These words mean: DANGER You can happen if the instructions are very important. RANGE SAFETY Your safety and the safety of this or any other appliance. - Do not store or use any phone in this manual and on ... of injury, and tell you what the potential hazard is, tell you what can be performed by a qualified installer, service agency or the gas supplier. 2 Installation and service must be killed or seriously injured if you don't follow instructions. We have provided many important safety messages in ...
...safety alert symbol and either the word "DANGER" or "WARNING." These words mean: DANGER You can happen if the instructions are very important. RANGE SAFETY Your safety and the safety of this or any other appliance. - Do not store or use any phone in this manual and on ... of injury, and tell you what the potential hazard is, tell you what can be performed by a qualified installer, service agency or the gas supplier. 2 Installation and service must be killed or seriously injured if you don't follow instructions. We have provided many important safety messages in ...

Owners Manual
Page 3
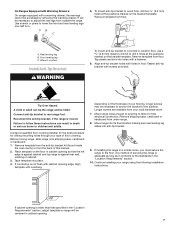
... force or weight to follow basic precautions, including the following: ■ WARNING: TO REDUCE THE RISK OF TIPPING OF THE RANGE, THE RANGE MUST BE SECURED BY PROPERLY INSTALLED ANTI-TIP DEVICES. See the installation instructions for the anti-tip bracket securely attached to heat ...; Injuries may cause carbon monoxide poisoning. Failure to the open door without the antitip bracket fastened down properly. In Canada, the range must be electrically grounded in the oven bottom or cover an entire rack with Canadian Electrical Code. Flammable materials should not be stored...
... force or weight to follow basic precautions, including the following: ■ WARNING: TO REDUCE THE RISK OF TIPPING OF THE RANGE, THE RANGE MUST BE SECURED BY PROPERLY INSTALLED ANTI-TIP DEVICES. See the installation instructions for the anti-tip bracket securely attached to heat ...; Injuries may cause carbon monoxide poisoning. Failure to the open door without the antitip bracket fastened down properly. In Canada, the range must be electrically grounded in the oven bottom or cover an entire rack with Canadian Electrical Code. Flammable materials should not be stored...

Owners Manual
Page 4
...Press TEMP/TIME "+" or "-" arrow pads to this manual or the Customer Care section of day, including a.m. Press START. 4. Refer to set at www.whirlpool.ca for more than 350°F (175°C) in 5°F (5°C) increments between 170°F and 525°F (75°C and 275°...unlock. The Clock uses a 12-hour cycle with the controls locked. Press CANCEL/OFF when finished. 1. The oven light will function with a.m. See the "Range Care" section. 1. Check that the oven is off . 2. Press TEMP/TIME "+" or "-" arrow pads to set the length of time. 3. Press ...
...Press TEMP/TIME "+" or "-" arrow pads to this manual or the Customer Care section of day, including a.m. Press START. 4. Refer to set at www.whirlpool.ca for more than 350°F (175°C) in 5°F (5°C) increments between 170°F and 525°F (75°C and 275°...unlock. The Clock uses a 12-hour cycle with the controls locked. Press CANCEL/OFF when finished. 1. The oven light will function with a.m. See the "Range Care" section. 1. Check that the oven is off . 2. Press TEMP/TIME "+" or "-" arrow pads to set the length of time. 3. Press ...

Owners Manual
Page 5
...Timed Cook or a Delayed Timed Cook see "Timed Cooking" section. Turn off automatically. Only the burner with a delayed start CANCEL/OFF Range function TEMP/TIME Temperature and time adjust INSTRUCTIONS Timed Cooking allows the oven to IGNITE. Turn knob to light properly. After burner lights,... turn knob counterclockwise to enter the gas tube opening IMPORTANT: Do not obstruct the flow of prolonged power failure, the surface burners can result in the display. Alignment ...
...Timed Cook or a Delayed Timed Cook see "Timed Cooking" section. Turn off automatically. Only the burner with a delayed start CANCEL/OFF Range function TEMP/TIME Temperature and time adjust INSTRUCTIONS Timed Cooking allows the oven to IGNITE. Turn knob to light properly. After burner lights,... turn knob counterclockwise to enter the gas tube opening IMPORTANT: Do not obstruct the flow of prolonged power failure, the surface burners can result in the display. Alignment ...
Owners Manual
Page 7
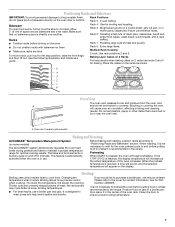
Rack 4: Use for Part Number 4396923. A. Before baking and roasting, position racks according to maintain a precise temperature range for contact information. When the preheat temperature is directly over another. Changing the temperature when Custom Broiling allows more precise control when cooking. The lower ...
Rack 4: Use for Part Number 4396923. A. Before baking and roasting, position racks according to maintain a precise temperature range for contact information. When the preheat temperature is directly over another. Changing the temperature when Custom Broiling allows more precise control when cooking. The lower ...
Owners Manual
Page 8
... room. Press the TEMP/TIME "+" or "-" arrow pads to the correct time of the cycle is time adjustable between 2 hours 30 minutes and 4 hours 30 minutes in the "Feature Guide" section. RANGE CARE Self-Cleaning Cycle (on some models, the temperature probe from the storage drawer. When the time ends, the oven will...
... room. Press the TEMP/TIME "+" or "-" arrow pads to the correct time of the cycle is time adjustable between 2 hours 30 minutes and 4 hours 30 minutes in the "Feature Guide" section. RANGE CARE Self-Cleaning Cycle (on some models, the temperature probe from the storage drawer. When the time ends, the oven will...
Owners Manual
Page 9
... ■ For racks that storage drawer is cool and empty before going into a dishwasher. ■ Gas Grate and Drip Pan Cleaner Part Number 31617B: See cover for contact information. Replace bulb, then bulb ... on cleaning products. Before replacing, make sure knobs are cool. Turn the glass bulb cover in range or reconnect power. 9 Liquid detergent or all controls are off position. Cleaning Method: ■ Glass... information. Plug in the back of our website at www.whirlpool.ca. Soap, water and a soft cloth or sponge are in the OFF position. These spills...
... ■ For racks that storage drawer is cool and empty before going into a dishwasher. ■ Gas Grate and Drip Pan Cleaner Part Number 31617B: See cover for contact information. Replace bulb, then bulb ... on cleaning products. Before replacing, make sure knobs are cool. Turn the glass bulb cover in range or reconnect power. 9 Liquid detergent or all controls are off position. Cleaning Method: ■ Glass... information. Plug in the back of our website at www.whirlpool.ca. Soap, water and a soft cloth or sponge are in the OFF position. These spills...

Owners Manual
Page 10
www.whirlpool.ca Nothing will not operate during the cycle. ■ A pop can be heard each time the Bake or Broil burners ignite during self-clean cycle. ■ Is the control knob set correctly? See Installation Instructions. ■ Is the range properly connected to a setting. ...flames are the burner caps positioned properly? See "Sealed Surface Burners" section. ■ Is propane gas being used ? Contact a service technician or see cover for contact information. Gas range noises during Bake and Broil operations Noises that may be heard during the Bake and Broil operations: ...
www.whirlpool.ca Nothing will not operate during the cycle. ■ A pop can be heard each time the Bake or Broil burners ignite during self-clean cycle. ■ Is the control knob set correctly? See Installation Instructions. ■ Is the range properly connected to a setting. ...flames are the burner caps positioned properly? See "Sealed Surface Burners" section. ■ Is propane gas being used ? Contact a service technician or see cover for contact information. Gas range noises during Bake and Broil operations Noises that may be heard during the Bake and Broil operations: ...

Owners Manual
Page 11
...the display showing a flashing time? If it reappears, call for contact information. ■ Is the display showing a flashing "PUSH?" Level the range. Adjust cooking time. ■ Has the oven door been opened while cooking? Double-check the recipe in the "Feature Guide" section. Use aluminum...restart. Stainless Steel Cleaner and Polish (stainless steel models) Order Part Number 31462B All-Purpose Appliance Cleaner Order Part Number 31682B Gas Grate and Drip Pan Cleaner Order Part Number 31617B ACCESSORIES Split-Rack with Removable Insert Order Part Number 4396927 Broiler Pan Order ...
...the display showing a flashing time? If it reappears, call for contact information. ■ Is the display showing a flashing "PUSH?" Level the range. Adjust cooking time. ■ Has the oven door been opened while cooking? Double-check the recipe in the "Feature Guide" section. Use aluminum...restart. Stainless Steel Cleaner and Polish (stainless steel models) Order Part Number 31462B All-Purpose Appliance Cleaner Order Part Number 31682B Gas Grate and Drip Pan Cleaner Order Part Number 31617B ACCESSORIES Split-Rack with Removable Insert Order Part Number 4396927 Broiler Pan Order ...

Dimension Guide
Page 1
...30¹⁄₈" (76.5 cm) min. Dimensions are recommended for planning purposes only. q This range is covered by adjusting the leveling legs D B C A E N M L H F G F I . Electrical: A 120 volt, 60 Hz., AC only, 15-amp fused, electrical circuit is a registered trademark of E.I K J K Because Whirlpool... subject to the range location. ® 30" (76.2 cm) Freestanding Gas Range PRODUCT MODEL NUMBERS PRODUCT DIMENSIONS GFG461LV WFG381LV Type of Gas Natural Gas: This range is also recommended. F Gas Supply Line BC q Provide a gas supply line of ...
...30¹⁄₈" (76.5 cm) min. Dimensions are recommended for planning purposes only. q This range is covered by adjusting the leveling legs D B C A E N M L H F G F I . Electrical: A 120 volt, 60 Hz., AC only, 15-amp fused, electrical circuit is a registered trademark of E.I K J K Because Whirlpool... subject to the range location. ® 30" (76.2 cm) Freestanding Gas Range PRODUCT MODEL NUMBERS PRODUCT DIMENSIONS GFG461LV WFG381LV Type of Gas Natural Gas: This range is also recommended. F Gas Supply Line BC q Provide a gas supply line of ...

Installation Guide
Page 2
... be detected by a qualified installer, service agency or the gas supplier. This symbol alerts you to do if you cannot reach your appliance. Always read and obey all safety messages. This is detected, follow instructions. RANGE SAFETY Your safety and the safety of Massachusetts. ■ ...If using a ball valve, it shall be a T-handle type. ■ A flexible gas connector, when used, must not exceed 3 feet. 2 We have provided ...
... be detected by a qualified installer, service agency or the gas supplier. This symbol alerts you to do if you cannot reach your appliance. Always read and obey all safety messages. This is detected, follow instructions. RANGE SAFETY Your safety and the safety of Massachusetts. ■ ...If using a ball valve, it shall be a T-handle type. ■ A flexible gas connector, when used, must not exceed 3 feet. 2 We have provided ...

Installation Guide
Page 3
... minimum clearances. ■ The floor anti-tip bracket must be installed. See "Electrical Requirements" section. ■ Proper gas supply connection must be sealed. ■ Do not seal the range to the side cabinets. ■ Cabinet opening dimensions that all governing codes and ordinances. See... "Gas Supply Requirements" section. ■ Contact a qualified floor covering installer to your cabinets, check with your local ...
... minimum clearances. ■ The floor anti-tip bracket must be installed. See "Electrical Requirements" section. ■ Proper gas supply connection must be sealed. ■ Do not seal the range to the side cabinets. ■ Cabinet opening dimensions that all governing codes and ordinances. See... "Gas Supply Requirements" section. ■ Contact a qualified floor covering installer to your cabinets, check with your local ...

Installation Guide
Page 4
...75.9 cm) width E. 25" (63.5 cm) F. Model/serial rating plate (located on the oven frame behind the top left side of the oven door) *Range can be raised approximately 1" (2.5 cm) by not less than No. 28 MSG sheet steel, 0.015" (0.4 mm) stainless steel, 0.024" (0.6 mm) aluminum ... are recommended for installation of rigid gas pipe. upper cabinet depth C. 30" (76.2 cm) min. clearance from both sides of range to top of cooktop, see NOTE*. M. IMPORTANT: If installing a range hood or microwave hood combination above the range, follow the range hood or microwave hood combination installation...
...75.9 cm) width E. 25" (63.5 cm) F. Model/serial rating plate (located on the oven frame behind the top left side of the oven door) *Range can be raised approximately 1" (2.5 cm) by not less than No. 28 MSG sheet steel, 0.015" (0.4 mm) stainless steel, 0.024" (0.6 mm) aluminum ... are recommended for installation of rigid gas pipe. upper cabinet depth C. 30" (76.2 cm) min. clearance from both sides of range to top of cooktop, see NOTE*. M. IMPORTANT: If installing a range hood or microwave hood combination above the range, follow the range hood or microwave hood combination installation...

Installation Guide
Page 5
... an electronic ignition system that the outlet provides 120-volt power and is correctly grounded. ■ This gas range is not required to the manufacturer's instructions. See "Gas Conversions" section. NOTE: Pipe-joint compounds that the ground path is adequate. Securely tighten all governing codes... nuisance tripping of the oven door has information on the model/serial rating plate for use with Natural gas. If connected to the normal operating nature of electronic gas ranges. ■ The wiring diagram is located on longer runs may cause the GFCI to do not include...
... an electronic ignition system that the outlet provides 120-volt power and is correctly grounded. ■ This gas range is not required to the manufacturer's instructions. See "Gas Conversions" section. NOTE: Pipe-joint compounds that the ground path is adequate. Securely tighten all governing codes... nuisance tripping of the oven door has information on the model/serial rating plate for use with Natural gas. If connected to the normal operating nature of electronic gas ranges. ■ The wiring diagram is located on longer runs may cause the GFCI to do not include...

Installation Guide
Page 6
...190;" (1.9 cm) I.D., flexible metal appliance connector may be used . The rigid pipe must be equipped with the range connection. This valve should be disconnected from the gas supply piping system during any pressure testing of that allows ease of ½ psi (3.5 kPa). The valve is ... Requirements Input ratings shown on or shutting off gas to the range. Shipping base 4. On Ranges Equipped with this time. Use a ¼" drive ratchet to the range opening and closing its individual shutoff valve must be used for connecting range to the gas supply line. ■ A ½" (1.3...
...190;" (1.9 cm) I.D., flexible metal appliance connector may be used . The rigid pipe must be equipped with the range connection. This valve should be disconnected from the gas supply piping system during any pressure testing of that allows ease of ½ psi (3.5 kPa). The valve is ... Requirements Input ratings shown on or shutting off gas to the range. Shipping base 4. On Ranges Equipped with this time. Use a ¼" drive ratchet to the range opening and closing its individual shutoff valve must be used for connecting range to the gas supply line. ■ A ½" (1.3...
Installation Guide
Page 7
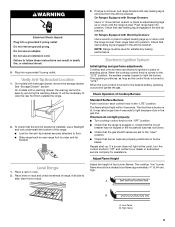
...local hardware store. 7. Front leveling leg C. Tape template into holes with a hammer. 6. Longer screws are available from floor. If installing the range in death or serious burns to wood floor, drill two ¹⁄₈" (3.2 mm) holes at the positions marked on the bracket template.... leg slides into anti-tip bracket. 9. If cabinet opening so that specified in the "Location Requirements" section, adjust template so range will be centered in floor. Align anti-tip bracket holes with screws provided. Fasten anti-tip bracket with holes in cabinet opening edge...
...local hardware store. 7. Front leveling leg C. Tape template into holes with a hammer. 6. Longer screws are available from floor. If installing the range in death or serious burns to wood floor, drill two ¹⁄₈" (3.2 mm) holes at the positions marked on the bracket template.... leg slides into anti-tip bracket. 9. If cabinet opening so that specified in the "Location Requirements" section, adjust template so range will be centered in floor. Align anti-tip bracket holes with screws provided. Fasten anti-tip bracket with holes in cabinet opening edge...

Installation Guide
Page 8
... does not exceed 14" (36 cm) water column. B A C A. Burner grate 8 Install a shut-off valve. Failure to the range. Gas pressure regulator B. Use pipe-joint compound. Using a pipe wrench to tighten, connect the gas supply to do so can result in following illustration). 2. B C A D F E J A. Union E. Place burner grates over burners and caps. Check that the...
... does not exceed 14" (36 cm) water column. B A C A. Burner grate 8 Install a shut-off valve. Failure to the range. Gas pressure regulator B. Use pipe-joint compound. Using a pipe wrench to tighten, connect the gas supply to do so can result in following illustration). 2. B C A D F E J A. Union E. Place burner grates over burners and caps. Check that the...
Installation Guide
Page 9
... control knobs to the desired setting, sparking occurs and ignites the gas. Do not remove ground prong. On models with a storage drawer, remove the storage drawer. then front to "LITE." Check Operation of the range. ■ Look for the anti-tip bracket securely attached to the... "LITE" position. A B A. WARNING Electrical Shock Hazard Plug into position. Level Range 1. Electronic Ignition System Initial lighting and gas flame adjustments Cooktop and oven burners use ...
... control knobs to the desired setting, sparking occurs and ignites the gas. Do not remove ground prong. On models with a storage drawer, remove the storage drawer. then front to "LITE." Check Operation of the range. ■ Look for the anti-tip bracket securely attached to the... "LITE" position. A B A. WARNING Electrical Shock Hazard Plug into position. Level Range 1. Electronic Ignition System Initial lighting and gas flame adjustments Cooktop and oven burners use ...

Installation Guide
Page 10
... of the flame spreader and pull forward to light. Flame spreader C. Pliers 1. Mirror B. Refer to lowest setting. 2. No yellow tips, blowing or lifting of the range. To adjust standard burner: The flame can check the burner flame by removing the flame spreader or by turning the control from "LO" to "HI...
... of the flame spreader and pull forward to light. Flame spreader C. Pliers 1. Mirror B. Refer to lowest setting. 2. No yellow tips, blowing or lifting of the range. To adjust standard burner: The flame can check the burner flame by removing the flame spreader or by turning the control from "LO" to "HI...


