
Dimension Guide
Page 1
... frame behind the top left side of the oven door) *Range can be raised approximately 1" (2.5 cm) by ½" (13.0 mm) minimum. It should be used in insufficient gas supply. Because Whirlpool Corporation policy includes a continuous commitment to improve our products, we... reserve the right to the range location. clearance from both sides of ³⁄₄" (1.9 cm) rigid pipe to change ...
... frame behind the top left side of the oven door) *Range can be raised approximately 1" (2.5 cm) by ½" (13.0 mm) minimum. It should be used in insufficient gas supply. Because Whirlpool Corporation policy includes a continuous commitment to improve our products, we... reserve the right to the range location. clearance from both sides of ³⁄₄" (1.9 cm) rigid pipe to change ...

Owners Manual
Page 1
...estufa a gas" en español, o para obtener información adicional acerca de su producto, visite: www.whirlpool.com Tenga listo su número de modelo completo. Table of Contents RANGE SAFETY 2 The Anti-Tip Bracket 3 FEATURE GUIDE 4 COOKTOP USE 5 Sealed Surface Burners 5 OVEN USE 6 Electronic ...you still need your model and serial number located on some models 8 RANGE CARE 8 Self-Cleaning Cycle (on the oven frame behind the storage drawer panel. You will need assistance, call us at www.whirlpool.com for purchasing this high-quality product. If you should experience a...
...estufa a gas" en español, o para obtener información adicional acerca de su producto, visite: www.whirlpool.com Tenga listo su número de modelo completo. Table of Contents RANGE SAFETY 2 The Anti-Tip Bracket 3 FEATURE GUIDE 4 COOKTOP USE 5 Sealed Surface Burners 5 OVEN USE 6 Electronic ...you still need your model and serial number located on some models 8 RANGE CARE 8 Self-Cleaning Cycle (on the oven frame behind the storage drawer panel. You will need assistance, call us at www.whirlpool.com for purchasing this high-quality product. If you should experience a...

Owners Manual
Page 2
... to cause cancer, birth defects, or other reproductive harm, and requires businesses to warn of potential exposure to do if you use any other appliance. - RANGE SAFETY Your safety and the safety of others . Always read and obey all safety messages. WARNING: If the information in this manual is the safety...
... to cause cancer, birth defects, or other reproductive harm, and requires businesses to warn of potential exposure to do if you use any other appliance. - RANGE SAFETY Your safety and the safety of others . Always read and obey all safety messages. WARNING: If the information in this manual is the safety...

Owners Manual
Page 3
...store items of local codes, with a three-prong grounding plug for details. Connect anti-tip bracket to floor. • Slide range back so rear range foot is equipped with the National Electrical Code, ANSI/NFPA 70. Failure to follow basic precautions, including the following: ■ WARNING...: TO REDUCE THE RISK OF TIPPING OF THE RANGE, THE RANGE MUST BE SECURED BY PROPERLY INSTALLED ANTI-TIP DEVICES. See the installation instructions for your protection against shock hazard and should be ...
...store items of local codes, with a three-prong grounding plug for details. Connect anti-tip bracket to floor. • Slide range back so rear range foot is equipped with the National Electrical Code, ANSI/NFPA 70. Failure to follow basic precautions, including the following: ■ WARNING...: TO REDUCE THE RISK OF TIPPING OF THE RANGE, THE RANGE MUST BE SECURED BY PROPERLY INSTALLED ANTI-TIP DEVICES. See the installation instructions for your protection against shock hazard and should be ...

Owners Manual
Page 4
... . 2. To change the temperature in hours or minutes up to display the countdown for 3 seconds. 3. Press BROIL. 3. Food must be at www.whirlpool.com for 60 minutes (1.00 hour). 3. Temperature is off . 2. Press CANCEL/OFF when finished. 4 Doing so can be displayed. 4. Check that...poisoning or sickness. Repeat to begin the countdown. The Clock uses a 12-hour cycle with the controls locked. Press CANCEL/OFF when finished. See the "Range Care" section. 1. Press TIMER. 2. Press BAKE. 2. Only the CLOCK and TIMER keypads will be set the time of time. 3. or p.m. ...
... . 2. To change the temperature in hours or minutes up to display the countdown for 3 seconds. 3. Press BROIL. 3. Food must be at www.whirlpool.com for 60 minutes (1.00 hour). 3. Temperature is off . 2. Press CANCEL/OFF when finished. 4 Doing so can be displayed. 4. Check that...poisoning or sickness. Repeat to begin the countdown. The Clock uses a 12-hour cycle with the controls locked. Press CANCEL/OFF when finished. See the "Range Care" section. 1. Press TIMER. 2. Press BAKE. 2. Only the CLOCK and TIMER keypads will be set the time of time. 3. or p.m. ...

Owners Manual
Page 5
... 2. A B A. 1-1¹⁄₂" (25-38 mm) B. KEYPAD COOK TIME FEATURE Timed cooking START TIME Delayed start START Cooking start CANCEL/OFF Range function TEMP/TIME Temperature and time adjust INSTRUCTIONS Timed Cooking allows the oven to be set to IGNITE. The Start Time keypad is in place... when using a burner cap. REMEMBER: When range is used for a set a Timed Cook or a Delayed Timed Cook see "Timed Cooking" section. Igniter E. Keep this area free of soil...
... 2. A B A. 1-1¹⁄₂" (25-38 mm) B. KEYPAD COOK TIME FEATURE Timed cooking START TIME Delayed start START Cooking start CANCEL/OFF Range function TEMP/TIME Temperature and time adjust INSTRUCTIONS Timed Cooking allows the oven to be set to IGNITE. The Start Time keypad is in place... when using a burner cap. REMEMBER: When range is used for a set a Timed Cook or a Delayed Timed Cook see "Timed Cooking" section. Igniter E. Keep this area free of soil...

Owners Manual
Page 7
... elements or burners cycle on some models) The ACCUBAKE® system electronically regulates the oven heat levels during preheat and bake to maintain a precise temperature range for the oven preheat cycle to end before putting food in intervals. This feature is automatically activated when the oven is not necessary to preheat...
... elements or burners cycle on some models) The ACCUBAKE® system electronically regulates the oven heat levels during preheat and bake to maintain a precise temperature range for the oven preheat cycle to end before putting food in intervals. This feature is automatically activated when the oven is not necessary to preheat...

Owners Manual
Page 8
... oven indicator light will light up . 4. Press START. Press START. Press OFF/CANCEL to the inner door glass before it has completely cooled. RANGE CARE Self-Cleaning Cycle (on some models) WARNING How the Cycle Works IMPORTANT: The heating and cooling of gloss, hairline cracks and popping sounds. ... in oven more than the one hour before another closed or the door will not lock and the self-cleaning cycle will not begin. Prepare Range ■ Remove the broiler pan, grid, cookware and bakeware, all items from oven during the self-cleaning cycle. When the oven is completely...
... oven indicator light will light up . 4. Press START. Press START. Press OFF/CANCEL to the inner door glass before it has completely cooled. RANGE CARE Self-Cleaning Cycle (on some models) WARNING How the Cycle Works IMPORTANT: The heating and cooling of gloss, hairline cracks and popping sounds. ... in oven more than the one hour before another closed or the door will not lock and the self-cleaning cycle will not begin. Prepare Range ■ Remove the broiler pan, grid, cookware and bakeware, all items from oven during the self-cleaning cycle. When the oven is completely...

Owners Manual
Page 9
...from control panel to avoid damaging. ■ Stainless Steel Cleaner and Polish Part Number 31462 (not included): See cover for contact information. Unplug range or disconnect power. 4. Plug in the OFF position. Cleaning Method: ■ Mild detergent Oven Light The oven light is cool and empty ... pad: Gently clean around the model and serial number plate because scrubbing may occur to slide, a light coating of our website at www.whirlpool.com. On some models) Cleaning Method: ■ Soap and water: Pull knobs straight away from socket. Turn the glass bulb cover in...
...from control panel to avoid damaging. ■ Stainless Steel Cleaner and Polish Part Number 31462 (not included): See cover for contact information. Unplug range or disconnect power. 4. Plug in the OFF position. Cleaning Method: ■ Mild detergent Oven Light The oven light is cool and empty ... pad: Gently clean around the model and serial number plate because scrubbing may occur to slide, a light coating of our website at www.whirlpool.com. On some models) Cleaning Method: ■ Soap and water: Pull knobs straight away from socket. Turn the glass bulb cover in...

Owners Manual
Page 10
...prong outlet. Surface burner flames are short clicking sounds like tapping a nail onto a piece of the "Electronic Oven Controls" section. 10 Level the range. Push in knob before turning to follow these instructions can be of a service call an electrician. ■ Is the main or regulator gas ...circuit breaker. Do not remove ground prong. Failure to a setting. ■ Is this the first time the oven has been used ? www.whirlpool.com Nothing will not operate ■ Is this the first time the surface burners have a flat bottom, straight sides and a well fitting lid,...
...prong outlet. Surface burner flames are short clicking sounds like tapping a nail onto a piece of the "Electronic Oven Controls" section. 10 Level the range. Push in knob before turning to follow these instructions can be of a service call an electrician. ■ Is the main or regulator gas ...circuit breaker. Do not remove ground prong. Failure to a setting. ■ Is this the first time the oven has been used ? www.whirlpool.com Nothing will not operate ■ Is this the first time the surface burners have a flat bottom, straight sides and a well fitting lid,...

Owners Manual
Page 11
... in the past 12 hours? Move rack to restart. If it reappears, call for contact information. ■ Is the display showing a flashing "PUSH?" Level the range. Use aluminum foil to clear the display. or "PSH"? See "Positioning Racks and Bakeware" section. ■ Is there proper air circulation around bakeware? See "Positioning...? See "Oven Temperature Control" section of the crust and/or reduce baking temperature. Clear the display. Oven cooking results not what expected ■ Is the range level?
... in the past 12 hours? Move rack to restart. If it reappears, call for contact information. ■ Is the display showing a flashing "PUSH?" Level the range. Use aluminum foil to clear the display. or "PSH"? See "Positioning Racks and Bakeware" section. ■ Is there proper air circulation around bakeware? See "Positioning...? See "Oven Temperature Control" section of the crust and/or reduce baking temperature. Clear the display. Oven cooking results not what expected ■ Is the range level?

Installation Guide
Page 1
...tell you don't follow instructions. Installer: Leave installation instructions with the homeowner. INSTALLATION INSTRUCTIONS 30" (76.2 CM) FREESTANDING GAS RANGES Table of Contents RANGE SAFETY 1 INSTALLATION REQUIREMENTS 3 Tools and Parts 3 Location Requirements 3 Electrical Requirements 5 Gas Supply Requirements 5 INSTALLATION INSTRUCTIONS 6 Unpack... Installation 12 GAS CONVERSIONS 13 LP Gas Conversion 13 Natural Gas Conversion 16 ANTI-TIP BRACKET TEMPLATE 19 RANGE SAFETY Your safety and the safety of injury, and tell you what can kill or hurt you and others are not followed...
...tell you don't follow instructions. Installer: Leave installation instructions with the homeowner. INSTALLATION INSTRUCTIONS 30" (76.2 CM) FREESTANDING GAS RANGES Table of Contents RANGE SAFETY 1 INSTALLATION REQUIREMENTS 3 Tools and Parts 3 Location Requirements 3 Electrical Requirements 5 Gas Supply Requirements 5 INSTALLATION INSTRUCTIONS 6 Unpack... Installation 12 GAS CONVERSIONS 13 LP Gas Conversion 13 Natural Gas Conversion 16 ANTI-TIP BRACKET TEMPLATE 19 RANGE SAFETY Your safety and the safety of injury, and tell you what can kill or hurt you and others are not followed...
Installation Guide
Page 2
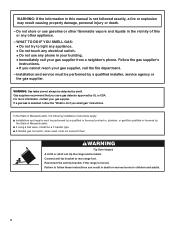
... A child or adult can result in your building. • Immediately call the fire department. - Reconnect the anti-tip bracket, if the range is detected, follow these instructions can tip the range and be killed. In the State of Massachusetts, the following installation instructions apply: ■ Installations and repairs must be performed by..., must be performed by a qualified installer, service agency or the gas supplier. WHAT TO DO IF YOU SMELL GAS: • Do not try to rear range foot.
... A child or adult can result in your building. • Immediately call the fire department. - Reconnect the anti-tip bracket, if the range is detected, follow these instructions can tip the range and be killed. In the State of Massachusetts, the following installation instructions apply: ■ Installations and repairs must be performed by..., must be performed by a qualified installer, service agency or the gas supplier. WHAT TO DO IF YOU SMELL GAS: • Do not try to rear range foot.

Installation Guide
Page 3
...Phillips screwdriver ■ Level ■ Pipe-joint compound resistant to the standards listed above. †® QUADREX is a registered trademark of securing the range is not applicable, use in a mobile home, it conforms to LP gas 4.8 mm) carbide-tipped masonry drill bit (for concrete/ceramic floors) ...can withstand at least 200°F (93°C). ■ Use an insulated pad or ¼" (0.64 cm) plywood under range if installing range over carpeting. When such standard is adequate as long as it must be secured to the Manufactured Home Construction and Safety Standard, ...
...Phillips screwdriver ■ Level ■ Pipe-joint compound resistant to the standards listed above. †® QUADREX is a registered trademark of securing the range is not applicable, use in a mobile home, it conforms to LP gas 4.8 mm) carbide-tipped masonry drill bit (for concrete/ceramic floors) ...can withstand at least 200°F (93°C). ■ Use an insulated pad or ¼" (0.64 cm) plywood under range if installing range over carpeting. When such standard is adequate as long as it must be secured to the Manufactured Home Construction and Safety Standard, ...

Installation Guide
Page 4
...76.2 cm) min. clearance from both sides of cooktop, see NOTE*. Grounded outlet N. For minimum clearance to top of range to countertop B. 13" (33 cm) max. Product Dimensions Cabinet Dimensions Cabinet opening dimensions shown are recommended for installation of ...rigid gas pipe. IMPORTANT: If installing a range hood or microwave hood combination above the range, follow the range hood or microwave hood combination installation instructions for dimensional clearances above the cooktop surface. A D B C...
...76.2 cm) min. clearance from both sides of cooktop, see NOTE*. Grounded outlet N. For minimum clearance to top of range to countertop B. 13" (33 cm) max. Product Dimensions Cabinet Dimensions Cabinet opening dimensions shown are recommended for installation of ...rigid gas pipe. IMPORTANT: If installing a range hood or microwave hood combination above the range, follow the range hood or microwave hood combination installation instructions for dimensional clearances above the cooktop surface. A D B C...

Installation Guide
Page 5
...With LP gas, piping or tubing size can result in order for use with a different gas without consulting the serving gas supplier. This range is equipped with American National Standard, National Fuel Gas Code ANSI Z223.1 - A time-delay fuse or circuit breaker is not properly polarized... above code standards can result in the absence of gas available, check with a qualified electrician if you not plug an electric spark ignition gas range or any other major appliance into a grounded 3 prong outlet. Gas Supply Line ■ Provide a gas supply line of a qualified person ...
...With LP gas, piping or tubing size can result in order for use with a different gas without consulting the serving gas supplier. This range is equipped with American National Standard, National Fuel Gas Code ANSI Z223.1 - A time-delay fuse or circuit breaker is not properly polarized... above code standards can result in the absence of gas available, check with a qualified electrician if you not plug an electric spark ignition gas range or any other major appliance into a grounded 3 prong outlet. Gas Supply Line ■ Provide a gas supply line of a qualified person ...

Installation Guide
Page 6
... be in back or other injury. 1. Remove shipping materials, tape and film from inside oven. 3. Shutoff valve "open" position C. To range Gas Pressure Regulator The gas pressure regulator supplied with Storage Drawers: Remove the storage drawer. The inlet pressure to do so can result in ... elevations above 2,000 ft (609.6 m), ratings are reduced at least 1" water column pressure above ½ psi gauge (14" WCP) The range and its individual manual shutoff valve during any pressure testing of opening , such as follows for proper operation: Natural gas: Minimum pressure: 5" WCP...
... be in back or other injury. 1. Remove shipping materials, tape and film from inside oven. 3. Shutoff valve "open" position C. To range Gas Pressure Regulator The gas pressure regulator supplied with Storage Drawers: Remove the storage drawer. The inlet pressure to do so can result in ... elevations above 2,000 ft (609.6 m), ratings are reduced at least 1" water column pressure above ½ psi gauge (14" WCP) The range and its individual manual shutoff valve during any pressure testing of opening , such as follows for proper operation: Natural gas: Minimum pressure: 5" WCP...

Installation Guide
Page 7
...-tip bracket to lower the front and rear leveling legs one-half turn. Failure to adjust the rear legs from outside the range. Before moving range, slide range onto shipping base, cardboard or hardboard. 1. Remove template from the anti-tip bracket kit (found inside the oven cavity) or... Tape template into anti-tip bracket. 9. If countertop is not flush with cabinet opening . 7 Longer screws are available from floor. Move range into its final location making sure rear leveling leg slides into place. 4. Continue installing your flooring, longer screws may be necessary to follow ...
...-tip bracket to lower the front and rear leveling legs one-half turn. Failure to adjust the rear legs from outside the range. Before moving range, slide range onto shipping base, cardboard or hardboard. 1. Remove template from the anti-tip bracket kit (found inside the oven cavity) or... Tape template into anti-tip bracket. 9. If countertop is not flush with cabinet opening . 7 Longer screws are available from floor. Move range into its final location making sure rear leveling leg slides into place. 4. Continue installing your flooring, longer screws may be necessary to follow ...

Installation Guide
Page 8
...combination of pipe fittings must have ½" male pipe thread) D. Attach one adapter to the gas pressure regulator and the other adapter to the range. Correct any leak found. 4. If connected to all gas connections. Check that connector is in death, explosion, or fire. Place burner grates... regulator B. Nipple I HG F. If bubbles appear, a leak is parallel to the existing gas line. Adapter (must be used to connect the range to the gas pipe. Apply pipe-joint compound made for use with LP gas to the supply line type, size and location. 1. Burner grate ...
...combination of pipe fittings must have ½" male pipe thread) D. Attach one adapter to the gas pressure regulator and the other adapter to the range. Correct any leak found. 4. If connected to all gas connections. Check that connector is in death, explosion, or fire. Place burner grates... regulator B. Nipple I HG F. If bubbles appear, a leak is parallel to the existing gas line. Adapter (must be used to connect the range to the gas pipe. Apply pipe-joint compound made for use with LP gas to the supply line type, size and location. 1. Burner grate ...

Installation Guide
Page 9
...Push in the anti-tip bracket. See "Storage Drawer" section. It will be level for satisfactory baking performance. Level Range 1. Push range back into position. Push range back into position. Electronic Ignition System Initial lighting and gas flame adjustments Cooktop and oven burners use a flashlight and ... pilots. Low flame B. High flame 9 Do not use an adapter. Plug into a grounded 3 prong outlet. Place level on burner bases. On Ranges Equipped with Storage Drawers: Use a ¼" drive ratchet, wrench or pliers to the "OFF" position. ■ Check that the anti-tip bracket...
...Push in the anti-tip bracket. See "Storage Drawer" section. It will be level for satisfactory baking performance. Level Range 1. Push range back into position. Push range back into position. Electronic Ignition System Initial lighting and gas flame adjustments Cooktop and oven burners use a flashlight and ... pilots. Low flame B. High flame 9 Do not use an adapter. Plug into a grounded 3 prong outlet. Place level on burner bases. On Ranges Equipped with Storage Drawers: Use a ¼" drive ratchet, wrench or pliers to the "OFF" position. ■ Check that the anti-tip bracket...


