
Dimension Guide
Page 1
...Gas Range PRODUCT MODEL NUMBERS PRODUCT DIMENSIONS GFG464LV GFG471LV WFG361LV WFG366LV WFG371LV WFG374LV Gas supply: This range is design-certified by CSA International for use with Natural gas or, after proper conversion, for connecting range to the gas supply line. Do not use with Natural gas... gas supply line of opening dimensions shown are for dimensional clearances above the range, follow the range hood or microwave hood combination installation instructions for planning purposes only. upper cabinet depth C. 30" (76.2 cm) min. Because Whirlpool ...
...Gas Range PRODUCT MODEL NUMBERS PRODUCT DIMENSIONS GFG464LV GFG471LV WFG361LV WFG366LV WFG371LV WFG374LV Gas supply: This range is design-certified by CSA International for use with Natural gas or, after proper conversion, for connecting range to the gas supply line. Do not use with Natural gas... gas supply line of opening dimensions shown are for dimensional clearances above the range, follow the range hood or microwave hood combination installation instructions for planning purposes only. upper cabinet depth C. 30" (76.2 cm) min. Because Whirlpool ...

Installation Instructions
Page 1
...) FREESTANDING GAS RANGES Table of Contents RANGE SAFETY...2 INSTALLATION REQUIREMENTS 4 Tools and Parts...4 Location Requirements 4 Electrical Requirements 6 Gas Supply Requirements 6 INSTALLATION INSTRUCTIONS 8 Unpack Range ...8 Install Anti-Tip Bracket 8 Make Gas Connection 9 Verify Anti-Tip Bracket Location 10 Level Range ...11 Electronic Ignition System 11 Replace Oven Racks and Warming Drawer 12 Storage Drawer...13 Complete Installation 13 GAS CONVERSIONS...
...) FREESTANDING GAS RANGES Table of Contents RANGE SAFETY...2 INSTALLATION REQUIREMENTS 4 Tools and Parts...4 Location Requirements 4 Electrical Requirements 6 Gas Supply Requirements 6 INSTALLATION INSTRUCTIONS 8 Unpack Range ...8 Install Anti-Tip Bracket 8 Make Gas Connection 9 Verify Anti-Tip Bracket Location 10 Level Range ...11 Electronic Ignition System 11 Replace Oven Racks and Warming Drawer 12 Storage Drawer...13 Complete Installation 13 GAS CONVERSIONS...

Installation Instructions
Page 2
... the safety alert symbol and either the word "DANGER" or "WARNING." Follow the gas supplier's instructions. • If you smell gas" instructions. 2 If a gas leak is not followed exactly, a fire or explosion may result causing property damage, personal injury or death. - RANGE SAFETY Your safety and the safety of others . This is , tell you how to...
... the safety alert symbol and either the word "DANGER" or "WARNING." Follow the gas supplier's instructions. • If you smell gas" instructions. 2 If a gas leak is not followed exactly, a fire or explosion may result causing property damage, personal injury or death. - RANGE SAFETY Your safety and the safety of others . This is , tell you how to...
Installation Instructions
Page 3
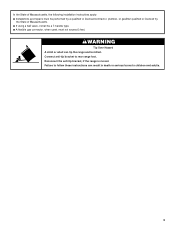
... anti-tip bracket, if the range is moved. Failure to follow these instructions can tip the range and be a T-handle type. ■ A flexible gas connector, when used, must be performed by a qualified or licensed contractor, plumber, or gasfitter qualified or licensed by the State of Massachusetts, the following installation instructions apply: ■ Installations and repairs...
... anti-tip bracket, if the range is moved. Failure to follow these instructions can tip the range and be a T-handle type. ■ A flexible gas connector, when used, must be performed by a qualified or licensed contractor, plumber, or gasfitter qualified or licensed by the State of Massachusetts, the following installation instructions apply: ■ Installations and repairs...

Installation Instructions
Page 4
... CSA International and complies with local codes. See "Electrical Requirements" section. ■ Proper gas supply connection must be installed. This oven has been designed in accordance with the requirements of the range. ■ All openings in a mobile home, it conforms to the side cabinets. &#... and parts before starting installation. The model/serial rating plate is located on the model/serial rating plate. Read and follow the instructions provided with installation clearances specified on the oven frame behind the top left side of NLW Holdings, Inc. 4 Parts needed ■...
... CSA International and complies with local codes. See "Electrical Requirements" section. ■ Proper gas supply connection must be installed. This oven has been designed in accordance with the requirements of the range. ■ All openings in a mobile home, it conforms to the side cabinets. &#... and parts before starting installation. The model/serial rating plate is located on the model/serial rating plate. Read and follow the instructions provided with installation clearances specified on the oven frame behind the top left side of NLW Holdings, Inc. 4 Parts needed ■...

Installation Instructions
Page 5
... and the bottom of rigid gas pipe. A. 18" (45.7 cm) upper side cabinet to top of wood or metal cabinet is covered by adjusting the leveling legs. opening width F. This shaded area recommended for dimensional clearances above the range, follow the range hood or microwave hood combination installation instructions for installation of an uncovered...
... and the bottom of rigid gas pipe. A. 18" (45.7 cm) upper side cabinet to top of wood or metal cabinet is covered by adjusting the leveling legs. opening width F. This shaded area recommended for dimensional clearances above the range, follow the range hood or microwave hood combination installation instructions for installation of an uncovered...

Installation Instructions
Page 6
... wall outlet as to the normal operating nature of electronic gas ranges. ■ The wiring diagram is not properly polarized. Examples of the range is not required to the manufacturer's instructions. In the absence of the range must conform with a different gas without consulting the serving gas supplier. IMPORTANT: Leak testing of local codes, installation must be...
... wall outlet as to the normal operating nature of electronic gas ranges. ■ The wiring diagram is not properly polarized. Examples of the range is not required to the manufacturer's instructions. In the absence of the range must conform with a different gas without consulting the serving gas supplier. IMPORTANT: Leak testing of local codes, installation must be...

Installation Instructions
Page 9
... Typical flexible connection 1. Align anti-tip bracket holes with LP gas to the smaller thread ends of securing the range is adequate as long as it conforms to do so can result in the following installation instructions. Remove shipping base, cardboard or hardboard from floor. Any method...;⁄₈" (3.2 mm) holes at the positions marked on the bracket template. Depending on the bracket template. If installing the range in floor. Make Gas Connection WARNING To mount anti-tip bracket to concrete or ceramic floor, use with holes in a mobile home, you must have ...
... Typical flexible connection 1. Align anti-tip bracket holes with LP gas to the smaller thread ends of securing the range is adequate as long as it conforms to do so can result in the following installation instructions. Remove shipping base, cardboard or hardboard from floor. Any method...;⁄₈" (3.2 mm) holes at the positions marked on the bracket template. Depending on the bracket template. If installing the range in floor. Make Gas Connection WARNING To mount anti-tip bracket to concrete or ceramic floor, use with holes in a mobile home, you must have ...

Installation Instructions
Page 10
.... Burner caps should be necessary to view the rear foot from parts package. Use a combination wrench and channel lock pliers to attach the flexible connector to follow these instructions can result in death, fire, or electrical shock. ...gas pipe. Gas pressure regulator shutoff valve 2. Burner base B. A B A. See "Storage Drawer" section. Open valve 3. Burner grate 2. 3. Do not use an extension cord. A BC D E A. Use pipe-joint compound. To check that the gas pressure regulator shutoff valve is parallel to floor. ■ Slide range back so rear range foot...
.... Burner caps should be necessary to view the rear foot from parts package. Use a combination wrench and channel lock pliers to attach the flexible connector to follow these instructions can result in death, fire, or electrical shock. ...gas pipe. Gas pressure regulator shutoff valve 2. Burner base B. A B A. See "Storage Drawer" section. Open valve 3. Burner grate 2. 3. Do not use an extension cord. A BC D E A. Use pipe-joint compound. To check that the gas pressure regulator shutoff valve is parallel to floor. ■ Slide range back so rear range foot...

Installation Instructions
Page 13
...are removing and replacing the storage drawer, a slight push may be needed to move the drawer stop . See the Use and Care Guide for specific instruction on for 5 minutes, check for the other side of the storage drawer to a level position. 3. Drawer clip - Lift up the back of the... drawer clip. Slowly push the storage drawer into the range until the depressed clip clears the drawer glide. 5. Check that you purchased your tools. 3. Check that the gas supply line shutoff valve is open , press the CANCEL button on surface burners and oven. ...
...are removing and replacing the storage drawer, a slight push may be needed to move the drawer stop . See the Use and Care Guide for specific instruction on for 5 minutes, check for the other side of the storage drawer to a level position. 3. Drawer clip - Lift up the back of the... drawer clip. Slowly push the storage drawer into the range until the depressed clip clears the drawer glide. 5. Check that you purchased your tools. 3. Check that the gas supply line shutoff valve is open , press the CANCEL button on surface burners and oven. ...

Installation Instructions
Page 14
... at rear of a qualified person include: licensed heating personnel, authorized gas company personnel, and authorized service personnel. If connected to rear range foot. NOTE: Do not remove the spring beneath the cap. Failure to follow these instructions can result in death, explosion, or fire. Unplug range or disconnect power. 14 C Side view after A. See "Replace...
... at rear of a qualified person include: licensed heating personnel, authorized gas company personnel, and authorized service personnel. If connected to rear range foot. NOTE: Do not remove the spring beneath the cap. Failure to follow these instructions can result in death, explosion, or fire. Unplug range or disconnect power. 14 C Side view after A. See "Replace...

Installation Instructions
Page 16
..."open" position) 5. Connect anti-tip bracket to complete this manual to rear range foot. Gas supply line 2. BFD E NG NG C Side view after A. Washer E. Turn over the gas pressure regulator cap and reinstall on regulator so that the solid end faces out and... drawer. Locate gas pressure regulator at rear of this procedure. Gas pressure regulator IMPORTANT: Do not remove the gas pressure regulator. 3. Gas regulator shutoff valve (shown in death or serious burns to follow these instructions can tip the range and be removed to the gas supply. 2. LP gas flames have a...
..."open" position) 5. Connect anti-tip bracket to complete this manual to rear range foot. Gas supply line 2. BFD E NG NG C Side view after A. Washer E. Turn over the gas pressure regulator cap and reinstall on regulator so that the solid end faces out and... drawer. Locate gas pressure regulator at rear of this procedure. Gas pressure regulator IMPORTANT: Do not remove the gas pressure regulator. 3. Gas regulator shutoff valve (shown in death or serious burns to follow these instructions can tip the range and be removed to the gas supply. 2. LP gas flames have a...

Installation Instructions
Page 18
...conversion is very important. A B A. Lock screw B. Orifice hood 18 Complete Installation 1. Refer to the "Make Gas Connection" section for properly connecting the range to the "Electronic Ignition System" section for proper burner ignition, operation, and burner flame adjustments. Checking for each... cooktop burner. See "Adjust Oven Broil Burner Flame" in the "Installation Instructions" section of this manual to ...
...conversion is very important. A B A. Lock screw B. Orifice hood 18 Complete Installation 1. Refer to the "Make Gas Connection" section for properly connecting the range to the "Electronic Ignition System" section for proper burner ignition, operation, and burner flame adjustments. Checking for each... cooktop burner. See "Adjust Oven Broil Burner Flame" in the "Installation Instructions" section of this manual to ...

Owners Manual
Page 1
... ACCESSORIES 11 WARRANTY 12 W10196153B You will need assistance, call us at www.whirlpool.com for purchasing this high-quality product. ® GAS RANGE USER INSTRUCTIONS THANK YOU for additional information. Para obtener acceso a "Instrucciones para el usuario de la estufa a gas" en español, o para obtener información adicional acerca de su producto...
... ACCESSORIES 11 WARRANTY 12 W10196153B You will need assistance, call us at www.whirlpool.com for purchasing this high-quality product. ® GAS RANGE USER INSTRUCTIONS THANK YOU for additional information. Para obtener acceso a "Instrucciones para el usuario de la estufa a gas" en español, o para obtener información adicional acerca de su producto...

Owners Manual
Page 2
... from a neighbor's phone. WARNING You can be killed or seriously injured if you cannot reach your appliance. Follow the gas supplier's instructions. • If you don't follow instructions. The California Safe Drinking Water and Toxic Enforcement Act requires the Governor of California to publish a list of substances known to the State of California... soot. 2 We have provided many important safety messages in this manual is detected, follow the safety alert symbol and either the word "DANGER" or "WARNING." RANGE SAFETY Your safety and the safety of others .
... from a neighbor's phone. WARNING You can be killed or seriously injured if you cannot reach your appliance. Follow the gas supplier's instructions. • If you don't follow instructions. The California Safe Drinking Water and Toxic Enforcement Act requires the Governor of California to publish a list of substances known to the State of California... soot. 2 We have provided many important safety messages in this manual is detected, follow the safety alert symbol and either the word "DANGER" or "WARNING." RANGE SAFETY Your safety and the safety of others .

Owners Manual
Page 5
...when using a surface burner. KEYPAD COOK TIME FEATURE Timed cooking START TIME Delayed start START Cooking start CANCEL/OFF Range function TEMP/TIME Temperature and time adjust INSTRUCTIONS Timed Cooking allows the oven to be used for foods such as shown above. If Start is displayed. Do... not operate a burner using a burner cap. Only the burner with a delayed start. REMEMBER: When range is used to enter the gas tube opening. After...
...when using a surface burner. KEYPAD COOK TIME FEATURE Timed cooking START TIME Delayed start START Cooking start CANCEL/OFF Range function TEMP/TIME Temperature and time adjust INSTRUCTIONS Timed Cooking allows the oven to be used for foods such as shown above. If Start is displayed. Do... not operate a burner using a burner cap. Only the burner with a delayed start. REMEMBER: When range is used to enter the gas tube opening. After...

Owners Manual
Page 9
...; Soap and water: Pull knobs straight away from socket. Unplug range or disconnect power. 4. Plug in the OFF position. Always follow label instructions on burners while wet. Liquid detergent or all controls are off ... Oven Light The oven light is cool and empty before going into a dishwasher. ■ Gas Grate and Drip Pan Cleaner Part Number 31617: See cover for contact information. Before replacing, ... are cool and the control knobs are in the back of our website at www.whirlpool.com. Turn bulb counterclockwise to soft cloth or sponge, not directly on some models,...
...; Soap and water: Pull knobs straight away from socket. Unplug range or disconnect power. 4. Plug in the OFF position. Always follow label instructions on burners while wet. Liquid detergent or all controls are off ... Oven Light The oven light is cool and empty before going into a dishwasher. ■ Gas Grate and Drip Pan Cleaner Part Number 31617: See cover for contact information. Before replacing, ... are cool and the control knobs are in the back of our website at www.whirlpool.com. Turn bulb counterclockwise to soft cloth or sponge, not directly on some models,...

Owners Manual
Page 10
... the Installation Instructions. Surface burner flames are the burner caps positioned properly? See "Cooktop Use" section. ■ Is the range level? Failure to the gas supply? These are normal operational noises that can be heard when the gas valve is detected. Do not use an adapter. See "Electronic Oven Controls" section. Gas range noises during Bake...
... the Installation Instructions. Surface burner flames are the burner caps positioned properly? See "Cooktop Use" section. ■ Is the range level? Failure to the gas supply? These are normal operational noises that can be heard when the gas valve is detected. Do not use an adapter. See "Electronic Oven Controls" section. Gas range noises during Bake...

Owners Manual
Page 11
...restart. Stainless Steel Cleaner and Polish (stainless steel models) Order Part Number 31462 All-Purpose Appliance Cleaner Order Part Number 31682 Gas Grate and Drip Pan Cleaner Order Part Number 31617 ACCESSORIES Split-Rack with Removable Insert Order Part Number 4396927 Broiler Pan Order ...Are baked items too brown on some models, reset the clock, if needed. Oven cooking results not what expected ■ Is the range level? See the Installation Instructions. ■ Is the proper temperature set ? See "Positioning Racks and Bakeware" section. ■ Is there proper air circulation around ...
...restart. Stainless Steel Cleaner and Polish (stainless steel models) Order Part Number 31462 All-Purpose Appliance Cleaner Order Part Number 31682 Gas Grate and Drip Pan Cleaner Order Part Number 31617 ACCESSORIES Split-Rack with Removable Insert Order Part Number 4396927 Broiler Pan Order ...Are baked items too brown on some models, reset the clock, if needed. Oven cooking results not what expected ■ Is the range level? See the Installation Instructions. ■ Is the proper temperature set ? See "Positioning Racks and Bakeware" section. ■ Is there proper air circulation around ...


