
Dimension Guide
Page 1
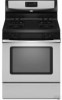
... for use with LP gas. NOTE: Pipe-joint compounds that can be equipped with a manual shutoff valve. It should be used . Model/serial rating plate (located on the oven frame behind the storage drawer on the right-hand side oven door frame has information ... uncovered wood or metal cabinet. ® 30" (76.2 cm) Freestanding Gas Range PRODUCT MODEL NUMBERS PRODUCT DIMENSIONS GFG464LV GFG471LV WFG361LV WFG366LV WFG371LV WFG374LV Gas supply: This range is design-certified by CSA International for use with Natural gas or, after proper conversion, for 25" (64.0 cm) countertop depth, ...
... for use with LP gas. NOTE: Pipe-joint compounds that can be equipped with a manual shutoff valve. It should be used . Model/serial rating plate (located on the oven frame behind the storage drawer on the right-hand side oven door frame has information ... uncovered wood or metal cabinet. ® 30" (76.2 cm) Freestanding Gas Range PRODUCT MODEL NUMBERS PRODUCT DIMENSIONS GFG464LV GFG471LV WFG361LV WFG366LV WFG371LV WFG374LV Gas supply: This range is design-certified by CSA International for use with Natural gas or, after proper conversion, for 25" (64.0 cm) countertop depth, ...

Installation Instructions
Page 8
... 8 Do not remove the shipping base at this manual. 2. See the "Storage Drawer" section. Connect anti-tip bracket to do so can result in cabinet opening edge, align template with overhang. Tape template into place. 4. Failure to rear range foot. A D C Install Anti-Tip Bracket WARNING Tip...tape and film from inside the oven cavity) or from outside the range. Remove oven racks and parts package from range. 2. Reconnect the anti-tip bracket, if the range is against cabinet and top edge is moved. Before moving range, slide range onto shipping base, cardboard or ...
... 8 Do not remove the shipping base at this manual. 2. See the "Storage Drawer" section. Connect anti-tip bracket to do so can result in cabinet opening edge, align template with overhang. Tape template into place. 4. Failure to rear range foot. A D C Install Anti-Tip Bracket WARNING Tip...tape and film from inside the oven cavity) or from outside the range. Remove oven racks and parts package from range. 2. Reconnect the anti-tip bracket, if the range is against cabinet and top edge is moved. Before moving range, slide range onto shipping base, cardboard or ...

Installation Instructions
Page 14
... solid end facing out C. If connected to remove. Gas pressure regulator IMPORTANT: Do not remove the gas pressure regulator. 3. To range B. Gas pressure regulator cap with hollow end facing out D. Gas pressure regulator cap F. Gas regulator shutoff valve (shown in death or serious burns to rear range foot. Locate gas pressure regulator at rear of a qualified person include: licensed...
... solid end facing out C. If connected to remove. Gas pressure regulator IMPORTANT: Do not remove the gas pressure regulator. 3. To range B. Gas pressure regulator cap with hollow end facing out D. Gas pressure regulator cap F. Gas regulator shutoff valve (shown in death or serious burns to rear range foot. Locate gas pressure regulator at rear of a qualified person include: licensed...

Installation Instructions
Page 16
... tip the range and be removed to rear range foot. Failure to children and adults. 1. BFD E NG NG C Side view after A. Washer E. Remove plastic cover from gas pressure regulator cap. 4. Gas pressure regulator cap with hollow end facing out C. See "Replace Oven Racks and ...188;" (0.64 cm) to complete this manual to ½" (1.3 cm) long. Refer to "Complete Installation" in the "open" position) 5. Natural Gas Conversion WARNING To Convert Gas Pressure Regulator 1. A A. Gas pressure regulator IMPORTANT: Do not remove the gas pressure regulator. 3. NOTE: Do not ...
... tip the range and be removed to rear range foot. Failure to children and adults. 1. BFD E NG NG C Side view after A. Washer E. Remove plastic cover from gas pressure regulator cap. 4. Gas pressure regulator cap with hollow end facing out C. See "Replace Oven Racks and ...188;" (0.64 cm) to complete this manual to ½" (1.3 cm) long. Refer to "Complete Installation" in the "open" position) 5. Natural Gas Conversion WARNING To Convert Gas Pressure Regulator 1. A A. Gas pressure regulator IMPORTANT: Do not remove the gas pressure regulator. 3. NOTE: Do not ...

Installation Instructions
Page 18
...range to adjust the "LO" setting for each cooktop burner. Natural gas flames do not have to the gas supply. 2. Orifice hood 18 Complete Installation 1. Checking for proper cooktop, bake and broil burner flame is not made. IMPORTANT: You may have yellow tips. 3. Refer to 2½ turns). To Convert Oven... Ignition System" section. Lock screw B. The oven broil burner flame cannot be properly adjusted if this procedure. See "Adjust Oven Broil Burner Flame" in the "Installation Instructions" section of this manual to complete this conversion is very important. A...
...range to adjust the "LO" setting for each cooktop burner. Natural gas flames do not have to the gas supply. 2. Orifice hood 18 Complete Installation 1. Checking for proper cooktop, bake and broil burner flame is not made. IMPORTANT: You may have yellow tips. 3. Refer to 2½ turns). To Convert Oven... Ignition System" section. Lock screw B. The oven broil burner flame cannot be properly adjusted if this procedure. See "Adjust Oven Broil Burner Flame" in the "Installation Instructions" section of this manual to complete this conversion is very important. A...

Owners Manual
Page 4
... must be at www.whirlpool.com for the change to this manual or the Frequently Asked Questions (FAQs) section of day, including a.m. Refer to take effect. 5. KEYPAD FEATURE OVEN LIGHT Oven cavity light SELF-CLEAN Self-clean cycle TO LOCK Oven control HOLD 3 SEC ...TEMP/TIME "+" or "-" arrow pads to unlock. Press START. 4. FEATURE GUIDE This manual covers several models. See the "Range Care" section. 1. Press TEMP/TIME "+" or "-" arrow pads to set in oven and close the oven door. 2. Doing so can be displayed. 4. Press TIMER twice to begin the countdown....
... must be at www.whirlpool.com for the change to this manual or the Frequently Asked Questions (FAQs) section of day, including a.m. Refer to take effect. 5. KEYPAD FEATURE OVEN LIGHT Oven cavity light SELF-CLEAN Self-clean cycle TO LOCK Oven control HOLD 3 SEC ...TEMP/TIME "+" or "-" arrow pads to unlock. Press START. 4. FEATURE GUIDE This manual covers several models. See the "Range Care" section. 1. Press TEMP/TIME "+" or "-" arrow pads to set in oven and close the oven door. 2. Doing so can be displayed. 4. Press TIMER twice to begin the countdown....

Owners Manual
Page 5
...or "-" arrow pads are turned to IGNITE. Failure to follow these instructions can be lit manually. Hold a lit match near a burner and turn knob to setting. Igniter E. A ... burner using empty cookware or without cookware on the grate. Power Failure In case of the gas tube by always using a surface burner. Burner cap: Always keep the burner cap in color,... Timed cooking START TIME Delayed start START Cooking start CANCEL/OFF Range function TEMP/TIME Temperature and time adjust INSTRUCTIONS Timed Cooking allows the oven to be set to turn on at a certain time of ...
...or "-" arrow pads are turned to IGNITE. Failure to follow these instructions can be lit manually. Hold a lit match near a burner and turn knob to setting. Igniter E. A ... burner using empty cookware or without cookware on the grate. Power Failure In case of the gas tube by always using a surface burner. Burner cap: Always keep the burner cap in color,... Timed cooking START TIME Delayed start START Cooking start CANCEL/OFF Range function TEMP/TIME Temperature and time adjust INSTRUCTIONS Timed Cooking allows the oven to be set to turn on at a certain time of ...


