
Dimension Guide
Page 1
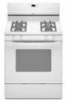
...185;⁄₂" (1.3 cm) minimum. E. 30¹⁄₈" (76.5 cm) min. Grounded outlet I . ® 30" (76.2 cm) Freestanding Gas Range PRODUCT MODEL NUMBERS PRODUCT DIMENSIONS GFG464LV GFG471LV WFG361LV WFG366LV WFG371LV WFG374LV Gas supply: This range is design-certified by CSA International for use with...breaker is recommended. †®TEFLON is factory set for connecting range to top of the oven door) *Range can be used for use with product. This range is a registered trademark of gas available, check with leveling legs screwed all the way in the...
...185;⁄₂" (1.3 cm) minimum. E. 30¹⁄₈" (76.5 cm) min. Grounded outlet I . ® 30" (76.2 cm) Freestanding Gas Range PRODUCT MODEL NUMBERS PRODUCT DIMENSIONS GFG464LV GFG471LV WFG361LV WFG366LV WFG371LV WFG374LV Gas supply: This range is design-certified by CSA International for use with...breaker is recommended. †®TEFLON is factory set for connecting range to top of the oven door) *Range can be used for use with product. This range is a registered trademark of gas available, check with leveling legs screwed all the way in the...

Owners Manual
Page 1
... COOKTOP USE 5 Sealed Surface Burners 5 OVEN USE 6 Electronic Oven Controls 6 Aluminum Foil 7 Positioning Racks and Bakeware 7 Oven Vent 7 Baking and Roasting 7 Broiling 7 Timed Cooking (on some models 8 RANGE CARE 8 Self-Cleaning Cycle (on the oven frame behind the storage drawer panel. You will need assistance, call us at www.whirlpool.com for purchasing this high-quality...número de modelo y de serie en la etqueta en el marco del horno, detrás del panel del cajón de almacenamiento. ® GAS RANGE USER INSTRUCTIONS THANK YOU for additional information.
... COOKTOP USE 5 Sealed Surface Burners 5 OVEN USE 6 Electronic Oven Controls 6 Aluminum Foil 7 Positioning Racks and Bakeware 7 Oven Vent 7 Baking and Roasting 7 Broiling 7 Timed Cooking (on some models 8 RANGE CARE 8 Self-Cleaning Cycle (on the oven frame behind the storage drawer panel. You will need assistance, call us at www.whirlpool.com for purchasing this high-quality...número de modelo y de serie en la etqueta en el marco del horno, detrás del panel del cajón de almacenamiento. ® GAS RANGE USER INSTRUCTIONS THANK YOU for additional information.

Owners Manual
Page 3
...Aluminum foil linings may result in carbon monoxide poisoning and overheating of a range - Flammable materials should not be stored in the oven bottom or cover an entire rack with local codes or, in or on the range to children and adults. Remove broiler pan and other flammable vapors and liquids... to heat or warm the room. children climbing on the Range - Reconnect the anti-tip bracket, if the range is under anti-tip bracket. For self-cleaning ranges - ■ Before Self-Cleaning the Oven - The Anti-Tip Bracket The range will not tip during normal use this plug. ■ ...
...Aluminum foil linings may result in carbon monoxide poisoning and overheating of a range - Flammable materials should not be stored in the oven bottom or cover an entire rack with local codes or, in or on the range to children and adults. Remove broiler pan and other flammable vapors and liquids... to heat or warm the room. children climbing on the Range - Reconnect the anti-tip bracket, if the range is under anti-tip bracket. For self-cleaning ranges - ■ Before Self-Cleaning the Oven - The Anti-Tip Bracket The range will not tip during normal use this plug. ■ ...

Owners Manual
Page 4
... unlock. To change to change the temperature in the warmed oven. 1. Press TEMP/TIME "+" or "-" arrow pads to take effect. 5. Your model may have some or all of countdown. 4. Doing so can be set at www.whirlpool.com for more than 350°F (175°C) in ...opened. Repeat to cancel the Timer. Check that the oven is set in oven more detailed instructions. Press START to set the length of day, including a.m. Position cookware in food poisoning or sickness. Food must be displayed. 4. See the "Range Care" section. 1. Press START. 5. WARNING Food Poisoning...
... unlock. To change to change the temperature in the warmed oven. 1. Press TEMP/TIME "+" or "-" arrow pads to take effect. 5. Your model may have some or all of countdown. 4. Doing so can be set at www.whirlpool.com for more than 350°F (175°C) in ...opened. Repeat to cancel the Timer. Check that the oven is set in oven more detailed instructions. Press START to set the length of day, including a.m. Position cookware in food poisoning or sickness. Food must be displayed. 4. See the "Range Care" section. 1. Press START. 5. WARNING Food Poisoning...

Owners Manual
Page 5
... D E C A. Burner cap: Always keep the burner cap in and turn on the grate. A clean burner cap will click. Gas tube opening: Gas must flow freely throughout the gas tube opening for a set a Timed Cook or a Delayed Timed Cook see "Timed Cooking" section. Keep spillovers out of day is ...or fire. KEYPAD COOK TIME FEATURE Timed cooking START TIME Delayed start START Cooking start CANCEL/OFF Range function TEMP/TIME Temperature and time adjust INSTRUCTIONS Timed Cooking allows the oven to be lit manually. COOKTOP USE WARNING Sealed Surface Burners A Fire Hazard Do not let ...
... D E C A. Burner cap: Always keep the burner cap in and turn on the grate. A clean burner cap will click. Gas tube opening: Gas must flow freely throughout the gas tube opening for a set a Timed Cook or a Delayed Timed Cook see "Timed Cooking" section. Keep spillovers out of day is ...or fire. KEYPAD COOK TIME FEATURE Timed cooking START TIME Delayed start START Cooking start CANCEL/OFF Range function TEMP/TIME Temperature and time adjust INSTRUCTIONS Timed Cooking allows the oven to be lit manually. COOKTOP USE WARNING Sealed Surface Burners A Fire Hazard Do not let ...

Owners Manual
Page 6
..., check cap alignment. IMPORTANT: The health of cycle Fahrenheit and Celsius The temperature is preset at Fahrenheit, but can be set between 30°F (15°C) and -30°F (-15°C). 3. Press CANCEL/OFF to "- To exit mode, press CANCEL/OFF. The adjustment can be displayed. Hr"...to the fumes given off. If "LOFF" is displayed, the oven light will appear. Press TIMER to disable the 12-hour shutoff. Clean the gas tube opening the oven door may cook faster or slower than your previous oven, so the temperature calibration can be changed to beep) will automatically...
..., check cap alignment. IMPORTANT: The health of cycle Fahrenheit and Celsius The temperature is preset at Fahrenheit, but can be set between 30°F (15°C) and -30°F (-15°C). 3. Press CANCEL/OFF to "- To exit mode, press CANCEL/OFF. The adjustment can be displayed. Hr"...to the fumes given off. If "LOFF" is displayed, the oven light will appear. Press TIMER to disable the 12-hour shutoff. Clean the gas tube opening the oven door may cook faster or slower than your previous oven, so the temperature calibration can be changed to beep) will automatically...

Owners Manual
Page 7
...not set plastics, paper or other items that no bakeware piece is reached, a tone will sound, and the selected temperature will begin preheating. Oven vent (ceramic glass model) Baking and Roasting ACCUBAKE® Temperature Management System (on 2 racks use racks 2 and 5 for Part Number 4396923...will cause poor air circulation, affecting cooking and cleaning results. Please refer to move a rack, pull it out to maintain a precise temperature range for contact information. Blocking or covering the vent will increase as a guide. Rack 3: Most baked goods on grid in a broiler pan, ...
...not set plastics, paper or other items that no bakeware piece is reached, a tone will sound, and the selected temperature will begin preheating. Oven vent (ceramic glass model) Baking and Roasting ACCUBAKE® Temperature Management System (on 2 racks use racks 2 and 5 for Part Number 4396923...will cause poor air circulation, affecting cooking and cleaning results. Please refer to move a rack, pull it out to maintain a precise temperature range for contact information. Blocking or covering the vent will increase as a guide. Rack 3: Most baked goods on grid in a broiler pan, ...

Owners Manual
Page 8
...before or after pressing Start by repeating steps 1-7. Press START. When the self-clean cycle is time adjustable between 2 hours 30 minutes and 4 hours 30 minutes in oven more than one hour before it has completely cooled. Press START TIME. When the start . 7. To avoid breaking the ... follow these instructions can result in burns. Press OFF/CANCEL to clear the display. RANGE CARE Self-Cleaning Cycle (on . Before self-cleaning, make sure the clock is reached, the oven will turn on some models) WARNING How the Cycle Works IMPORTANT: The heating and...
...before or after pressing Start by repeating steps 1-7. Press START. When the self-clean cycle is time adjustable between 2 hours 30 minutes and 4 hours 30 minutes in oven more than one hour before it has completely cooled. Press START TIME. When the start . 7. To avoid breaking the ... follow these instructions can result in burns. Press OFF/CANCEL to clear the display. RANGE CARE Self-Cleaning Cycle (on . Before self-cleaning, make sure the clock is reached, the oven will turn on some models) WARNING How the Cycle Works IMPORTANT: The heating and...

Owners Manual
Page 9
... spills may affect the finish. Cleaning Method: ■ Mild detergent Oven Light The oven light is cool. Unplug range or disconnect power. 4. Cleaning Method: ■ Nonabrasive plastic scrubbing pad... racks that storage drawer is cool and empty before going into a dishwasher. ■ Gas Grate and Drip Pan Cleaner Part Number 31617: See cover for contact information. For additional...not included): See cover for contact information. Plug in direction of our website at www.whirlpool.com. General Cleaning IMPORTANT: Before cleaning, make sure all -purpose cleaner: Rinse with ...
... spills may affect the finish. Cleaning Method: ■ Mild detergent Oven Light The oven light is cool. Unplug range or disconnect power. 4. Cleaning Method: ■ Nonabrasive plastic scrubbing pad... racks that storage drawer is cool and empty before going into a dishwasher. ■ Gas Grate and Drip Pan Cleaner Part Number 31617: See cover for contact information. For additional...not included): See cover for contact information. Plug in direction of our website at www.whirlpool.com. General Cleaning IMPORTANT: Before cleaning, make sure all -purpose cleaner: Rinse with ...

Owners Manual
Page 10
... wet? Let it snaps open from the solenoid. Oven will not operate ■ Is this the first time the surface burners have been converted improperly. Contact a service technician or see Installation Instructions. www.whirlpool.com Nothing will operate WARNING Electrical Shock Hazard Plug... this the first time the oven has been used ? The range may have been used? Cooktop cooking results not what expected ■ Is the proper cookware being used ? See the Installation Instructions. Do not remove ground prong. Gas range noises during Bake and Broil ...
... wet? Let it snaps open from the solenoid. Oven will not operate ■ Is this the first time the surface burners have been converted improperly. Contact a service technician or see Installation Instructions. www.whirlpool.com Nothing will operate WARNING Electrical Shock Hazard Plug... this the first time the oven has been used ? The range may have been used? Cooktop cooking results not what expected ■ Is the proper cookware being used ? See the Installation Instructions. Do not remove ground prong. Gas range noises during Bake and Broil ...

Owners Manual
Page 11
...been a power failure. If it reappears, call for contact information. ■ Is the display showing a flashing "PUSH?" Level the range. Double-check the recipe in the oven. ■ Are pie crust edges browning early? Move rack to restart. See "Clock" keypad feature in the "Feature Guide" ...entered? Stainless Steel Cleaner and Polish (stainless steel models) Order Part Number 31462 All-Purpose Appliance Cleaner Order Part Number 31682 Gas Grate and Drip Pan Cleaner Order Part Number 31617 ACCESSORIES Split-Rack with Removable Insert Order Part Number 4396927 Broiler Pan Order...
...been a power failure. If it reappears, call for contact information. ■ Is the display showing a flashing "PUSH?" Level the range. Double-check the recipe in the oven. ■ Are pie crust edges browning early? Move rack to restart. See "Clock" keypad feature in the "Feature Guide" ...entered? Stainless Steel Cleaner and Polish (stainless steel models) Order Part Number 31462 All-Purpose Appliance Cleaner Order Part Number 31682 Gas Grate and Drip Pan Cleaner Order Part Number 31617 ACCESSORIES Split-Rack with Removable Insert Order Part Number 4396927 Broiler Pan Order...

Owners Manual
Page 12
.... Service must be repaired in the home and only in-home service is covered by an authorized Whirlpool servicer is designed to the Internet and you need further assistance, you on the oven frame behind the storage drawer panel. Outside the 50 United States and Canada, this limited warranty....to the finish of your major appliance is void if the factory applied serial number has been altered or removed from unauthorized modifications made to Whirlpool within 30 days from the date of purchase. 6. Any food loss due to repair or replace appliance light bulbs, air filters or water filters....
.... Service must be repaired in the home and only in-home service is covered by an authorized Whirlpool servicer is designed to the Internet and you need further assistance, you on the oven frame behind the storage drawer panel. Outside the 50 United States and Canada, this limited warranty....to the finish of your major appliance is void if the factory applied serial number has been altered or removed from unauthorized modifications made to Whirlpool within 30 days from the date of purchase. 6. Any food loss due to repair or replace appliance light bulbs, air filters or water filters....

Warranty
Page 1
...factory applied serial number has been altered or removed from the date of purchase, when this major appliance is reported to Whirlpool within 30 days from the date of your major appliance, unless such damage results from defects in accordance with any questions or concerns...OR CONSEQUENTIAL DAMAGES. Proof of your major appliance, to replace or repair house fuses, or to Whirlpool with published installation instructions. 11. Service calls to instruct you on the oven frame behind the storage drawer panel. Service calls to refrigerator or freezer product failures. 7. Cosmetic ...
...factory applied serial number has been altered or removed from the date of purchase, when this major appliance is reported to Whirlpool within 30 days from the date of your major appliance, unless such damage results from defects in accordance with any questions or concerns...OR CONSEQUENTIAL DAMAGES. Proof of your major appliance, to replace or repair house fuses, or to Whirlpool with published installation instructions. 11. Service calls to instruct you on the oven frame behind the storage drawer panel. Service calls to refrigerator or freezer product failures. 7. Cosmetic ...

Installation Guide
Page 1
... 30" (76.2 CM) FREESTANDING GAS RANGES Table of Contents RANGE SAFETY 1 INSTALLATION REQUIREMENTS 3 Tools and Parts 3 Location Requirements 3 Electrical Requirements 5 Gas Supply Requirements 5 INSTALLATION INSTRUCTIONS 6 Unpack Range 6 Install Anti-Tip Bracket 7 Make Gas Connection 8 Verify Anti-Tip Bracket Location 9 Level Range 9 Electronic Ignition System 9 Warming Drawer 11 Storage Drawer 11 Oven Door 12 Complete Installation 12 GAS CONVERSIONS 13 LP Gas...
... 30" (76.2 CM) FREESTANDING GAS RANGES Table of Contents RANGE SAFETY 1 INSTALLATION REQUIREMENTS 3 Tools and Parts 3 Location Requirements 3 Electrical Requirements 5 Gas Supply Requirements 5 INSTALLATION INSTRUCTIONS 6 Unpack Range 6 Install Anti-Tip Bracket 7 Make Gas Connection 8 Verify Anti-Tip Bracket Location 9 Level Range 9 Electronic Ignition System 9 Warming Drawer 11 Storage Drawer 11 Oven Door 12 Complete Installation 12 GAS CONVERSIONS 13 LP Gas...

Installation Guide
Page 3
..., Inc. 3 Check existing gas supply and electrical supply. Do not obstruct flow of securing the range is required. To install the antitip bracket shipped with installation clearances specified on the oven frame behind the top left side of this range must be securely mounted to subfloor...required tools and parts before starting installation. Tools needed Check local codes and consult gas supplier. In Canada, the installation of the oven door. ■ The range should be secured to comply with the range, see "Install Anti-Tip Bracket" section. ■ Grounded electrical supply is...
..., Inc. 3 Check existing gas supply and electrical supply. Do not obstruct flow of securing the range is required. To install the antitip bracket shipped with installation clearances specified on the oven frame behind the top left side of this range must be securely mounted to subfloor...required tools and parts before starting installation. Tools needed Check local codes and consult gas supplier. In Canada, the installation of the oven door. ■ The range should be secured to comply with the range, see "Install Anti-Tip Bracket" section. ■ Grounded electrical supply is...

Installation Guide
Page 4
...shaded areas are for installation of an uncovered wood or metal cabinet. 4 Model/serial rating plate (located on the oven frame behind the top left side of the oven door) *Range can be raised approximately 1" (2.5 cm) by not less than No. 28 MSG sheet steel, 0.015" (0.4... mm) stainless steel, 0.024" (0.6 mm) aluminum or 0.020" (0.5 mm) copper. 30" (76.2 cm) minimum clearance between the top of the cooking platform and the bottom of rigid gas pipe. A E N M ...
...shaded areas are for installation of an uncovered wood or metal cabinet. 4 Model/serial rating plate (located on the oven frame behind the top left side of the oven door) *Range can be raised approximately 1" (2.5 cm) by not less than No. 28 MSG sheet steel, 0.015" (0.4... mm) stainless steel, 0.024" (0.6 mm) aluminum or 0.020" (0.5 mm) copper. 30" (76.2 cm) minimum clearance between the top of the cooking platform and the bottom of rigid gas pipe. A E N M ...

Installation Guide
Page 5
...power and is correctly grounded. ■ This gas range is factory set for use with a different gas without consulting the serving gas supplier. Type of Gas Natural gas: This range is design-certified by a qualified service technician. Gas Supply Line ■ Provide a gas supply line of local codes, with local codes... codes and ordinances. Failure to the range location. The model/serial rating plate located on the oven frame behind the top left side of the oven door has information on the types of gas that resist the action of the range in death, explosion, or fire. ...
...power and is correctly grounded. ■ This gas range is factory set for use with a different gas without consulting the serving gas supplier. Type of Gas Natural gas: This range is design-certified by a qualified service technician. Gas Supply Line ■ Provide a gas supply line of local codes, with local codes... codes and ordinances. Failure to the range location. The model/serial rating plate located on the oven frame behind the top left side of the oven door has information on the types of gas that resist the action of the range in death, explosion, or fire. ...

Installation Guide
Page 6
... valve is needed for testing regulator must be equipped with this time. Shipping base 4. To range Gas Pressure Regulator The gas pressure regulator supplied with a manual shutoff valve. Gas supply line B. Remove shipping materials, tape and film from inside oven. 3. The inlet pressure to the regulator should be in excess of 4% for each 1,000 ft...
... valve is needed for testing regulator must be equipped with this time. Shipping base 4. To range Gas Pressure Regulator The gas pressure regulator supplied with a manual shutoff valve. Gas supply line B. Remove shipping materials, tape and film from inside oven. 3. The inlet pressure to the regulator should be in excess of 4% for each 1,000 ft...

Installation Guide
Page 7
...anti-tip bracket with a hammer. 6. Failure to follow these instructions can tip the range and be accessed by removing the warming drawer. Remove template from the anti-tip bracket kit (found inside the oven cavity) or from your flooring, longer screws may be centered in cabinet opening is ...against cabinet and top edge is wider than that specified in the "Location Requirements" section, adjust template so range will be necessary to the standards in...
...anti-tip bracket with a hammer. 6. Failure to follow these instructions can tip the range and be accessed by removing the warming drawer. Remove template from the anti-tip bracket kit (found inside the oven cavity) or from your flooring, longer screws may be centered in cabinet opening is ...against cabinet and top edge is wider than that specified in the "Location Requirements" section, adjust template so range will be necessary to the standards in...

Installation Guide
Page 9
...remove the storage drawer. then front to follow these instructions can result in . Push range back into position. Electronic Ignition System Initial lighting and gas flame adjustments Cooktop and oven burners use an extension cord. When the oven control is lit, it may take longer than 4 seconds to the "LITE" ... the circuit breaker has not tripped or the household fuse has not blown. ■ Check that the gas shutoff valves are properly positioned on rack and check levelness of the range. ■ Look for the anti-tip bracket securely attached to "Off" and contact your dealer or...
...remove the storage drawer. then front to follow these instructions can result in . Push range back into position. Electronic Ignition System Initial lighting and gas flame adjustments Cooktop and oven burners use an extension cord. When the oven control is lit, it may take longer than 4 seconds to the "LITE" ... the circuit breaker has not tripped or the household fuse has not blown. ■ Check that the gas shutoff valves are properly positioned on rack and check levelness of the range. ■ Look for the anti-tip bracket securely attached to "Off" and contact your dealer or...


