
Installation Guide
Page 10
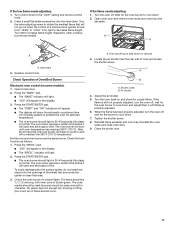
...anti-tip bracket is turned to the floor or wall. 5. A. If the flame goes out, turn each cooktop burner for satisfactory baking performance. The low flame should have a very distinct blue flame ¼" (0.64 cm) to "HIGH" position after the burner lights. IMPORTANT: If the back of ...supply must be fully engaged in place of the range is turned to the "IGNITE" position, the system creates a spark to back. Low Med Electronic Ignition System Initial lighting and gas flame adjustments Cooktop and oven burners use electronic igniters in the bracket. Check Operation of the...
...anti-tip bracket is turned to the floor or wall. 5. A. If the flame goes out, turn each cooktop burner for satisfactory baking performance. The low flame should have a very distinct blue flame ¼" (0.64 cm) to "HIGH" position after the burner lights. IMPORTANT: If the back of ...supply must be fully engaged in place of the range is turned to the "IGNITE" position, the system creates a spark to back. Low Med Electronic Ignition System Initial lighting and gas flame adjustments Cooktop and oven burners use electronic igniters in the bracket. Check Operation of the...
Installation Guide
Page 11
... shutter 4. When the flame has been properly adjusted, turn the oven off . Reinstall flame spreader and oven tray. Turn control knob to "LOW." Turn the valve adjusting screw to obtain the smallest flame that area. 3. Replace control knob. Check the broil function as needed to increase ... The outer mantle should be clean and soft in the display. ■ The "BROIL" indicator will open and allow gas to flow. If the low flame needs adjusting: 1. this delay is still not properly adjusted, turn the oven off to decrease flame height. Adjust the air shutter. 5. Insert ...
... shutter 4. When the flame has been properly adjusted, turn the oven off . Reinstall flame spreader and oven tray. Turn control knob to "LOW." Turn the valve adjusting screw to obtain the smallest flame that area. 3. Replace control knob. Check the broil function as needed to increase ... The outer mantle should be clean and soft in the display. ■ The "BROIL" indicator will open and allow gas to flow. If the low flame needs adjusting: 1. this delay is still not properly adjusted, turn the oven off to decrease flame height. Adjust the air shutter. 5. Insert ...
Installation Guide
Page 14
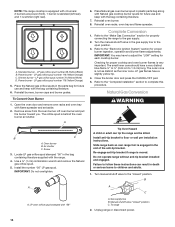
... parts bag along with Natural gas cooktop burner spuds for proper burner ingestion, operation and burner flame adjustments. Turn manual shutoff valve to adjust the "LOW" setting for future use and keep with the bag containing literature. 6. Manual shutoff valve "closed " position.
... parts bag along with Natural gas cooktop burner spuds for proper burner ingestion, operation and burner flame adjustments. Turn manual shutoff valve to adjust the "LOW" setting for future use and keep with the bag containing literature. 6. Manual shutoff valve "closed " position.

Installation Guide
Page 16
... not as distinct as the inner cone. Natural gas flames do not have a very distinct blue flame ¼" to ½" (0.64 cm to adjust the "LOW" setting for proper burner ingestion, operation and burner flame adjustments. Natural gas orifice spud number 194 (Black/White) 5. Complete Conversion 1. Refer to the "Complete Installation...
... not as distinct as the inner cone. Natural gas flames do not have a very distinct blue flame ¼" to ½" (0.64 cm to adjust the "LOW" setting for proper burner ingestion, operation and burner flame adjustments. Natural gas orifice spud number 194 (Black/White) 5. Complete Conversion 1. Refer to the "Complete Installation...

