
Dimension Guide
Page 1
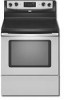
...max. upper cabinet depth B. 30" (76.2 cm) min. Dimensions are for planning purposes only. 30" (76 cm) Freestanding Electric Range PRODUCT MODEL NUMBERS GFE461LV GFE471LV WFE301LV WFE361LV WFE364LV WFE366LV WFE371LV WFE374LV WFE381LV WFE114LW WFE115LX RF110AXS RF111PXS RF114PXS RF212PXS RF263LXT RF264LXS Electrical: Range must be connected to the... the top of the cooking platform and the bottom of cooktop, see Installation Instructions packed with ranges. Because Whirlpool Corporation policy includes a continuous commitment to improve our products, we reserve the right to the ...
...max. upper cabinet depth B. 30" (76.2 cm) min. Dimensions are for planning purposes only. 30" (76 cm) Freestanding Electric Range PRODUCT MODEL NUMBERS GFE461LV GFE471LV WFE301LV WFE361LV WFE364LV WFE366LV WFE371LV WFE374LV WFE381LV WFE114LW WFE115LX RF110AXS RF111PXS RF114PXS RF212PXS RF263LXT RF264LXS Electrical: Range must be connected to the... the top of the cooking platform and the bottom of cooktop, see Installation Instructions packed with ranges. Because Whirlpool Corporation policy includes a continuous commitment to improve our products, we reserve the right to the ...

Installation Instructions
Page 3
... temperatures of flooring may require longer screws to anchor bracket to comply with the range, see "Install Anti-Tip Bracket" section. ■ Grounded electrical supply is located on the model/serial rating plate. Mobile home installations require: ■ When this range must be made by reaching over heated surface units, cabinet storage space located...
... temperatures of flooring may require longer screws to anchor bracket to comply with the range, see "Install Anti-Tip Bracket" section. ■ Grounded electrical supply is located on the model/serial rating plate. Mobile home installations require: ■ When this range must be made by reaching over heated surface units, cabinet storage space located...

Installation Instructions
Page 4
... standards can result in * C. 36" (91.4 cm) cooktop height (max.) with local codes. upper cabinet depth B. 30" (76.2 cm) min. opening width C. Electrical Requirements - U.S.A. A copy of wood or metal cabinet is properly grounded. WARNING: Improper connection of an uncovered wood or metal... cabinet. Do not modify the power supply cord plug. Model/serial rating plate (located on the left side frame behind storage drawer panel) *Range can...
... standards can result in * C. 36" (91.4 cm) cooktop height (max.) with local codes. upper cabinet depth B. 30" (76.2 cm) min. opening width C. Electrical Requirements - U.S.A. A copy of wood or metal cabinet is properly grounded. WARNING: Improper connection of an uncovered wood or metal... cabinet. Do not modify the power supply cord plug. Model/serial rating plate (located on the left side frame behind storage drawer panel) *Range can...

Installation Instructions
Page 5
... Circuit Protection Amps 40 or 50** 50 *The NEC calculated load is manufactured with the rating of the range. ■ The wiring diagram is located on the model/serial number rating plate. See "Electrical Connection." Range Rating* 120/240 Volts 8.8 - 16.5 KW 16.6 - 22.5 KW 120/208 Volts 7.8 - ... - 18.5 KW Specified Rating of the "Location Requirements" section. ■ This range is less than the total connected load listed on the model/serial rating plate. **If connecting to the proper electrical voltage and frequency as specified on the back of NEMA Type 14-50R is connected ...
... Circuit Protection Amps 40 or 50** 50 *The NEC calculated load is manufactured with the rating of the range. ■ The wiring diagram is located on the model/serial number rating plate. See "Electrical Connection." Range Rating* 120/240 Volts 8.8 - 16.5 KW 16.6 - 22.5 KW 120/208 Volts 7.8 - ... - 18.5 KW Specified Rating of the "Location Requirements" section. ■ This range is less than the total connected load listed on the model/serial rating plate. **If connecting to the proper electrical voltage and frequency as specified on the back of NEMA Type 14-50R is connected ...

Installation Instructions
Page 12
...look underneath the bottom of storage drawer 4. A. view from the anti-tip bracket. On models with Storage Drawers: Use a ¼" drive ratchet, wrench or pliers to floor. ■ Slide range back so rear range foot is level. To Remove: 1. Insert a flat-blade screwdriver through the opening in... clip by removing the warming drawer. On models with Warming Drawers: Use a wrench or pliers to back. 3. Before removing, check that rear leveling leg is removed from outside of the storage drawer and remove. 12 A Level Range 1. Place rack in anti-tip bracket. then...
...look underneath the bottom of storage drawer 4. A. view from the anti-tip bracket. On models with Storage Drawers: Use a ¼" drive ratchet, wrench or pliers to floor. ■ Slide range back so rear range foot is level. To Remove: 1. Insert a flat-blade screwdriver through the opening in... clip by removing the warming drawer. On models with Warming Drawers: Use a wrench or pliers to back. 3. Before removing, check that rear leveling leg is removed from outside of the storage drawer and remove. 12 A Level Range 1. Place rack in anti-tip bracket. then...

Owners Manual
Page 1
..., visite: www.whirlpool.com Tenga listo su número de modelo completo. Puede encontrar su número de modelo y de serie en la etqueta en el marco del horno, detrás del panel del cajón de almacenamiento. ® ELECTRIC RANGE USER INSTRUCTIONS THANK YOU... for additional information. You will need assistance, call us at www.whirlpool.com for purchasing this high-quality product. If you still need your model and serial number located on some models 8 SteamClean (on the oven frame...
..., visite: www.whirlpool.com Tenga listo su número de modelo completo. Puede encontrar su número de modelo y de serie en la etqueta en el marco del horno, detrás del panel del cajón de almacenamiento. ® ELECTRIC RANGE USER INSTRUCTIONS THANK YOU... for additional information. You will need assistance, call us at www.whirlpool.com for purchasing this high-quality product. If you still need your model and serial number located on some models 8 SteamClean (on the oven frame...

Owners Manual
Page 4
...2. Press STEAM CLEAN. Push START. 5. Check that the oven is off . 2. Only the CLOCK, OVEN LIGHT, and TIMER keypads will sound at www.whirlpool.com for the SteamClean feature. 1. Check that the oven is off . 2. Press TEMP/TIME "+" or "-" arrow pads to set the time of the cycle... left corner of time. 3. Press CANCEL/OFF to unlock. SELF-CLEAN Self-clean cycle See the "Range Care" section. (on some models) Oven cavity light The oven light may have some models) See "SteamClean" section for more information and helpful tips for more than 350°F (175°C)...
...2. Press STEAM CLEAN. Push START. 5. Check that the oven is off . 2. Only the CLOCK, OVEN LIGHT, and TIMER keypads will sound at www.whirlpool.com for the SteamClean feature. 1. Check that the oven is off . 2. Press TEMP/TIME "+" or "-" arrow pads to set the time of the cycle... left corner of time. 3. Press CANCEL/OFF to unlock. SELF-CLEAN Self-clean cycle See the "Range Care" section. (on some models) Oven cavity light The oven light may have some models) See "SteamClean" section for more information and helpful tips for more than 350°F (175°C)...

Owners Manual
Page 5
... COOK TIME (on some models) during the Self-Cleaning cycle, the entire cooktop area may become hot. Position cookware in the display. Press BROIL. 3. Press CANCEL/OFF when finished. Press CANCEL/OFF when finished. Delay start Range function Temperature and time adjust INSTRUCTIONS 1. The control knobs ... (150°C and 275°C). 4. Push in the warmed oven. 1. REMEMBER: When range is displayed. The hot surface indicator light will help keep it in and turn on some models) START TIME START CANCEL/OFF TEMP/TIME FEATURE Broiling Convection baking and roasting Hold warm Timed ...
... COOK TIME (on some models) during the Self-Cleaning cycle, the entire cooktop area may become hot. Position cookware in the display. Press BROIL. 3. Press CANCEL/OFF when finished. Press CANCEL/OFF when finished. Delay start Range function Temperature and time adjust INSTRUCTIONS 1. The control knobs ... (150°C and 275°C). 4. Push in the warmed oven. 1. REMEMBER: When range is displayed. The hot surface indicator light will help keep it in and turn on some models) START TIME START CANCEL/OFF TEMP/TIME FEATURE Broiling Convection baking and roasting Hold warm Timed ...

Owners Manual
Page 6
... ■ Oven is preheated (long tone) ■ Function has been entered ■ Reminder (on some models) WARNING Food Poisoning Hazard Do not let food sit in Fahrenheit or Celsius. Aluminum Foil IMPORTANT: To avoid...element and is recommended for example "0°F CAL" or "00." 2. IMPORTANT: The health of some models) The Dual Cooking Zone offers flexibility depending on the size of the cookware. Press TIMER to toggle ... the temperature calibration can be set between 30°F (15°C) and -30°F (-15°C). 3. The oven provides accurate temperatures;
... ■ Oven is preheated (long tone) ■ Function has been entered ■ Reminder (on some models) WARNING Food Poisoning Hazard Do not let food sit in Fahrenheit or Celsius. Aluminum Foil IMPORTANT: To avoid...element and is recommended for example "0°F CAL" or "00." 2. IMPORTANT: The health of some models) The Dual Cooking Zone offers flexibility depending on the size of the cookware. Press TIMER to toggle ... the temperature calibration can be set between 30°F (15°C) and -30°F (-15°C). 3. The oven provides accurate temperatures;

Owners Manual
Page 7
... illustration and charts as the actual temperature of the oven increases. Oven vent (ceramic glass model) Baking and Roasting ACCUBAKE® Temperature Management System (on some models) The ACCUBAKE® system electronically regulates the oven heat levels during preheat and bake to the...racks 2 and 4 for baking. Position food on 2 racks use a broiler pan and grid. Please refer to maintain a precise temperature range for contact information. Positioning Racks and Bakeware IMPORTANT: To avoid permanent damage to preheat the oven before putting food in unless recommended in ...
... illustration and charts as the actual temperature of the oven increases. Oven vent (ceramic glass model) Baking and Roasting ACCUBAKE® Temperature Management System (on some models) The ACCUBAKE® system electronically regulates the oven heat levels during preheat and bake to the...racks 2 and 4 for baking. Position food on 2 racks use a broiler pan and grid. Please refer to maintain a precise temperature range for contact information. Positioning Racks and Bakeware IMPORTANT: To avoid permanent damage to preheat the oven before putting food in unless recommended in ...

Owners Manual
Page 8
...the display. 6. The start time is reached, the oven will automatically turn off automatically and "End" will count down the time. RANGE CARE Self-Cleaning Cycle (on . Failure to follow these instructions can be changed anytime after cooking. If the temperature is extremely sensitive ...Do not block the oven vent(s) during Self-Cleaning cycle. How the Cycle Works IMPORTANT: The heating and cooling of porcelain on some models) WARNING Prepare Range ■ Remove the broiler pan, grid, cookware and bakeware, all items from the oven. ■ Use a damp cloth to...
...the display. 6. The start time is reached, the oven will automatically turn off automatically and "End" will count down the time. RANGE CARE Self-Cleaning Cycle (on . Failure to follow these instructions can be changed anytime after cooking. If the temperature is extremely sensitive ...Do not block the oven vent(s) during Self-Cleaning cycle. How the Cycle Works IMPORTANT: The heating and cooling of porcelain on some models) WARNING Prepare Range ■ Remove the broiler pan, grid, cookware and bakeware, all items from the oven. ■ Use a damp cloth to...

Owners Manual
Page 9
...Press CANCEL/OFF at www.whirlpool.com. Use a cloth soaked with bleach, rust removers, ammonia or sodium hydroxide (lye) because paint surface may stain. For additional information, you can be cleaned as soon as the entire range is cool. METALLIC PAINT (on some models) The SELF CLEAN self-cleaning... "OVEN COOLING" will appear in the oven bottom is completely cooled, remove ash with Cooktop Cleaner and Cooktop Scraper. Scrape off . 5. The last 30 minutes of the debris, resulting in the bottom of the oven with a sponge or cloth. ■ Wipe any remaining moisture from the oven cavity....
...Press CANCEL/OFF at www.whirlpool.com. Use a cloth soaked with bleach, rust removers, ammonia or sodium hydroxide (lye) because paint surface may stain. For additional information, you can be cleaned as soon as the entire range is cool. METALLIC PAINT (on some models) The SELF CLEAN self-cleaning... "OVEN COOLING" will appear in the oven bottom is completely cooled, remove ash with Cooktop Cleaner and Cooktop Scraper. Scrape off . 5. The last 30 minutes of the debris, resulting in the bottom of the oven with a sponge or cloth. ■ Wipe any remaining moisture from the oven cavity....

Owners Manual
Page 10
...? Cookware should not extend more than ½" (1.3 cm) outside the cooking area. Level the range. See "Timed Cooking" section. ■ On some models, do not affect cooking performance, and after many cleanings they will help them slide. Scratches and ...range or reconnect power. See cover for contact information. See "Electronic Oven Controls" section. ■ Has a delay start been set ? See "Oven Temperature Control" section of the oven counterclockwise to a setting. ■ On ceramic glass models, is the oven control lockout set ? Do not soak knobs. www.whirlpool...
...? Cookware should not extend more than ½" (1.3 cm) outside the cooking area. Level the range. See "Timed Cooking" section. ■ On some models, do not affect cooking performance, and after many cleanings they will help them slide. Scratches and ...range or reconnect power. See cover for contact information. See "Electronic Oven Controls" section. ■ Has a delay start been set ? See "Oven Temperature Control" section of the oven counterclockwise to a setting. ■ On ceramic glass models, is the oven control lockout set ? Do not soak knobs. www.whirlpool...

Owners Manual
Page 11
...9632; Are the racks positioned properly? Check that batter is level in longer cooking times. ■ Are baked items too brown on your model, press OFF/CANCEL or CANCEL/ OFF to cover the edge of time being used? Adjust cooking time. ■ Has the oven door been... Temperature Control" section of the "Electronic Oven Controls" section. ■ Was the oven preheated? Oven cooking results not what expected ■ Is the range level? See "Positioning Racks and Bakeware" section. ■ Is the batter evenly distributed in a reliable cookbook. ■ Is the proper oven temperature ...
...9632; Are the racks positioned properly? Check that batter is level in longer cooking times. ■ Are baked items too brown on your model, press OFF/CANCEL or CANCEL/ OFF to cover the edge of time being used? Adjust cooking time. ■ Has the oven door been... Temperature Control" section of the "Electronic Oven Controls" section. ■ Was the oven preheated? Oven cooking results not what expected ■ Is the range level? See "Positioning Racks and Bakeware" section. ■ Is the batter evenly distributed in a reliable cookbook. ■ Is the proper oven temperature ...

Owners Manual
Page 12
...to correct the installation of your major appliance, to instruct you can find your complete model number ready. Costs associated with electrical or plumbing codes, or use of Whirlpool, U.S.A. 7/08 Printed in U.S.A. Repairs to parts or systems resulting from warranty coverage. ...3. This warranty is reported to Whirlpool within 30 days from the date of purchase. 6. IMPLIED WARRANTIES, INCLUDING ...
...to correct the installation of your major appliance, to instruct you can find your complete model number ready. Costs associated with electrical or plumbing codes, or use of Whirlpool, U.S.A. 7/08 Printed in U.S.A. Repairs to parts or systems resulting from warranty coverage. ...3. This warranty is reported to Whirlpool within 30 days from the date of purchase. 6. IMPLIED WARRANTIES, INCLUDING ...

Warranty
Page 1
...the oven frame behind the storage drawer panel. This major appliance is designed to Whirlpool within 30 days from the date of purchase. 6. This warranty is void if the factory ...your major appliance. Outside the 50 United States and Canada, this User Instructions and model number information for repairs. Repairs when your major appliance is used in the country ...water filters. Costs associated with electrical or plumbing codes, or use your major appliance, to replace or repair house fuses, or to the appliance. 9. WHIRLPOOL CORPORATION MAJOR APPLIANCE WARRANTY LIMITED ...
...the oven frame behind the storage drawer panel. This major appliance is designed to Whirlpool within 30 days from the date of purchase. 6. This warranty is void if the factory ...your major appliance. Outside the 50 United States and Canada, this User Instructions and model number information for repairs. Repairs when your major appliance is used in the country ...water filters. Costs associated with electrical or plumbing codes, or use your major appliance, to replace or repair house fuses, or to the appliance. 9. WHIRLPOOL CORPORATION MAJOR APPLIANCE WARRANTY LIMITED ...


