Owners Manual
Page 3
...been used for grounding instructions. IMPORTANT SAFETY INSTRUCTIONS WARNING: To reduce the risk of fire, electric shock, or injury to persons when using the washer. ■ Do not allow children to the wash water. explode. ■ Do not add gasoline, dry-cleaning solvents, or other flammable,...We have provided many important safety messages in this manual or in , or spotted with controls. ■ Do not repair or replace any part of injury, and tell you don't immediately follow basic precautions, including the following: ■ Read all instructions before using the washing &#...
...been used for grounding instructions. IMPORTANT SAFETY INSTRUCTIONS WARNING: To reduce the risk of fire, electric shock, or injury to persons when using the washer. ■ Do not allow children to the wash water. explode. ■ Do not add gasoline, dry-cleaning solvents, or other flammable,...We have provided many important safety messages in this manual or in , or spotted with controls. ■ Do not repair or replace any part of injury, and tell you don't immediately follow basic precautions, including the following: ■ Read all instructions before using the washing &#...
Owners Manual
Page 4
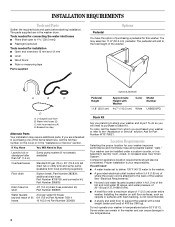
...end wrenches 13 mm and 12 mm ■ Level ■ Wood block ■ Ruler or measuring tape Parts supplied Options Pedestal You have the option of the washer. See "Drain System." Tools needed for connecting the water inlet hoses ■ Pliers (that open to ...Assistance or Service" section. INSTALLATION REQUIREMENTS Tools and Parts Gather the required tools and parts before starting installation. Installing the washer on the cover or in the washer and can be considered. Your washer can cause damage in the washer drum. Companion appliance location requirements should also be...
...end wrenches 13 mm and 12 mm ■ Level ■ Wood block ■ Ruler or measuring tape Parts supplied Options Pedestal You have the option of the washer. See "Drain System." Tools needed for connecting the water inlet hoses ■ Pliers (that open to ...Assistance or Service" section. INSTALLATION REQUIREMENTS Tools and Parts Gather the required tools and parts before starting installation. Installing the washer on the cover or in the washer and can be considered. Your washer can cause damage in the washer drum. Companion appliance location requirements should also be...

Owners Manual
Page 6
See "Tools and Parts." The top of the washer. 30" min. (76.2 cm) † 1" (2.5 cm) 23.4" (59.5 cm) † 1" (2.5 cm) *Min. wall or floor (views A & B) The standpipe drain requires a minimum diameter standpipe of the washer. Standpipe drain system - The top of the laundry tub must be a minimum of...view C) The laundry tub needs a minimum 20 gal. (76 L) capacity. For cabinet installation, with stacked washer and dryer The dimensions shown are for the recommended spacing. See "Tools and Parts." The siphon break must be at least 30" (76.2 cm) high and no less than 55" (1.4 ...
See "Tools and Parts." The top of the washer. 30" min. (76.2 cm) † 1" (2.5 cm) 23.4" (59.5 cm) † 1" (2.5 cm) *Min. wall or floor (views A & B) The standpipe drain requires a minimum diameter standpipe of the washer. Standpipe drain system - The top of the laundry tub must be a minimum of...view C) The laundry tub needs a minimum 20 gal. (76 L) capacity. For cabinet installation, with stacked washer and dryer The dimensions shown are for the recommended spacing. See "Tools and Parts." The siphon break must be at least 30" (76.2 cm) high and no less than 55" (1.4 ...
Owners Manual
Page 8
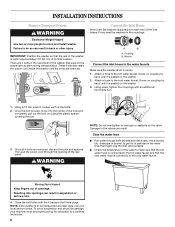
...and structural damage, your machine must be transported at a later date, call your local service center. Connect the Inlet Hoses Insert new flat washers (supplied) into each of the water to make sure that the hot water hose is connected to the hot water faucet and that the...; Check the temperature of the bolts. 2. There are 4 bolts in amputation or serious cuts. 4. Moving Parts Hazard Keep fingers out of the washer is seated on the valve. These bolts also retain the power cord inside the washer until the bolts are removed, discard the bolts and spacers. IMPORTANT: Position the...
...and structural damage, your machine must be transported at a later date, call your local service center. Connect the Inlet Hoses Insert new flat washers (supplied) into each of the water to make sure that the hot water hose is connected to the hot water faucet and that the...; Check the temperature of the bolts. 2. There are 4 bolts in amputation or serious cuts. 4. Moving Parts Hazard Keep fingers out of the washer is seated on the valve. These bolts also retain the power cord inside the washer until the bolts are removed, discard the bolts and spacers. IMPORTANT: Position the...

Owners Manual
Page 9
H. Damage to the washer's hot (H) water inlet valve. A B A. See Floor drain under "Tools and Parts." Read and follow these instructions. NOTES: ■ Do not force excess drain hose back into the standpipe. 9 Attach the hot water hose to the ... water leakage. Screw on coupling by hand until it is seated on the washer. 2. Place the drain hose in the standpipe as shown. Floor drain You may need additional parts. Hot water inlet C. Using pliers, tighten the couplings with an additional two-thirds turn. Route the Drain Hose Proper routing of...
H. Damage to the washer's hot (H) water inlet valve. A B A. See Floor drain under "Tools and Parts." Read and follow these instructions. NOTES: ■ Do not force excess drain hose back into the standpipe. 9 Attach the hot water hose to the ... water leakage. Screw on coupling by hand until it is seated on the washer. 2. Place the drain hose in the standpipe as shown. Floor drain You may need additional parts. Hot water inlet C. Using pliers, tighten the couplings with an additional two-thirds turn. Route the Drain Hose Proper routing of...

Owners Manual
Page 10
... adjust feet as necessary; Make sure all parts are stable and resting on . 6. Check the electrical requirements. Do not use an extension cord. Read "Washer Use." 9. If the washer is level, use a level). 3. After the washer is against the washer cabinet, the washer may vibrate. 4. WARNING Electrical Shock Hazard ...Dispose of/recycle all of the washer. If there is not level, first prop the front with a wood block and adjust the feet as necessary. Allow the washer to see which step was skipped. 3. If the washer is an extra part, go back through the steps ...
... adjust feet as necessary; Make sure all parts are stable and resting on . 6. Check the electrical requirements. Do not use an extension cord. Read "Washer Use." 9. If the washer is level, use a level). 3. After the washer is against the washer cabinet, the washer may vibrate. 4. WARNING Electrical Shock Hazard ...Dispose of/recycle all of the washer. If there is not level, first prop the front with a wood block and adjust the feet as necessary. Allow the washer to see which step was skipped. 3. If the washer is an extra part, go back through the steps ...
Owners Manual
Page 15
...low-speed spin for gentle fabric care. ■ Use mesh garment bags to wash undergarments such as underwire bras, items with AFFRESH™ washer cleaner tablet or liquid chlorine bleach to thoroughly clean the inside of your washing machine. This cycle should not be a blinking light. Drain/... sounds and pauses are available with a selected cycle, there will have a lower spin speed and last a shorter time. 15 See "Cleaning Your Washer." Rinse & Spin is unavailable with all Options are part of tumbling. Extra Rinse An extra rinse can customize your cycle selections.
...low-speed spin for gentle fabric care. ■ Use mesh garment bags to wash undergarments such as underwire bras, items with AFFRESH™ washer cleaner tablet or liquid chlorine bleach to thoroughly clean the inside of your washing machine. This cycle should not be a blinking light. Drain/... sounds and pauses are available with a selected cycle, there will have a lower spin speed and last a shorter time. 15 See "Cleaning Your Washer." Rinse & Spin is unavailable with all Options are part of tumbling. Extra Rinse An extra rinse can customize your cycle selections.
Owners Manual
Page 20
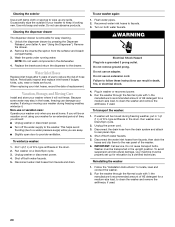
... the Dispenser"). Unlock the dispenser drawer by a certified technician. Remove the inserts (the siphon from the drain system and attach to clean the washer and remove the antifreeze, if used . Wash the parts under running water. Flush water pipes. 2. Do not reuse transport bolts. Follow the "Installation Instructions" to faucets. 3. Run the...
... the Dispenser"). Unlock the dispenser drawer by a certified technician. Remove the inserts (the siphon from the drain system and attach to clean the washer and remove the antifreeze, if used . Wash the parts under running water. Flush water pipes. 2. Do not reuse transport bolts. Follow the "Installation Instructions" to faucets. 3. Run the...
Owners Manual
Page 21
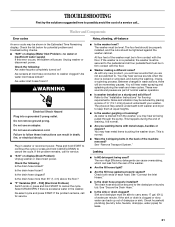
...Refer to the pedestal and all four pedestal feet must be shown in washer or reconnect power. Are water inlet hoses kinked? Failure to follow these instructions can leak from the washer, you are part of each hose. Check the following : Are water faucets completely turned on...new product, you will pause. Are water inlet hoses frozen? You may extend underneath both ends of normal washer operation. ■ Is washer installed on a pedestal, the washer must be secured to the "Installation Instructions" for leaks. 21 The four feet should be properly installed, and...
...Refer to the pedestal and all four pedestal feet must be shown in washer or reconnect power. Are water inlet hoses kinked? Failure to follow these instructions can leak from the washer, you are part of each hose. Check the following : Are water faucets completely turned on...new product, you will pause. Are water inlet hoses frozen? You may extend underneath both ends of normal washer operation. ■ Is washer installed on a pedestal, the washer must be secured to the "Installation Instructions" for leaks. 21 The four feet should be properly installed, and...
Owners Manual
Page 25
...8212487RP 5 ft (1.5 m) nylon braided fill hose. To locate FSP® replacement parts in Canada. Whirlpool Canada LP designated service technicians are made with any questions or concerns at: Whirlpool Brand Home Appliances Customer eXperience Center 553 Benson Road Benton Harbor, MI 49022-2692 ...W10178021 All purpose appliance cleaner Laundry supply storage cart AFFRESH™ Washer Cleaner Stack kit 25 Accessories Enhance your washer with : ■ Use and maintenance procedures ■ Accessory and repair parts sales ■ Features and specifications on our full line of ...
...8212487RP 5 ft (1.5 m) nylon braided fill hose. To locate FSP® replacement parts in Canada. Whirlpool Canada LP designated service technicians are made with any questions or concerns at: Whirlpool Brand Home Appliances Customer eXperience Center 553 Benson Road Benton Harbor, MI 49022-2692 ...W10178021 All purpose appliance cleaner Laundry supply storage cart AFFRESH™ Washer Cleaner Stack kit 25 Accessories Enhance your washer with : ■ Use and maintenance procedures ■ Accessory and repair parts sales ■ Features and specifications on our full line of ...


