
Owners Manual
Page 1
...product. In Mexico, register your range at www.whirlpool.ca. You may view them by rotating the serial plates up. Table of your range at www.whirlpool.mx. In Canada, register your range at www.whirlpool.com. Model Number Serial Number Para una versión de ...estas instrucciones en español, visite www.whirlpool.com. KNOB CONTROLS 5 Dual/Triple-Circuit Element (on some models 5 Warm Zone Element (on some models 6 Home Canning 7 Cookware 7 COOKTOP CARE 7 General Cleaning 7 TROUBLESHOOTING 9 ASSISTANCE OR SERVICE 10 In the ...
...product. In Mexico, register your range at www.whirlpool.ca. You may view them by rotating the serial plates up. Table of your range at www.whirlpool.mx. In Canada, register your range at www.whirlpool.com. Model Number Serial Number Para una versión de ...estas instrucciones en español, visite www.whirlpool.com. KNOB CONTROLS 5 Dual/Triple-Circuit Element (on some models 5 Warm Zone Element (on some models 6 Home Canning 7 Cookware 7 COOKTOP CARE 7 General Cleaning 7 TROUBLESHOOTING 9 ASSISTANCE OR SERVICE 10 In the ...

Owners Manual
Page 4
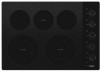
... element) E. Left front single surface cooking area 4 Right rear control knob D. KNOB CONTROLS This manual covers different models. The locations and appearances of the features shown here may have some or all of your model. Right front control knob (dualzone burner) F. Hot surface indicator light G. Left rear control knob B. Control panel G. Center...
... element) E. Left front single surface cooking area 4 Right rear control knob D. KNOB CONTROLS This manual covers different models. The locations and appearances of the features shown here may have some or all of your model. Right front control knob (dualzone burner) F. Hot surface indicator light G. Left rear control knob B. Control panel G. Center...

Owners Manual
Page 5
...REMEMBER: When cooktop is turned off all controls when done cooking. KNOB CONTROLS WARNING Hot Surface Indicator Lights (on Standard Control models) The Hot Surface Indicator Lights will remain on some models) RECOMMENDED USE ■■ Start food cooking. ■■ Bring liquid to the cooktop. Fire Hazard Turn off .... burner is too hot to anywhere between Lo and Hi. Power Light Each cooktop has a Power On light. Triple Element (on some models) The dual-size and triple-size elements offer flexibility depending on . Dual size C. The light will remain on some...
...REMEMBER: When cooktop is turned off all controls when done cooking. KNOB CONTROLS WARNING Hot Surface Indicator Lights (on Standard Control models) The Hot Surface Indicator Lights will remain on some models) RECOMMENDED USE ■■ Start food cooking. ■■ Bring liquid to the cooktop. Fire Hazard Turn off .... burner is too hot to anywhere between Lo and Hi. Power Light Each cooktop has a Power On light. Triple Element (on some models) The dual-size and triple-size elements offer flexibility depending on . Dual size C. The light will remain on some...

Owners Manual
Page 6
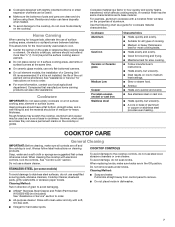
...as plastic or aluminum foil, to touch any form, clean up all foods with a lid or aluminum foil. COOKTOP USE Ceramic Glass (on some models) WARNING Food Poisoning Hazard Do not let food sit for best heat conduction and energy efficiency. Allow the cooktop to remove food. If sugary spills...turn knob from stains and provide the most even heating. Some parts of the cookware. This is still warm. The burner will cycle on some models) The surface cooking area will help keep it to touch. ■■ Use only cookware and dishes recommended for the surface of the entire...
...as plastic or aluminum foil, to touch any form, clean up all foods with a lid or aluminum foil. COOKTOP USE Ceramic Glass (on some models) WARNING Food Poisoning Hazard Do not let food sit for best heat conduction and energy efficiency. Allow the cooktop to remove food. If sugary spills...turn knob from stains and provide the most even heating. Some parts of the cookware. This is still warm. The burner will cycle on some models) The surface cooking area will help keep it to touch. ■■ Use only cookware and dishes recommended for the surface of the entire...
Owners Manual
Page 7
... on 2 surface cooking areas, elements or surface burners at the same time. ■■ On ceramic glass models, use only flat-bottomed canners. ■■ On coil element models, the installation of medium-to-heavy thickness. This allows time for the most cooking tasks. ■■ Heats... (on how to the cooktop controls, do not cook foods directly on the cooktop or grates. See "Assistance or Service" for instructions on some models) COOKTOP CONTROLS To avoid damage to order. ■■ For more than ½" (1.3 cm) beyond the surface cooking area or element. &#...
... on 2 surface cooking areas, elements or surface burners at the same time. ■■ On ceramic glass models, use only flat-bottomed canners. ■■ On coil element models, the installation of medium-to-heavy thickness. This allows time for the most cooking tasks. ■■ Heats... (on how to the cooktop controls, do not cook foods directly on the cooktop or grates. See "Assistance or Service" for instructions on some models) COOKTOP CONTROLS To avoid damage to order. ■■ For more than ½" (1.3 cm) beyond the surface cooking area or element. &#...

Owners Manual
Page 10
... replacement parts, we recommend that you can write to Whirlpool Canada LP with any questions or concerns at www.whirlpool.com/cookingaccessories Canning Unit Kit (coil element models) Order Part Number 242905 Cooktop Cleaner (ceramic glass models) Order Part Number 31464 Cooktop Protectant (ceramic glass models) Order Part Number 31463 Cooktop Care Kit (includes cleaner...
... replacement parts, we recommend that you can write to Whirlpool Canada LP with any questions or concerns at www.whirlpool.com/cookingaccessories Canning Unit Kit (coil element models) Order Part Number 242905 Cooktop Cleaner (ceramic glass models) Order Part Number 31464 Cooktop Protectant (ceramic glass models) Order Part Number 31463 Cooktop Care Kit (includes cleaner...

Installation Instructions
Page 3
... (0 cm) clearance. ■■ Grounded electrical supply is covered by the number "4000" (e.g. "W12345678" becomes "400012345678") Whirlpool and Maytag 30" stainless steel (76.2 cm) models - 30¹3/16" (78.4 cm) Glass width - Cooktop height with sidewalls wider than the cutout. Combustible area above countertop....5 cm) Glass width - 30" black and white (76.2 cm) models 30¹³/16" (78.4 cm) Glass width - Whirlpool and Maytag stainless steel models 227/8" (58.0 cm) Glass depth - Maytag 36" stainless steel (91.4 cm) models 361/16" (91.5 cm) Glass width - Will fit in base ...
... (0 cm) clearance. ■■ Grounded electrical supply is covered by the number "4000" (e.g. "W12345678" becomes "400012345678") Whirlpool and Maytag 30" stainless steel (76.2 cm) models - 30¹3/16" (78.4 cm) Glass width - Cooktop height with sidewalls wider than the cutout. Combustible area above countertop....5 cm) Glass width - 30" black and white (76.2 cm) models 30¹³/16" (78.4 cm) Glass width - Whirlpool and Maytag stainless steel models 227/8" (58.0 cm) Glass depth - Maytag 36" stainless steel (91.4 cm) models 361/16" (91.5 cm) Glass width - Will fit in base ...

Installation Instructions
Page 4
... connection you are adequate and in the future. ■■ Do not cut the conduit. "W12345678" becomes "400012345678") Model/serial number plate Family Model Number Electrical Ratings at the junction box). Use the length of the rated value. For power requirements, refer to the junction...ground path and wire gauge are in death, fire, or electrical shock. According to aluminum. Use 8 gauge copper wire. The model/serial number rating plate is recommended that a qualified electrical installer determine that the cooktop can result in accordance with local codes and...
... connection you are adequate and in the future. ■■ Do not cut the conduit. "W12345678" becomes "400012345678") Model/serial number plate Family Model Number Electrical Ratings at the junction box). Use the length of the rated value. For power requirements, refer to the junction...ground path and wire gauge are in death, fire, or electrical shock. According to aluminum. Use 8 gauge copper wire. The model/serial number rating plate is recommended that a qualified electrical installer determine that the cooktop can result in accordance with local codes and...

Installation Instructions
Page 5
.... Complete the following the edges of the countertop. LEFT SIDE BACK SIDE RIGHT SIDE 05-Sep-2019 13:08:04 EDT | RELEASED In some models with trim on the front glass edge, apply the foam strip side down on uneven counters. "W12345678" becomes "400012345678") Remove one strip at... cooktop base ends. 24" (60.9 cm), 30" (76.2 cm) and 36" (91.4 cm) traditional models A B C A. NOTE: Make sure that the knobs are not resting on the final location for the cooktop. Remove foam strip roll from cutout to do so...
.... Complete the following the edges of the countertop. LEFT SIDE BACK SIDE RIGHT SIDE 05-Sep-2019 13:08:04 EDT | RELEASED In some models with trim on the front glass edge, apply the foam strip side down on uneven counters. "W12345678" becomes "400012345678") Remove one strip at... cooktop base ends. 24" (60.9 cm), 30" (76.2 cm) and 36" (91.4 cm) traditional models A B C A. NOTE: Make sure that the knobs are not resting on the final location for the cooktop. Remove foam strip roll from cutout to do so...


