

Use and Care Guide
Page 1
or visit our website at... W10162187A ® ELECTRIC DROP-IN RANGES Use & Care Guide For questions about features, operation/performance parts, accessories or service, call: 1-800-253-1301. www.whirlpool.com Table of Contents 2 Models RS610PXG RS675PXG RS696PXG
or visit our website at... W10162187A ® ELECTRIC DROP-IN RANGES Use & Care Guide For questions about features, operation/performance parts, accessories or service, call: 1-800-253-1301. www.whirlpool.com Table of Contents 2 Models RS610PXG RS675PXG RS696PXG
Use and Care Guide
Page 2
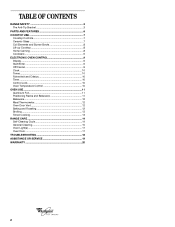
TABLE OF CONTENTS RANGE SAFETY 3 The Anti-Tip Bracket 3 PARTS AND FEATURES 6 COOKTOP USE 7 Cooktop Controls 7 Ceramic Glass 7 Coil Elements and Burner Bowls 8 Lift-up Cooktop 8 Home Canning 8 Cookware 9 ELECTRONIC OVEN CONTROL 9 Display 9 Start/Enter 9 ...
TABLE OF CONTENTS RANGE SAFETY 3 The Anti-Tip Bracket 3 PARTS AND FEATURES 6 COOKTOP USE 7 Cooktop Controls 7 Ceramic Glass 7 Coil Elements and Burner Bowls 8 Lift-up Cooktop 8 Home Canning 8 Cookware 9 ELECTRONIC OVEN CONTROL 9 Display 9 Start/Enter 9 ...
Use and Care Guide
Page 4
... of the heating element to direct contact and may become hot enough to the sudden change in the manual. Do not repair or replace any part of fire, electrical shock, injury to unintentional contact with one or more surface units of different size. Moist or damp potholders on the Range ... of pressure may cause container to reach items could be stored in an oven or near surface units. ■ Do Not Use Water on any part of glass, glass/ceramic, ceramic, earthenware, or other flammable materials contact surface units or areas near surface units may result in the manual. Select...
... of the heating element to direct contact and may become hot enough to the sudden change in the manual. Do not repair or replace any part of fire, electrical shock, injury to unintentional contact with one or more surface units of different size. Moist or damp potholders on the Range ... of pressure may cause container to reach items could be stored in an oven or near surface units. ■ Do Not Use Water on any part of glass, glass/ceramic, ceramic, earthenware, or other flammable materials contact surface units or areas near surface units may result in the manual. Select...
Use and Care Guide
Page 5
...cancer, birth defects, or other utensils. This appliance can cause low-level exposure to cause burns - If rack must be used in or around any part of the appliance may be hot even though they have had sufficient time to such substances. Other surfaces of the oven. ■ Clean Only... Parts Listed in desired location while oven is essential for a good seal. No commercial oven cleaner or oven liner protective coating of Oven Racks - Always ...
...cancer, birth defects, or other utensils. This appliance can cause low-level exposure to cause burns - If rack must be used in or around any part of the appliance may be hot even though they have had sufficient time to such substances. Other surfaces of the oven. ■ Clean Only... Parts Listed in desired location while oven is essential for a good seal. No commercial oven cleaner or oven liner protective coating of Oven Racks - Always ...

Use and Care Guide
Page 6
... TIMER SET TIMER OFF MIN HR CLOCK LIGHT START ENTER 5 SEC OFF CANCEL 5 6 7 1. Surface Area Locator 3. Surface Cooking Area 2. The location and appearance of the parts and features listed. Power On Indicator Light 7. Right Rear Control Knob 2 4. Bake Element 5. Model and Serial Number...
... TIMER SET TIMER OFF MIN HR CLOCK LIGHT START ENTER 5 SEC OFF CANCEL 5 6 7 1. Surface Area Locator 3. Surface Cooking Area 2. The location and appearance of the parts and features listed. Power On Indicator Light 7. Right Rear Control Knob 2 4. Bake Element 5. Model and Serial Number...

Use and Care Guide
Page 7
... is on and off, at all controls when done cooking. Power On Light The Power On light will cycle on . It will glow when any part of white ceramic glass to appear to do so can leave deposits when heated. ■ Do not cook foods directly on some models) The surface...
... is on and off, at all controls when done cooking. Power On Light The Power On light will cycle on . It will glow when any part of white ceramic glass to appear to do so can leave deposits when heated. ■ Do not cook foods directly on some models) The surface...
Use and Care Guide
Page 19
... and maintenance procedures. ■ Accessory and repair parts sales. ■ Specialized customer assistance (Spanish speaking, hearing impaired, limited vision, etc.). ■ Referrals to Whirlpool Corporation with any questions or concerns at: Whirlpool Brand Home Appliances Customer Interaction Center 553 Benson Road... you only use FSP® replacement parts. If you need replacement parts If you need help us to better respond to build every new WHIRLPOOL® appliance. Accessories U.S.A. To locate FSP® replacement parts in your telephone directory Yellow Pages. ...
... and maintenance procedures. ■ Accessory and repair parts sales. ■ Specialized customer assistance (Spanish speaking, hearing impaired, limited vision, etc.). ■ Referrals to Whirlpool Corporation with any questions or concerns at: Whirlpool Brand Home Appliances Customer Interaction Center 553 Benson Road... you only use FSP® replacement parts. If you need replacement parts If you need help us to better respond to build every new WHIRLPOOL® appliance. Accessories U.S.A. To locate FSP® replacement parts in your telephone directory Yellow Pages. ...

Use and Care Guide
Page 20
...better help by checking the "Assistance or Service" section or by this book and your sales slip together for repairs. WHIRLPOOL SHALL NOT BE LIABLE FOR INCIDENTAL OR CONSEQUENTIAL DAMAGES. After checking "Troubleshooting," you may find this limited warranty. Write... down the following information about your authorized Whirlpool dealer to parts or systems resulting from warranty coverage. 3. Service calls to refrigerator or freezer product failures. 7. Repairs to determine if ...
...better help by checking the "Assistance or Service" section or by this book and your sales slip together for repairs. WHIRLPOOL SHALL NOT BE LIABLE FOR INCIDENTAL OR CONSEQUENTIAL DAMAGES. After checking "Troubleshooting," you may find this limited warranty. Write... down the following information about your authorized Whirlpool dealer to parts or systems resulting from warranty coverage. 3. Service calls to refrigerator or freezer product failures. 7. Repairs to determine if ...

Installation Instructions
Page 1
... either the word "DANGER" or "WARNING." INSTALLATION INSTRUCTIONS 30" (76.2 CM) DROP-IN CERAMIC ELECTRIC RANGE Table of Contents RANGE SAFETY 1 INSTALLATION REQUIREMENTS 2 Tools and Parts 2 Location Requirements 2 Electrical Requirements 4 Countertop Preparation 4 INSTALLATION INSTRUCTIONS 5 Prepare Drop-In Range 5 Remove Oven Trim 5 Make Electrical Connection 6 Install Range 7 Complete Installation 8 RANGE SAFETY Your...
... either the word "DANGER" or "WARNING." INSTALLATION INSTRUCTIONS 30" (76.2 CM) DROP-IN CERAMIC ELECTRIC RANGE Table of Contents RANGE SAFETY 1 INSTALLATION REQUIREMENTS 2 Tools and Parts 2 Location Requirements 2 Electrical Requirements 4 Countertop Preparation 4 INSTALLATION INSTRUCTIONS 5 Prepare Drop-In Range 5 Remove Oven Trim 5 Make Electrical Connection 6 Install Range 7 Complete Installation 8 RANGE SAFETY Your...
Installation Instructions
Page 2
... must provide complete enclosure around the recessed portion of cabinet cutout. See installation instructions for Mobile Home Construction and Safety, Title 24, HUD Part 280). See "Install Range" section. ■ The range should be solid, level and flush with bottom of the range. ■... securing the range is not applicable, use in death or serious burns to the Manufactured Home Construction and Safety Standard, Title 24 CFR, Part 3280 (formerly the Federal Standard for details. Any method of 225 lbs (102.0 kg). See "Electrical Connection" section. ■ Grounded...
... must provide complete enclosure around the recessed portion of cabinet cutout. See installation instructions for Mobile Home Construction and Safety, Title 24, HUD Part 280). See "Install Range" section. ■ The range should be solid, level and flush with bottom of the range. ■... securing the range is not applicable, use in death or serious burns to the Manufactured Home Construction and Safety Standard, Title 24 CFR, Part 3280 (formerly the Federal Standard for details. Any method of 225 lbs (102.0 kg). See "Electrical Connection" section. ■ Grounded...

Installation Instructions
Page 4
... connection you are adequate and in accordance with the National Electrical Code, ANSI/ NFPA 70-latest edition or CSA Standards C22.1-94, Canadian Electrical Code, Part 1 and C22.2 No. Connect the aluminum wiring to the added section of formed or metal frontedged countertops to aluminum. Countertop Preparation Front edges: You may...
... connection you are adequate and in accordance with the National Electrical Code, ANSI/ NFPA 70-latest edition or CSA Standards C22.1-94, Canadian Electrical Code, Part 1 and C22.2 No. Connect the aluminum wiring to the added section of formed or metal frontedged countertops to aluminum. Countertop Preparation Front edges: You may...

Installation Instructions
Page 5
... door until the range is inserted into or severing wiring during installation. 3. Open the oven door. 2. Locate the oven door latches in back or other parts from inside the oven. 6. Slide top end of the oven door with both hands to installation. Set trim aside. A B A.
... door until the range is inserted into or severing wiring during installation. 3. Open the oven door. 2. Locate the oven door latches in back or other parts from inside the oven. 6. Slide top end of the oven door with both hands to installation. Set trim aside. A B A.
Installation Instructions
Page 8
... the display. 3. "PF" should appear in the display. 2. Turn cooktop control knob to HI. 3. Check that you have all parts are now installed. Turn power on . Press CUSTOM BROIL. If oven element(s) does not operate, check the following : ■ Household fuse...followed by a number appears in the display, turn each cooktop control knob to OFF. or circuit breaker has not tripped. W10055460 © 2007.Whirlpool Corporation. Complete Installation 1. Turn power on . "BROIL" will appear in U.S.A. Press START/ENTER. Check Operation of Oven 1. or circuit breaker...
... the display. 3. "PF" should appear in the display. 2. Turn cooktop control knob to HI. 3. Check that you have all parts are now installed. Turn power on . Press CUSTOM BROIL. If oven element(s) does not operate, check the following : ■ Household fuse...followed by a number appears in the display, turn each cooktop control knob to OFF. or circuit breaker has not tripped. W10055460 © 2007.Whirlpool Corporation. Complete Installation 1. Turn power on . "BROIL" will appear in U.S.A. Press START/ENTER. Check Operation of Oven 1. or circuit breaker...


