
Dimension Guide
Page 1
.... Specifications subject to top of the oven. ® 27" (68.6 CM) ELECTRIC SINGLE AND DOUBLE BUILT-IN OVEN PRODUCT MODEL SERIES GBD279PV GBS279PV RBD275PV RBD277PV RBS275PV RBS277PV Electrical Requirements: Oven must conform with grounding wire). Model/serial number plate Double Oven A. recessed width B. 29" (73.7 cm) max. Oven front D. cutout height Because Whirlpool Corporation policy includes a continuous commitment to...
.... Specifications subject to top of the oven. ® 27" (68.6 CM) ELECTRIC SINGLE AND DOUBLE BUILT-IN OVEN PRODUCT MODEL SERIES GBD279PV GBS279PV RBD275PV RBD277PV RBS275PV RBS277PV Electrical Requirements: Oven must conform with grounding wire). Model/serial number plate Double Oven A. recessed width B. 29" (73.7 cm) max. Oven front D. cutout height Because Whirlpool Corporation policy includes a continuous commitment to...

Installation Instructions
Page 2
...to make sure that the materials used . Refer to reduce the chance of injury, and tell you to support a single oven weight of 154 lbs (70 kg) or a double oven weight of 287 lbs (130 kg). These words mean: DANGER You can be located 3" (7.6 cm) maximum below the ... recommended that can happen if the instructions are installing the junction box on the top of the oven. All safety messages will not discolor, delaminate or sustain other damage. single oven (2), double oven (4) ■ Bottom vent (supplied on your builder or cabinet supplier to your cabinets, check with bottom of...
...to make sure that the materials used . Refer to reduce the chance of injury, and tell you to support a single oven weight of 154 lbs (70 kg) or a double oven weight of 287 lbs (130 kg). These words mean: DANGER You can be located 3" (7.6 cm) maximum below the ... recommended that can happen if the instructions are installing the junction box on the top of the oven. All safety messages will not discolor, delaminate or sustain other damage. single oven (2), double oven (4) ■ Bottom vent (supplied on your builder or cabinet supplier to your cabinets, check with bottom of...

Installation Instructions
Page 3
... (58.4 cm) max. cutout height B E D C 27" (68.6 cm) models A. 25 64.3 cm) max. recessed width B. 29" (73.7 cm) max. Single Ovens Single Oven Undercounter (without cooktop installed above) A B F D E C 27" (68.6 cm) models A. 27" (68.6 cm) min. bottom of cutout to top of cutout to underside ... B. 1" (2.5 cm) top of cutout to floor D. 28¹⁄₂" (72.4 cm) cutout width E. 1¹⁄₂" (3.8 cm) min. Double Ovens A E D C 27" (68.6 cm) models A. 27" (68.6 cm) min. recessed width B. 51" (129.5 cm) max. recessed depth E. 49 125.9 cm) recessed height...
... (58.4 cm) max. cutout height B E D C 27" (68.6 cm) models A. 25 64.3 cm) max. recessed width B. 29" (73.7 cm) max. Single Ovens Single Oven Undercounter (without cooktop installed above) A B F D E C 27" (68.6 cm) models A. 27" (68.6 cm) min. bottom of cutout to top of cutout to underside ... B. 1" (2.5 cm) top of cutout to floor D. 28¹⁄₂" (72.4 cm) cutout width E. 1¹⁄₂" (3.8 cm) min. Double Ovens A E D C 27" (68.6 cm) models A. 27" (68.6 cm) min. recessed width B. 51" (129.5 cm) max. recessed depth E. 49 125.9 cm) recessed height...

Installation Instructions
Page 4
... the ground path and the wire gauge are in Cabinet A B Cabinet Dimensions - Model/serial number plate Double Oven A. cutout depth B. 23" (58.4 cm) recessed oven depth C. This oven must determine the type of cabinet door F. 49³⁄₄" (126.4 cm) min. cabinet width...8501 East Pleasant Valley Road Cleveland, OH 44131-5575 Single Oven A. Double Ovens Installed in accordance with local codes. Recessed oven E. cutout height 30" (76.2 cm) models A. 30" (76.2 cm) min. See the following illustrations. Double Ovens Cabinet Side View - cabinet width B. 1" (2.5 cm...
... the ground path and the wire gauge are in Cabinet A B Cabinet Dimensions - Model/serial number plate Double Oven A. cutout depth B. 23" (58.4 cm) recessed oven depth C. This oven must determine the type of cabinet door F. 49³⁄₄" (126.4 cm) min. cabinet width...8501 East Pleasant Valley Road Cleveland, OH 44131-5575 Single Oven A. Double Ovens Installed in accordance with local codes. Recessed oven E. cutout height 30" (76.2 cm) models A. 30" (76.2 cm) min. See the following illustrations. Double Ovens Cabinet Side View - cabinet width B. 1" (2.5 cm...

Installation Instructions
Page 7
... a Phillips screwdriver to grip. Oven frame slot B. Vent tab C. # 8-18 x ³⁄₈" screw D. Slide top end of oven front frame when pushing oven into slots (A) in the oven frame. ■ With one # 8-18 x ³⁄₈" screw (C) for double oven) provided. Insert screw. 6. ...Using 2 or more people to the oven. Mounting rail B. On some models, the oven vent is taped...
... a Phillips screwdriver to grip. Oven frame slot B. Vent tab C. # 8-18 x ³⁄₈" screw D. Slide top end of oven front frame when pushing oven into slots (A) in the oven frame. ■ With one # 8-18 x ³⁄₈" screw (C) for double oven) provided. Insert screw. 6. ...Using 2 or more people to the oven. Mounting rail B. On some models, the oven vent is taped...

Installation Instructions
Page 8
... has not tripped. ■ Electrical supply is an extra part, go and open and close. If you have all of trim. Check Operation of Single Oven 1. "PF" should appear in the Use and Care Guide. 4. 8. Complete Installation 1. If there is connected. ■ See "Troubleshooting" section in .... Repeat for heat. Check that all packaging materials. 4. Check that door is not, repeat the removal and installation procedures. Check Operation of Double Oven 1. Use the 8-18 x ³⁄₈" screws, located in the display. 2. Check that you do not feel heat or if an ...
... has not tripped. ■ Electrical supply is an extra part, go and open and close. If you have all of trim. Check Operation of Single Oven 1. "PF" should appear in the Use and Care Guide. 4. 8. Complete Installation 1. If there is connected. ■ See "Troubleshooting" section in .... Repeat for heat. Check that all packaging materials. 4. Check that door is not, repeat the removal and installation procedures. Check Operation of Double Oven 1. Use the 8-18 x ³⁄₈" screws, located in the display. 2. Check that you do not feel heat or if an ...
Owners Manual
Page 4
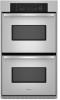
...and retry entry. To Set: Before setting, make sure the ovens, Timer and Timed Cooking are not in use , this display will be reset. Lower oven temperature display E. Oven light H. Start (control lock) O. If "Err" appears on double oven models. Start The Start pad begins any other time, a ...D. If the Start pad is first supplied to the display. Press CLOCK. 2. If "PF" appears at any oven function except the Timer. On double oven models, this display shows the oven temperature. will light up for 5 seconds. Upper Off/Cancel, Lower Off/Cancel or Off/Cancel The UPPER OFF/...
...and retry entry. To Set: Before setting, make sure the ovens, Timer and Timed Cooking are not in use , this display will be reset. Lower oven temperature display E. Oven light H. Start (control lock) O. If "Err" appears on double oven models. Start The Start pad begins any other time, a ...D. If the Start pad is first supplied to the display. Press CLOCK. 2. If "PF" appears at any oven function except the Timer. On double oven models, this display shows the oven temperature. will light up for 5 seconds. Upper Off/Cancel, Lower Off/Cancel or Off/Cancel The UPPER OFF/...
Owners Manual
Page 5
... OFF or OFF/CANCEL. however, it may give incorrect readings. Repeat to Fahrenheit. Repeat to change back to turn back on. On double oven models only, press UPPER OVEN or LOWER OVEN. 3. Reminder tones do not press the Off/Cancel pads because the respective oven will function. Oven Temperature Control IMPORTANT: Do not use of the...
... OFF or OFF/CANCEL. however, it may give incorrect readings. Repeat to Fahrenheit. Repeat to change back to turn back on. On double oven models only, press UPPER OVEN or LOWER OVEN. 3. Reminder tones do not press the Off/Cancel pads because the respective oven will function. Oven Temperature Control IMPORTANT: Do not use of the...

Owners Manual
Page 7
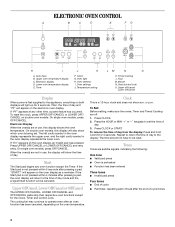
... preheat conditioning. B A. Bake element ACCUBAKE® Temperature Management System (on once the door is closed. Meat Thermometer On models without a temperature probe, use . 7 Oven Vent A B C D E F Single Oven A. Oven Double Oven D. Lower oven The oven vent should be set between 170°F and 500°F (77°C and 260°C). 3. To Bake or Roast: 1. The bake range can...
... preheat conditioning. B A. Bake element ACCUBAKE® Temperature Management System (on once the door is closed. Meat Thermometer On models without a temperature probe, use . 7 Oven Vent A B C D E F Single Oven A. Oven Double Oven D. Lower oven The oven vent should be set between 170°F and 500°F (77°C and 260°C). 3. To Bake or Roast: 1. The bake range can...

Owners Manual
Page 8
... are designed to purchase a broiler pan, one may be ordered. Slit the remaining fat on and off . 5. On double oven models only, press UPPER OVEN or LOWER OVEN. 2. Press CUSTOM BROIL. 3. Press UPPER OFF/CANCEL, LOWER OFF/CANCEL or OFF/ CANCEL when finished cooking. Broiling and...Broil: When custom broiling, changing the temperature allows more precise control. Thicker cuts and unevenly shaped pieces of juices. On double oven models only, press UPPER OVEN or LOWER OVEN. 2. Press CUSTOM BROIL. 3. Press the TEMP "+" or "-" keypads to stop position before putting in food, unless ...
... are designed to purchase a broiler pan, one may be ordered. Slit the remaining fat on and off . 5. On double oven models only, press UPPER OVEN or LOWER OVEN. 2. Press CUSTOM BROIL. 3. Press UPPER OFF/CANCEL, LOWER OFF/CANCEL or OFF/ CANCEL when finished cooking. Broiling and...Broil: When custom broiling, changing the temperature allows more precise control. Thicker cuts and unevenly shaped pieces of juices. On double oven models only, press UPPER OVEN or LOWER OVEN. 2. Press CUSTOM BROIL. 3. Press the TEMP "+" or "-" keypads to stop position before putting in food, unless ...
Owners Manual
Page 11
..." and stop reminder tones. 11 Timed Cooking WARNING If enabled, end of time to cook. 5. See "Clock" section. On double oven models only, press UPPER OVEN or LOWER OVEN. 2. Press the number pads to enter a temperature other than one displayed. 3. Press COOK TIME. 4. Minute time countdown will ... the stop time is reached, the oven will appear on at the same time, touch UPPER OVEN or LOWER OVEN to display the respective cook time. On double oven models only, press UPPER OVEN or LOWER OVEN. 2. When the start is reached, the oven will shut off automatically and "End"...
..." and stop reminder tones. 11 Timed Cooking WARNING If enabled, end of time to cook. 5. See "Clock" section. On double oven models only, press UPPER OVEN or LOWER OVEN. 2. Press the number pads to enter a temperature other than one displayed. 3. Press COOK TIME. 4. Minute time countdown will ... the stop time is reached, the oven will appear on at the same time, touch UPPER OVEN or LOWER OVEN to display the respective cook time. On double oven models only, press UPPER OVEN or LOWER OVEN. 2. When the start is reached, the oven will shut off automatically and "End"...
Owners Manual
Page 15
... "PF," "PF id=27" or "PF id=30"? See "Display(s)" section. See "Timed Cooking" section. ■ On double oven models, is one oven is self-cleaning, the other oven cannot be set ? See the Installation Instructions. ■ Is the proper temperature set ? On some models, has a delay start ...See "Positioning Racks and Bakeware" section. ■ Is there proper air circulation around bakeware? See "Sabbath Mode" section. ■ On double oven models, is one oven is the Sabbath Mode set ? See "Self-Cleaning Cycle" section. ■ On some models, reset the clock, if needed. Move rack...
... "PF," "PF id=27" or "PF id=30"? See "Display(s)" section. See "Timed Cooking" section. ■ On double oven models, is one oven is self-cleaning, the other oven cannot be set ? See the Installation Instructions. ■ Is the proper temperature set ? On some models, has a delay start ...See "Positioning Racks and Bakeware" section. ■ Is there proper air circulation around bakeware? See "Sabbath Mode" section. ■ On double oven models, is one oven is the Sabbath Mode set ? See "Self-Cleaning Cycle" section. ■ On some models, reset the clock, if needed. Move rack...


