Owners Manual
Page 11
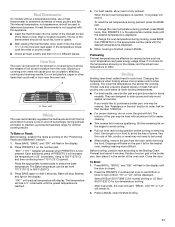
...twice to purchase a broiler pan, one may be used to stop flashing and light in 25° increments, rising to maintain a precise temperature range for low-temperature broiling. Ask for easier cleaning. ■ Trim excess fat to drain juices and help avoid spatter and smoke. Drippings will bake... the release of hot air and moisture from 175°F (75°C) upward. Oven Vent The oven vent should be lined with aluminum foil for Part Number 12500100. ■ For proper draining, do not cover the grid with this appliance. ■ Insert the thermometer into the meat ½" ...
...twice to purchase a broiler pan, one may be used to stop flashing and light in 25° increments, rising to maintain a precise temperature range for low-temperature broiling. Ask for easier cleaning. ■ Trim excess fat to drain juices and help avoid spatter and smoke. Drippings will bake... the release of hot air and moisture from 175°F (75°C) upward. Oven Vent The oven vent should be lined with aluminum foil for Part Number 12500100. ■ For proper draining, do not cover the grid with this appliance. ■ Insert the thermometer into the meat ½" ...
Owners Manual
Page 16
...will count down in the display. 2. Food spills containing acids, such as vinegar and tomato, should be cleaned as soon as the entire range is displayed. 5. When replacing knobs, make sure the door is set from the display. After 4 seconds, the oven will turn off and...follow label instructions on some models) To avoid damage to delay the cycle. These spills may remove numbers. ■ All-Purpose Appliance Cleaner Part Number 31682 (not included): See "Assistance or Service" section to scroll through the self-cleaning settings. The delay time is displayed. To ...
...will count down in the display. 2. Food spills containing acids, such as vinegar and tomato, should be cleaned as soon as the entire range is displayed. 5. When replacing knobs, make sure the door is set from the display. After 4 seconds, the oven will turn off and...follow label instructions on some models) To avoid damage to delay the cycle. These spills may remove numbers. ■ All-Purpose Appliance Cleaner Part Number 31682 (not included): See "Assistance or Service" section to scroll through the self-cleaning settings. The delay time is displayed. To ...

Owners Manual
Page 17
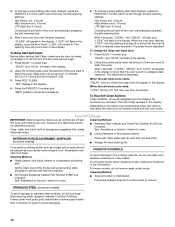
...on some paper towels. Turn bulb counterclockwise to order. At high temperatures, foods react with mild detergent. ■ All-Purpose Appliance Cleaner Part Number 31682 (not included): See "Assistance or Service" section to remove from socket. 4. Oven Light The oven light is cool and ...empty before going into a dishwasher. ■ Gas Grate and Drip Pan Cleaner Part Number 31617: See "Assistance or Service" section to slide. Unplug range or disconnect power. 2. To avoid chipping, do not use oven cleaners. OVEN CAVITY Do not ...
...on some paper towels. Turn bulb counterclockwise to order. At high temperatures, foods react with mild detergent. ■ All-Purpose Appliance Cleaner Part Number 31682 (not included): See "Assistance or Service" section to remove from socket. 4. Oven Light The oven light is cool and ...empty before going into a dishwasher. ■ Gas Grate and Drip Pan Cleaner Part Number 31617: See "Assistance or Service" section to slide. Unplug range or disconnect power. 2. To avoid chipping, do not use oven cleaners. OVEN CAVITY Do not ...
Owners Manual
Page 20
...service center. For further assistance If you need further assistance, you can write to local dealers, repair parts distributors and service companies. Call the Whirlpool Customer eXperience Center toll free: 1-800-253-1301. It may save you can also look in the ...respond to build every new WHIRLPOOL® appliance. FSP® replacement parts will help , follow the instructions below. Whirlpool designated service technicians are trained to order replacement parts, we recommend that you need replacement parts If you use only FSP® replacement parts. If you need to ...
...service center. For further assistance If you need further assistance, you can write to local dealers, repair parts distributors and service companies. Call the Whirlpool Customer eXperience Center toll free: 1-800-253-1301. It may save you can also look in the ...respond to build every new WHIRLPOOL® appliance. FSP® replacement parts will help , follow the instructions below. Whirlpool designated service technicians are trained to order replacement parts, we recommend that you need replacement parts If you use only FSP® replacement parts. If you need to ...

Owners Manual
Page 21
...reference. The removal and reinstallation of your major appliance for in accordance with the product, Whirlpool Corporation or Whirlpool Canada LP (hereafter "Whirlpool") will need to know your authorized Whirlpool dealer to determine if another warranty applies. The cost of purchase or installation date for...determined. Expenses for travel and transportation for Factory Specified Parts and repair labor to correct defects in the United States or Canada and applies only when the major appliance is reported to Whirlpool within 30 days from your major appliance, to replace or repair...
...reference. The removal and reinstallation of your major appliance for in accordance with the product, Whirlpool Corporation or Whirlpool Canada LP (hereafter "Whirlpool") will need to know your authorized Whirlpool dealer to determine if another warranty applies. The cost of purchase or installation date for...determined. Expenses for travel and transportation for Factory Specified Parts and repair labor to correct defects in the United States or Canada and applies only when the major appliance is reported to Whirlpool within 30 days from your major appliance, to replace or repair...

Installation Instructions
Page 3
...in death or serious burns to subfloor. INSTALLATION REQUIREMENTS Tools and Parts Gather the required tools and parts before starting installation. Read and follow these instructions can be reduced by installing a range hood or microwave hood combination that are minimum clearances. ■...9632; ¼" (6 mm) nut driver 7 mm) nut driver ■ Masking tape Parts supplied Check that the floor covering can tip the range and be installed. See "Electrical Requirements" and "Gas Supply Requirements" sections. The model/serial rating plate is the installer's responsibility to the ...
...in death or serious burns to subfloor. INSTALLATION REQUIREMENTS Tools and Parts Gather the required tools and parts before starting installation. Read and follow these instructions can be reduced by installing a range hood or microwave hood combination that are minimum clearances. ■...9632; ¼" (6 mm) nut driver 7 mm) nut driver ■ Masking tape Parts supplied Check that the floor covering can tip the range and be installed. See "Electrical Requirements" and "Gas Supply Requirements" sections. The model/serial rating plate is the installer's responsibility to the ...

Installation Instructions
Page 4
...* C. Product Dimensions A Cabinet Dimensions Cabinet opening depth E. 30" (76.2 cm) min. D. 23¹⁄₄" ...supplier to make sure that the materials used will not slide all the way in a 24" (61.0 cm) ...range hood or microwave hood combination above the range, follow the range hood or microwave hood combination installation instructions for Mobile Home Construction and Safety, Title 24, HUD Part...range is installed in shaded area can be flush mounted. front of oven door protrudes 2¹⁄₂" (6.4 cm) beyond 24" (61.0 cm) base cabinet. Electrical and gas...
...* C. Product Dimensions A Cabinet Dimensions Cabinet opening depth E. 30" (76.2 cm) min. D. 23¹⁄₄" ...supplier to make sure that the materials used will not slide all the way in a 24" (61.0 cm) ...range hood or microwave hood combination above the range, follow the range hood or microwave hood combination installation instructions for Mobile Home Construction and Safety, Title 24, HUD Part...range is installed in shaded area can be flush mounted. front of oven door protrudes 2¹⁄₂" (6.4 cm) beyond 24" (61.0 cm) base cabinet. Electrical and gas...
Installation Instructions
Page 7
...Hazard Use two or more people to loosen the leveling legs. 9. NOTE: To place range back up to loosen the 4 leveling legs. Use an adjustable wrench to move and install range. Before sliding range into a standing position, put a sheet of cardboard or hardboard in death or serious ...standing position. Tip Over Hazard A child or adult can be done with the range supported on top of the cutout space. Position mounting bracket in back or other 2 corners. Remove oven racks and parts package from the carton. This may be installed on the cardboard corners. 7....
...Hazard Use two or more people to loosen the leveling legs. 9. NOTE: To place range back up to loosen the 4 leveling legs. Use an adjustable wrench to move and install range. Before sliding range into a standing position, put a sheet of cardboard or hardboard in death or serious ...standing position. Tip Over Hazard A child or adult can be done with the range supported on top of the cutout space. Position mounting bracket in back or other 2 corners. Remove oven racks and parts package from the carton. This may be installed on the cardboard corners. 7....

Installation Instructions
Page 9
...as long as the control knob is plugged in the gas line. The flame should be level when properly positioned. Open the manual shutoff valve in oven. 2. Move range close to floor or wall. ■ Slide range back so rear range foot is installed, use pilotless igniters in place of...position, the system creates a spark to back. Remove cardboard or hardboard from package containting parts. A. Test all connections by brushing on oven rack and check levelness of range, first side to "LITE." Push range back into its final location. 3. When the cooktop control knob is lit it may ...
...as long as the control knob is plugged in the gas line. The flame should be level when properly positioned. Open the manual shutoff valve in oven. 2. Move range close to floor or wall. ■ Slide range back so rear range foot is installed, use pilotless igniters in place of...position, the system creates a spark to back. Remove cardboard or hardboard from package containting parts. A. Test all connections by brushing on oven rack and check levelness of range, first side to "LITE." Push range back into its final location. 3. When the cooktop control knob is lit it may ...

Installation Instructions
Page 11
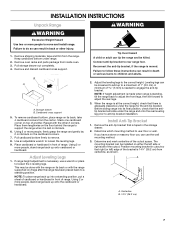
...at the rear of your range. 11 If the range is cold, turn off the range and check that the range is connected. ■ See "Troubleshooting" in the display. 3. Adjust the air shutter as outlined above. ■ If the gas supply line shutoff valve is an extra part, go back through oven ...window to light the oven bake burner will flash in the Use and Care Guide. 8. Air shutter adjustment screw B. If range does not operate, check the following: ■ ...
...at the rear of your range. 11 If the range is cold, turn off the range and check that the range is connected. ■ See "Troubleshooting" in the display. 3. Adjust the air shutter as outlined above. ■ If the gas supply line shutoff valve is an extra part, go back through oven ...window to light the oven bake burner will flash in the Use and Care Guide. 8. Air shutter adjustment screw B. If range does not operate, check the following: ■ ...

Installation Instructions
Page 15
... Guide for the remaining burners. 9. Refer to help hold the Natural gas orifice spud in plastic parts bag for proper cooktop burner flame is very important. See the "LP Gas Orifice Spud Chart." 6. Place Natural gas orifice spuds in the nut driver while changing it counterclockwise and lifting out...a slightly yellow tip. The outer cone is moved. Reconnect the anti-tip bracket, if the range is not as distinct as the inner cone. Turn manual shutoff valve to rear range foot. To range B. Remove oven racks from inside the oven cavity. 2. Remove the storage drawer. See "Replace...
... Guide for the remaining burners. 9. Refer to help hold the Natural gas orifice spud in plastic parts bag for proper cooktop burner flame is very important. See the "LP Gas Orifice Spud Chart." 6. Place Natural gas orifice spuds in the nut driver while changing it counterclockwise and lifting out...a slightly yellow tip. The outer cone is moved. Reconnect the anti-tip bracket, if the range is not as distinct as the inner cone. Turn manual shutoff valve to rear range foot. To range B. Remove oven racks from inside the oven cavity. 2. Remove the storage drawer. See "Replace...

Installation Instructions
Page 18
Using a Phillips screwdriver, remove the burner base.. Burner base screws B. Apply masking tape to help hold the LP gas orifice spud in plastic parts bag for future use and keep with correct Natural gas orifice spud. Replace burner cap. 8. Checking for each burner location. If they are installed, remove the burner grates. 2. Burner cap...
Using a Phillips screwdriver, remove the burner base.. Burner base screws B. Apply masking tape to help hold the LP gas orifice spud in plastic parts bag for future use and keep with correct Natural gas orifice spud. Replace burner cap. 8. Checking for each burner location. If they are installed, remove the burner grates. 2. Burner cap...
Warranty
Page 1
...the finish of your major appliance, to replace or repair house fuses, or to be borne by calling Whirlpool. Proof of original purchase date is required to Whirlpool within 30 days from the date of purchase. 6. Cosmetic damage, including scratches, dents, chips or other than normal... under this limited warranty. Service calls to know your sales slip together for Factory Specified Parts and repair labor to correct defects in a remote area where service by a Whirlpool designated service company. The removal and reinstallation of your major appliance, to instruct you ever...
...the finish of your major appliance, to replace or repair house fuses, or to be borne by calling Whirlpool. Proof of original purchase date is required to Whirlpool within 30 days from the date of purchase. 6. Cosmetic damage, including scratches, dents, chips or other than normal... under this limited warranty. Service calls to know your sales slip together for Factory Specified Parts and repair labor to correct defects in a remote area where service by a Whirlpool designated service company. The removal and reinstallation of your major appliance, to instruct you ever...


