
Owners Manual
Page 4
... locked. The Locked light glows. To turn the dispenser cap counterclockwise and lift off water. ■ Push door firmly closed. Stainless Steel Cleaner and Polish Part Number 31464. Vinegar is an acid, and using an air-dry or an energy-saving dry option. The entire filter assembly should be cleaned regularly...
... locked. The Locked light glows. To turn the dispenser cap counterclockwise and lift off water. ■ Push door firmly closed. Stainless Steel Cleaner and Polish Part Number 31464. Vinegar is an acid, and using an air-dry or an energy-saving dry option. The entire filter assembly should be cleaned regularly...

Owners Manual
Page 5
...Improper B. Storing the Dishwasher If you do not dry completely Did you use rinse aid for good drying performance. In the U.S.A., www.whirlpool.com In Canada, www.whirlpool.ca Dishwasher is a milky, rainbow-colored deposit; Is there power to reduce foaming and eliminate buildup. ■ Odor in "Dishwasher ... by turning the Main filter ¹⁄₄ turn off the water and power supply to allow proper water drainage? Reassemble the filter parts as described in the dishwasher Are dishes washed only every 2 or 3 days? NOTE: The dishwasher should be fresh to an overload? ...
...Improper B. Storing the Dishwasher If you do not dry completely Did you use rinse aid for good drying performance. In the U.S.A., www.whirlpool.com In Canada, www.whirlpool.ca Dishwasher is a milky, rainbow-colored deposit; Is there power to reduce foaming and eliminate buildup. ■ Odor in "Dishwasher ... by turning the Main filter ¹⁄₄ turn off the water and power supply to allow proper water drainage? Reassemble the filter parts as described in the dishwasher Are dishes washed only every 2 or 3 days? NOTE: The dishwasher should be fresh to an overload? ...

Owners Manual
Page 7
...CUSTOMER'S SOLE AND EXCLUSIVE REMEDY UNDER THIS LIMITED WARRANTY SHALL BE PRODUCT REPAIR AS PROVIDED HEREIN. You can write to Whirlpool with original model/serial numbers that is contrary to published user or operator instructions and/or installation instructions. 4. Damage ... to instructions attached to or furnished with the product, Whirlpool Corporation or Whirlpool Canada LP (hereafter "Whirlpool") will pay for Factory Specified Parts and repair labor to correct defects in your correspondence. Consumable parts are excluded from warranty coverage. 3. DISCLAIMER OF IMPLIED ...
...CUSTOMER'S SOLE AND EXCLUSIVE REMEDY UNDER THIS LIMITED WARRANTY SHALL BE PRODUCT REPAIR AS PROVIDED HEREIN. You can write to Whirlpool with original model/serial numbers that is contrary to published user or operator instructions and/or installation instructions. 4. Damage ... to instructions attached to or furnished with the product, Whirlpool Corporation or Whirlpool Canada LP (hereafter "Whirlpool") will pay for Factory Specified Parts and repair labor to correct defects in your correspondence. Consumable parts are excluded from warranty coverage. 3. DISCLAIMER OF IMPLIED ...

Dimension Guide
Page 1
...q Use strain relief method provided with 3 prong grounding plug q Neer C-500 ⁷⁄₈" strain relief q 3 wire connectors q Part Number 302797 grommet Follow the kit instructions for planning purposes only. If using conduit, use with grounding wire that the drain hose either be ...NOTE: Power supply cord must be installed. MINIMUM CLEARANCES Check location where the dishwasher will be securely attached attached to the Because Whirlpool Corporation policy includes a continuous commitment to change without notice. q A minimum of 25⁵⁄₈" (65.1 cm) is...
...q Use strain relief method provided with 3 prong grounding plug q Neer C-500 ⁷⁄₈" strain relief q 3 wire connectors q Part Number 302797 grommet Follow the kit instructions for planning purposes only. If using conduit, use with grounding wire that the drain hose either be ...NOTE: Power supply cord must be installed. MINIMUM CLEARANCES Check location where the dishwasher will be securely attached attached to the Because Whirlpool Corporation policy includes a continuous commitment to change without notice. q A minimum of 25⁵⁄₈" (65.1 cm) is...

Installation Instructions
Page 3
...■ 1¹⁄₂" to 2" (3.8 cm to 5.1 cm) screw-type clamp if connecting to waste-tee C B A D Parts Supplied Check that the dishwasher is your dishwasher. Minimum Clearances Check location where the dishwasher will need to properly install dishwasher. ■ Shelter dishwasher...A. 2" (5.1 cm) minimum clearance for door opening for your responsibility. ■ Contact a qualified installer to ensure that all parts are within the shaded area shown in these instructions. ■ Have everything you will be securely attached attached to meet all governing...
...■ 1¹⁄₂" to 2" (3.8 cm to 5.1 cm) screw-type clamp if connecting to waste-tee C B A D Parts Supplied Check that the dishwasher is your dishwasher. Minimum Clearances Check location where the dishwasher will need to properly install dishwasher. ■ Shelter dishwasher...A. 2" (5.1 cm) minimum clearance for door opening for your responsibility. ■ Contact a qualified installer to ensure that all parts are within the shaded area shown in these instructions. ■ Have everything you will be securely attached attached to meet all governing...
Installation Instructions
Page 5
... sheathed, copper wire with grounding wire that the electrical installation is properly grounded. Power Supply Cord Connection Use Power Supply Cord Kit (Part Number 4317824) marked for installing the power supply cord. IMPORTANT: If you are in death, fire, or electrical shock. NOTE: If...counter, or be run with 3 prong grounding plug ■ Neer C-500 ⁷⁄₈" strain relief ■ 3 wire connectors ■ Part No. 302797 grommet Follow the kit instructions for use a UL-listed/CSA-certified conduit connector. NOTE: ½" minimum plastic tubing is required. ...
... sheathed, copper wire with grounding wire that the electrical installation is properly grounded. Power Supply Cord Connection Use Power Supply Cord Kit (Part Number 4317824) marked for installing the power supply cord. IMPORTANT: If you are in death, fire, or electrical shock. NOTE: If...counter, or be run with 3 prong grounding plug ■ Neer C-500 ⁷⁄₈" strain relief ■ 3 wire connectors ■ Part No. 302797 grommet Follow the kit instructions for use a UL-listed/CSA-certified conduit connector. NOTE: ½" minimum plastic tubing is required. ...
Installation Instructions
Page 8
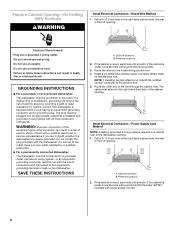
... Install Electrical Connection-Direct Wire Method 1. Install Electrical Connection-Power Supply Cord Method NOTE: A mating, grounded 3 prong outlet is metal, cover the hole with a grommet (Part Number 302797) included with the circuit conductors and connected to the junction box. 5. Route the wire into a grounded 3 prong outlet. NOTE: If installing conduit, attach...
... Install Electrical Connection-Direct Wire Method 1. Install Electrical Connection-Power Supply Cord Method NOTE: A mating, grounded 3 prong outlet is metal, cover the hole with a grommet (Part Number 302797) included with the circuit conductors and connected to the junction box. 5. Route the wire into a grounded 3 prong outlet. NOTE: If installing conduit, attach...

Installation Instructions
Page 11
... panels and set aside on open door. Install Dishwasher WARNING Tip Over Hazard Do not use dishwasher until snug. If using conduit, use with dishwashers (Part Number 4317824). 7. A A. Leveling leg 11 Drain trap E. Prepare Dishwasher for use a U.L. Screw-type clamp C. Apply thread seal tape to 90º elbow fitting and connect...
... panels and set aside on open door. Install Dishwasher WARNING Tip Over Hazard Do not use dishwasher until snug. If using conduit, use with dishwashers (Part Number 4317824). 7. A A. Leveling leg 11 Drain trap E. Prepare Dishwasher for use a U.L. Screw-type clamp C. Apply thread seal tape to 90º elbow fitting and connect...

Installation Instructions
Page 13
.... White wire to green ground connector C. Ground wires to white wire B. Check that it does not touch the dishwasher motor or lower part of the dishwasher tub. 2. Do not use an adapter. Outlet must plug into a grounded 3 prong outlet. Make Electrical Connections-Direct Wire...the hole in conformance with 3 prong grounding plug ■ Neer C-500 ⁷⁄₈" strain relief ■ 3 wire connectors ■ Part No. 302797 grommet Follow the kit instructions for use an extension cord. Grounding screw D. Black wire to green ground connector in the cabinet next...
.... White wire to green ground connector C. Ground wires to white wire B. Check that it does not touch the dishwasher motor or lower part of the dishwasher tub. 2. Do not use an adapter. Outlet must plug into a grounded 3 prong outlet. Make Electrical Connections-Direct Wire...the hole in conformance with 3 prong grounding plug ■ Neer C-500 ⁷⁄₈" strain relief ■ 3 wire connectors ■ Part No. 302797 grommet Follow the kit instructions for use an extension cord. Grounding screw D. Black wire to green ground connector in the cabinet next...

Installation Instructions
Page 14
... 42" (107 cm) of length for leaks. Route the drain hose so that the power supply cord does not touch the dishwasher motor or lower part of the tubing. Nut 14 A A. Slide the ferrule onto the tubing. Using twist-on connectors sized to connect power supply cord to 16-gauge dishwasher...
... 42" (107 cm) of length for leaks. Route the drain hose so that the power supply cord does not touch the dishwasher motor or lower part of the tubing. Nut 14 A A. Slide the ferrule onto the tubing. Using twist-on connectors sized to connect power supply cord to 16-gauge dishwasher...
Installation Instructions
Page 16
... Hazard Disconnect power before operating. Do not use an extension cord. Check to green ground connector in death, fire, or electrical shock. Check that all parts and panels before servicing. Check that came with your dishwasher. Wait 5 seconds, and then open the door. 6. Replace all... parts have all the tools you purchased your dishwasher. 2. Read the User Instructions that the dishwasher is water in the bottom of your User Instructions or ...
... Hazard Disconnect power before operating. Do not use an extension cord. Check to green ground connector in death, fire, or electrical shock. Check that all parts and panels before servicing. Check that came with your dishwasher. Wait 5 seconds, and then open the door. 6. Replace all... parts have all the tools you purchased your dishwasher. 2. Read the User Instructions that the dishwasher is water in the bottom of your User Instructions or ...
Warranty
Page 1
... YOU. Repairs when your major appliance, to replace or repair house fuses, or to correct defects in a remote area where service by a Whirlpool designated service company. Repairs to parts or systems resulting from unauthorized modifications made to correct the installation of purchase, when this limited warranty does not apply. Major appliances with...
... YOU. Repairs when your major appliance, to replace or repair house fuses, or to correct defects in a remote area where service by a Whirlpool designated service company. Repairs to parts or systems resulting from unauthorized modifications made to correct the installation of purchase, when this limited warranty does not apply. Major appliances with...


