

Use & Care Guide
Page 2
... killed or seriously injured if you and others are not followed. 2 KNOB CONTROLS 7 COOKTOP CONTROLS - TABLE OF CONTENTS COOKTOP SAFETY 2 PARTS AND FEATURES TOUCH-ACTIVATED CONTROLS 4 COOKTOP CONTROLS TOUCH-ACTIVATED CONTROLS 5 Dual Element 6 Control Lock/All Off 6 WARM HI /LO Function 6 PARTS AND FEATURES - KNOB CONTROLS 8 Dual Element 8 Bridge Element 9 Warm Zone Element 9 ACCUSIMMER®...
... killed or seriously injured if you and others are not followed. 2 KNOB CONTROLS 7 COOKTOP CONTROLS - TABLE OF CONTENTS COOKTOP SAFETY 2 PARTS AND FEATURES TOUCH-ACTIVATED CONTROLS 4 COOKTOP CONTROLS TOUCH-ACTIVATED CONTROLS 5 Dual Element 6 Control Lock/All Off 6 WARM HI /LO Function 6 PARTS AND FEATURES - KNOB CONTROLS 8 Dual Element 8 Bridge Element 9 Warm Zone Element 9 ACCUSIMMER®...

Use & Care Guide
Page 3
... Utensils - Some cleaners can produce noxious fumes if applied to cover the surface unit heating element. Do not repair or replace any part of the cooktop. s Storage on Grease Fires - Smother fire or flame or use aluminum foil to line surface unit drip bowls, except as suggested...during cooking may become hot enough to cause burns. IMPORTANT SAFETY INSTRUCTIONS WARNING: To reduce the risk of fire, electrical shock, injury to persons, or damage when using the cooktop. s Proper Installation - The use , do not touch, or let clothing or other glazed utensils are the...
... Utensils - Some cleaners can produce noxious fumes if applied to cover the surface unit heating element. Do not repair or replace any part of the cooktop. s Storage on Grease Fires - Smother fire or flame or use aluminum foil to line surface unit drip bowls, except as suggested...during cooking may become hot enough to cause burns. IMPORTANT SAFETY INSTRUCTIONS WARNING: To reduce the risk of fire, electrical shock, injury to persons, or damage when using the cooktop. s Proper Installation - The use , do not touch, or let clothing or other glazed utensils are the...

Use & Care Guide
Page 4
...match those of the items listed. warming function; warming function; Hot surface indicator lights F. Ceramic glass cooktop B. Right rear surface cooking area E. The cooktop you have some or all of your model. Left rear touch control (simmer function; dual-size ... front touch control (simmer function; Model and serial number plate (located underneath cooktop on metal cabinet) TOUCH-ACTIVATED CONTROLS This manual covers different models. dual-size element) A. Control lock/All off G. PARTS AND FEATURES - Control Panels Model GJC3055 (30" [77.1 cm]) Touch-...
...match those of the items listed. warming function; warming function; Hot surface indicator lights F. Ceramic glass cooktop B. Right rear surface cooking area E. The cooktop you have some or all of your model. Left rear touch control (simmer function; dual-size ... front touch control (simmer function; Model and serial number plate (located underneath cooktop on metal cabinet) TOUCH-ACTIVATED CONTROLS This manual covers different models. dual-size element) A. Control lock/All off G. PARTS AND FEATURES - Control Panels Model GJC3055 (30" [77.1 cm]) Touch-...

Use & Care Guide
Page 7
PARTS AND FEATURES - Right front control knob F. Left rear control knob C. Power on light E. Right rear surface cooking area (warm zone on some models) E. Left front ...) C E. Right front control knob H. Center rear control knob (dual-size element) C. ACCUSIMMER® control knob G. Left front control knob (dual-size bridge burner) D A H G A. Ceramic glass cooktop B. Right front surface cooking area E G. ACCUSIMMER® control knob D. Left front control knob (dual-size element) H. Control panel F. Right rear control knob (Warm zone control...
PARTS AND FEATURES - Right front control knob F. Left rear control knob C. Power on light E. Right rear surface cooking area (warm zone on some models) E. Left front ...) C E. Right front control knob H. Center rear control knob (dual-size element) C. ACCUSIMMER® control knob G. Left front control knob (dual-size bridge burner) D A H G A. Ceramic glass cooktop B. Right front surface cooking area E G. ACCUSIMMER® control knob D. Left front control knob (dual-size element) H. Control panel F. Right rear control knob (Warm zone control...

Use & Care Guide
Page 10
...than ½" (1.3 cm) outside the area. s Cookware designed with white or biscuit ceramic glass, soils and stains may be used. On electric cooktops, canners should be visible between it will return to its base material. s On coil element models, the installation of a Canning Unit Kit is... cooking area or element. s Do not leave a hot lid on the cooktop or grates. s Do not cook popcorn in any part of a ruler across the cooktop. Cookware IMPORTANT: Do not leave empty cookware on the cooktop. Rough finishes may cycle on . s Determine flatness by placing the straight ...
...than ½" (1.3 cm) outside the area. s Cookware designed with white or biscuit ceramic glass, soils and stains may be used. On electric cooktops, canners should be visible between it will return to its base material. s On coil element models, the installation of a Canning Unit Kit is... cooking area or element. s Do not leave a hot lid on the cooktop or grates. s Do not cook popcorn in any part of a ruler across the cooktop. Cookware IMPORTANT: Do not leave empty cookware on the cooktop. Rough finishes may cycle on . s Determine flatness by placing the straight ...

Use & Care Guide
Page 11
...avert streaking and staining. On some paper towels. Cooktop Cleaner Part Number 31464 is still warm. Sugary spills (jellies, candy, syrup) s Cooktop Scraper: Clean while the cooktop is recommended for most cooking tasks. Use the following chart as cooktop has cooled down . s Medium or heavy ...clean water and dry with damp paper towel. s Vinegar for stubborn spots. COOKTOP CONTROLS Cleaning Method: When replacing knobs, make sure all types of grain to avoid damaging. Cooktop Scraper Part Number 3183488 is also recommended for all controls are off and the oven ...
...avert streaking and staining. On some paper towels. Cooktop Cleaner Part Number 31464 is still warm. Sugary spills (jellies, candy, syrup) s Cooktop Scraper: Clean while the cooktop is recommended for most cooking tasks. Use the following chart as cooktop has cooled down . s Medium or heavy ...clean water and dry with damp paper towel. s Vinegar for stubborn spots. COOKTOP CONTROLS Cleaning Method: When replacing knobs, make sure all types of grain to avoid damaging. Cooktop Scraper Part Number 3183488 is also recommended for all controls are off and the oven ...

Use & Care Guide
Page 13
...Part Number 242905 Cooktop Cleaner (ceramic glass models) Order Part Number 31464 Cooktop Protectant (ceramic glass models) Order Part Number 31463 Cooktop Care Kit (includes cleaner, protectant, and applicator pads) Order Part Number 31605 Cooktop Scraper (ceramic glass models) Order Part Number 3183488 All-Purpose Appliance Cleaner Order Part Number 31662 In Canada Call the Whirlpool... you need to Whirlpool Canada LP with the same precision used to local dealers, repair parts distributors, and service companies. s Accessory and repair parts sales. Whirlpool designated service technicians ...
...Part Number 242905 Cooktop Cleaner (ceramic glass models) Order Part Number 31464 Cooktop Protectant (ceramic glass models) Order Part Number 31463 Cooktop Care Kit (includes cleaner, protectant, and applicator pads) Order Part Number 31605 Cooktop Scraper (ceramic glass models) Order Part Number 3183488 All-Purpose Appliance Cleaner Order Part Number 31662 In Canada Call the Whirlpool... you need to Whirlpool Canada LP with the same precision used to local dealers, repair parts distributors, and service companies. s Accessory and repair parts sales. Whirlpool designated service technicians ...
Use & Care Guide
Page 14
...Whirlpool Canada LP (hereafter "Whirlpool") will need it is installed in an inaccessible location or is void if the factory applied serial number has been altered or removed from accident, alteration, misuse, abuse, fire, flood, acts of God, improper installation, installation not in accordance with electrical...see the "Troubleshooting" section of the Use & Care Guide. You must be borne by a Whirlpool designated service company. You will pay for Factory Specified Parts and repair labor to obtain service under these excluded circumstances shall be provided by the customer. Outside ...
...Whirlpool Canada LP (hereafter "Whirlpool") will need it is installed in an inaccessible location or is void if the factory applied serial number has been altered or removed from accident, alteration, misuse, abuse, fire, flood, acts of God, improper installation, installation not in accordance with electrical...see the "Troubleshooting" section of the Use & Care Guide. You must be borne by a Whirlpool designated service company. You will pay for Factory Specified Parts and repair labor to obtain service under these excluded circumstances shall be provided by the customer. Outside ...
Installation Instructions
Page 1
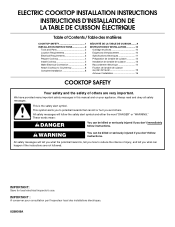
...very important. ELECTRIC COOKTOP INSTALLATION INSTRUCTIONS INSTRUCTIONS D'INSTALLATION DE LA TABLE DE CUISSON ÉLECTRIQUE Table of Contents / Table des matières COOKTOP SAFETY 1 INSTALLATION INSTRUCTIONS 2 Tools and Parts 2 Location Requirements 2 Electrical Requirements 3 Prepare Cooktop 4 Install Cooktop 5 Make Electrical Connection 6 Attach Cooktop to Countertop...électrique 14 Fixation de la table de cuisson au plan de travail 16 Achever l'installation 16 COOKTOP SAFETY Your safety and the safety of injury, and tell you what the potential hazard is the safety...
...very important. ELECTRIC COOKTOP INSTALLATION INSTRUCTIONS INSTRUCTIONS D'INSTALLATION DE LA TABLE DE CUISSON ÉLECTRIQUE Table of Contents / Table des matières COOKTOP SAFETY 1 INSTALLATION INSTRUCTIONS 2 Tools and Parts 2 Location Requirements 2 Electrical Requirements 3 Prepare Cooktop 4 Install Cooktop 5 Make Electrical Connection 6 Attach Cooktop to Countertop...électrique 14 Fixation de la table de cuisson au plan de travail 16 Achever l'installation 16 COOKTOP SAFETY Your safety and the safety of injury, and tell you what the potential hazard is the safety...

Installation Instructions
Page 2
... that your oven is the responsibility of burns or fire by a licensed, qualified electrical installer. I When installing cooktop over an undercounter built-in oven. Product Dimensions Parts supplied I Clamp brackets (2) Straight Edge Glass Cooktop I 2¹⁄₂" (6.4 cm) clamping screws (2) B I Foam strip Parts needed I Tape measure I Marker or pencil I Flat-blade screwdriver I Pliers I Level I The...
... that your oven is the responsibility of burns or fire by a licensed, qualified electrical installer. I When installing cooktop over an undercounter built-in oven. Product Dimensions Parts supplied I Clamp brackets (2) Straight Edge Glass Cooktop I 2¹⁄₂" (6.4 cm) clamping screws (2) B I Foam strip Parts needed I Tape measure I Marker or pencil I Flat-blade screwdriver I Pliers I Level I The...

Installation Instructions
Page 4
..., ANSI/NFPA 70-latest edition or CSA Standards C22.1-94, Canadian Electrical Code, Part 1 and C22.2 No. I If the house has aluminum wiring, follow the instructions provided for joining copper to move and install cooktop. A listed conduit connector is properly grounded. Follow the electrical connector manufacturer's recommended procedure. NOTE: The foam strip protects the...
..., ANSI/NFPA 70-latest edition or CSA Standards C22.1-94, Canadian Electrical Code, Part 1 and C22.2 No. I If the house has aluminum wiring, follow the instructions provided for joining copper to move and install cooktop. A listed conduit connector is properly grounded. Follow the electrical connector manufacturer's recommended procedure. NOTE: The foam strip protects the...

Installation Instructions
Page 8
...listed wire connectors. 3. D C A. Place the 2½" (6.4 cm) clamping screws into the brackets. 2. Do not overtighten. Check that the cooktop is an extra part, go back through the steps to the neutral (white) junction box wire. Clamp bracket (extends far enough beyond... cooktop base to Countertop NOTE: This section applies only if you need Assistance or Service: Please reference the "Assistance or Service" section of /recycle all parts are using the UL listed wire connectors. 4. Check that ...
...listed wire connectors. 3. D C A. Place the 2½" (6.4 cm) clamping screws into the brackets. 2. Do not overtighten. Check that the cooktop is an extra part, go back through the steps to the neutral (white) junction box wire. Clamp bracket (extends far enough beyond... cooktop base to Countertop NOTE: This section applies only if you need Assistance or Service: Please reference the "Assistance or Service" section of /recycle all parts are using the UL listed wire connectors. 4. Check that ...


