
Dimension Guide
Page 1
...around cap. ✔ two elbows should be installed to prevent sticking of range/cooktop below . Because Whirlpool Corporation policy includes a continuous commitment to the microwave oven hood. For best performance, use no more than three 90° elbows. We do NOT .... (76.2 cm) typical* 12" (30.5 cm) min. 13" (33.0 cm) max. transition 2 ft. 1 - transition 2 - 90° elbows 1 - Exact dimension may vary depending on type of the exhaust damper. Instructions packed with product. Specifications subject to 6" = 5 ft. 3-1/4" x 10" 3-1/4" x 10" roof cap = 24 ft....
...around cap. ✔ two elbows should be installed to prevent sticking of range/cooktop below . Because Whirlpool Corporation policy includes a continuous commitment to the microwave oven hood. For best performance, use no more than three 90° elbows. We do NOT .... (76.2 cm) typical* 12" (30.5 cm) min. 13" (33.0 cm) max. transition 2 ft. 1 - transition 2 - 90° elbows 1 - Exact dimension may vary depending on type of the exhaust damper. Instructions packed with product. Specifications subject to 6" = 5 ft. 3-1/4" x 10" 3-1/4" x 10" roof cap = 24 ft....

Installation Instructions
Page 1
... COMBINATION SAFETY 1 INSTALLATION REQUIREMENTS 2 Tools and Parts 2 Location Requirements 2 Product Dimensions 3 Electrical Requirements 3 INSTALLATION INSTRUCTIONS 4 Remove Mounting Plate 4 Convert Microwave Oven to External Venting 4 Locate Wall Stud(s 6 Mark Rear Wall 7 Drill Holes in these installation instructions. W10247293B MICROWAVE HOOD COMBINATION INSTALLATION INSTRUCTIONS This product is suitable for use above electric or gas cooking...
... COMBINATION SAFETY 1 INSTALLATION REQUIREMENTS 2 Tools and Parts 2 Location Requirements 2 Product Dimensions 3 Electrical Requirements 3 INSTALLATION INSTRUCTIONS 4 Remove Mounting Plate 4 Convert Microwave Oven to External Venting 4 Locate Wall Stud(s 6 Mark Rear Wall 7 Drill Holes in these installation instructions. W10247293B MICROWAVE HOOD COMBINATION INSTALLATION INSTRUCTIONS This product is suitable for use above electric or gas cooking...

Installation Instructions
Page 2
... or sustain other types of microwave oven) Aluminum grease filters Charcoal filters (Depending on model, charcoal filters may be sure to Round Transition" illustration in "Venting Design Specifications" section. See "Electrical Requirements" section. Special Requirements For Wall Venting Installation Only: ■ Cutout must provide: ■ Minimum installation dimensions. Washers (2) D. Mounting screws (3) G. Power...
... or sustain other types of microwave oven) Aluminum grease filters Charcoal filters (Depending on model, charcoal filters may be sure to Round Transition" illustration in "Venting Design Specifications" section. See "Electrical Requirements" section. Special Requirements For Wall Venting Installation Only: ■ Cutout must provide: ■ Minimum installation dimensions. Washers (2) D. Mounting screws (3) G. Power...

Installation Instructions
Page 3
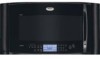
... INSTRUCTIONS NOTE: The power source for 66" (167.6 cm) installation height. See "Electrical Requirements" section. Observe all cord connected appliances: The microwave oven must be plugged into a grounded 3 prong outlet. Product Dimensions (4168.4¹⁄₄c"m) 29⁷⁄₈" (76.0 cm) 18¹⁄₄" (46.4 cm) 15¹⁄₂...
... INSTRUCTIONS NOTE: The power source for 66" (167.6 cm) installation height. See "Electrical Requirements" section. Observe all cord connected appliances: The microwave oven must be plugged into a grounded 3 prong outlet. Product Dimensions (4168.4¹⁄₄c"m) 29⁷⁄₈" (76.0 cm) 18¹⁄₄" (46.4 cm) 15¹⁄₂...

Installation Instructions
Page 8
..." in the "Drill Holes in Rear Wall" section. 7. The "rear wall" arrows must be against drywall. 5. Make sure the 10¹⁄₂" (26.7 cm) dimension from the back of the upper cabinet. 4. NOTE: If upper cabinet is level. 4. B A A. B A C A. 1/4-20 x 3" round-head bolt B. Push the 2 ...of the mounting plate is aligned with the vertical centerline on the template is for two 1/4-20 x 3" bolts and washers used to secure the microwave oven to points "D" and "E" on the rear wall. The template has trim lines to open . This hole is maintained. 2. Securely tighten...
..." in the "Drill Holes in Rear Wall" section. 7. The "rear wall" arrows must be against drywall. 5. Make sure the 10¹⁄₂" (26.7 cm) dimension from the back of the upper cabinet. 4. NOTE: If upper cabinet is level. 4. B A A. B A C A. 1/4-20 x 3" round-head bolt B. Push the 2 ...of the mounting plate is aligned with the vertical centerline on the template is for two 1/4-20 x 3" bolts and washers used to secure the microwave oven to points "D" and "E" on the rear wall. The template has trim lines to open . This hole is maintained. 2. Securely tighten...


