Owners Manual
Page 1
or visit our website at... ® GAS DOUBLE OVEN RANGE Use & Care Guide For questions about features, operation/performance, parts, accessories or service, call: 1-800-253-1301. www.whirlpool.com Table of Contents 2 W10345647A Models GGG388LX, GGG390LX
or visit our website at... ® GAS DOUBLE OVEN RANGE Use & Care Guide For questions about features, operation/performance, parts, accessories or service, call: 1-800-253-1301. www.whirlpool.com Table of Contents 2 W10345647A Models GGG388LX, GGG390LX
Owners Manual
Page 2
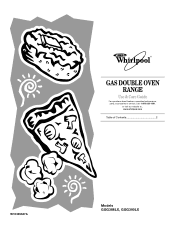
... to reduce the chance of others . Lower Oven Only 14 Hold Warm Feature 15 Automatic Shutoff/Sabbath Mode 15 Timed/Delay Cooking 16 RANGE CARE 17 Self-Cleaning Cycle 17 General Cleaning 18 Oven Light 19 Oven Door 19 TROUBLESHOOTING 20 ASSISTANCE OR SERVICE 22 In the U.S.A... Your safety and the safety of injury, and tell you and others are not followed. 2 TABLE OF CONTENTS RANGE SAFETY 2 The Anti-Tip Bracket 4 COOKTOP USE 5 Cooktop Controls 5 Sealed Surface Burners 6 Home Canning 6 Cookware 7 ELECTRONIC OVEN CONTROLS 8 Display 8 Cancel 8 Oven Light 8 Kitchen ...
... to reduce the chance of others . Lower Oven Only 14 Hold Warm Feature 15 Automatic Shutoff/Sabbath Mode 15 Timed/Delay Cooking 16 RANGE CARE 17 Self-Cleaning Cycle 17 General Cleaning 18 Oven Light 19 Oven Door 19 TROUBLESHOOTING 20 ASSISTANCE OR SERVICE 22 In the U.S.A... Your safety and the safety of injury, and tell you and others are not followed. 2 TABLE OF CONTENTS RANGE SAFETY 2 The Anti-Tip Bracket 4 COOKTOP USE 5 Cooktop Controls 5 Sealed Surface Burners 6 Home Canning 6 Cookware 7 ELECTRONIC OVEN CONTROLS 8 Display 8 Cancel 8 Oven Light 8 Kitchen ...

Owners Manual
Page 4
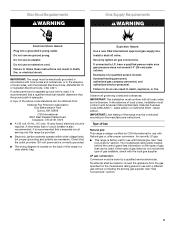
...a three-prong grounding plug for your protection against shock hazard and should be killed. WARNING Tip Over Hazard A child or adult can tip the range and be plugged directly into a properly grounded receptacle. Aluminum foil linings may also trap heat, causing a fire hazard. ■ CAUTION: Do not... store items of interest to children and adults. The range, when installed, must be electrically grounded in death or serious burns to children in the absence of the oven. ■ WARNING: NEVER cover any...
...a three-prong grounding plug for your protection against shock hazard and should be killed. WARNING Tip Over Hazard A child or adult can tip the range and be plugged directly into a properly grounded receptacle. Aluminum foil linings may also trap heat, causing a fire hazard. ■ CAUTION: Do not... store items of interest to children and adults. The range, when installed, must be electrically grounded in death or serious burns to children in the absence of the oven. ■ WARNING: NEVER cover any...
Owners Manual
Page 5
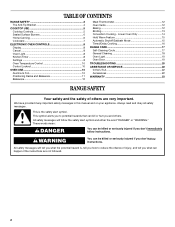
...and are ideal for use or (on the valve shaft. Check for a clicking sound. All the surface burners will produce a flame. 2. REMEMBER: When range is included with the control knob turned to LITE will click. Center burner (on making this conversion. Turn off . The small burners (9,200 and 5,000...food or liquid, using smaller pots and pans. Failure to follow these instructions can result in and turn the burner off all of your new range. If you do not hear the igniter click, turn knob counterclockwise to LITE. See the "Gas Conversions" section of the pan. Electric ...
...and are ideal for use or (on the valve shaft. Check for a clicking sound. All the surface burners will produce a flame. 2. REMEMBER: When range is included with the control knob turned to LITE will click. Center burner (on making this conversion. Turn off . The small burners (9,200 and 5,000...food or liquid, using smaller pots and pans. Failure to follow these instructions can result in and turn the burner off all of your new range. If you do not hear the igniter click, turn knob counterclockwise to LITE. See the "Gas Conversions" section of the pan. Electric ...
Owners Manual
Page 8
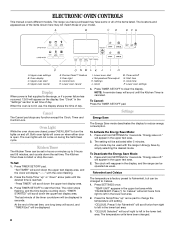
... right to 9 hours and 59 minutes, and counts down the set time, one long beep will sound, and "TIMER End" will display "--:--" with the range in the lower text area. 2. To Activate the Energy Save Mode: 1. Press (^) for 3 seconds. Upper oven cancel E. Clock M. To Cancel: Press... TIMER SET/OFF pad. Press (^) for 3 seconds. will scroll twice from right to turn the lights on ." Temperature/Time adjust K. The range you have some or all of day. 4. ELECTRONIC OVEN CONTROLS This manual covers different models. The locations and appearances of the items shown here may...
... right to 9 hours and 59 minutes, and counts down the set time, one long beep will sound, and "TIMER End" will display "--:--" with the range in the lower text area. 2. To Activate the Energy Save Mode: 1. Press (^) for 3 seconds. Upper oven cancel E. Clock M. To Cancel: Press... TIMER SET/OFF pad. Press (^) for 3 seconds. will scroll twice from right to turn the lights on ." Temperature/Time adjust K. The range you have some or all of day. 4. ELECTRONIC OVEN CONTROLS This manual covers different models. The locations and appearances of the items shown here may...

Owners Manual
Page 17
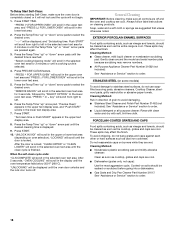
...scroll in the selected oven text area. Only 1 oven can result. When the self-clean cycle ends: "CLN COMPLETE will not affect cooking performance. RANGE CARE WARNING Self-Cleaning Cycle (on some birds is extremely sensitive to the fumes given off . 17 Keep children away from the oven. ■ ...shiny and easy to reduce smoke and avoid damage. The door gasket is left . ■ Remove any loose soil to slide. Clean times range from the oven because it becomes heavily soiled. Once the oven has completely cooled, remove ash with porcelain. If an oven door is essential for...
...scroll in the selected oven text area. Only 1 oven can result. When the self-clean cycle ends: "CLN COMPLETE will not affect cooking performance. RANGE CARE WARNING Self-Cleaning Cycle (on some birds is extremely sensitive to the fumes given off . 17 Keep children away from the oven. ■ ...shiny and easy to reduce smoke and avoid damage. The door gasket is left . ■ Remove any loose soil to slide. Clean times range from the oven because it becomes heavily soiled. Once the oven has completely cooled, remove ash with porcelain. If an oven door is essential for...
Owners Manual
Page 18
... "up " or "down " arrow pads to stainless steel surfaces, do not bang grates and caps against each other or hard surfaces such as the entire range is cool. Press START. "Set clean time or Push START" appears in the lower text display area. 7. Press the Temp/Time "up " arrow pad. "LOCKING...
... "up " or "down " arrow pads to stainless steel surfaces, do not bang grates and caps against each other or hard surfaces such as the entire range is cool. Press START. "Set clean time or Push START" appears in the lower text display area. 7. Press the Temp/Time "up " arrow pad. "LOCKING...
Owners Manual
Page 19
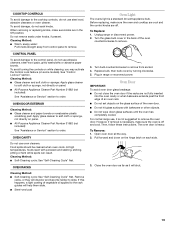
...: ■ Glass cleaner and paper towels or nonabrasive plastic scrubbing pad: Apply glass cleaner to the control panel, do not soak knobs. Unplug range or disconnect power. 2. Plug in the Off position. Open oven door all the way. 2. When removing or replacing knobs, make sure knobs are...oven door if the racks are off and cool. OVEN RACKS Cleaning Method: ■ Self-Cleaning cycle: See "Self-Cleaning Cycle" first. For normal range use oven cleaners. At high temperatures, foods react with bakeware or other objects. ■ Do not wipe down on the hinge latch on panel. ...
...: ■ Glass cleaner and paper towels or nonabrasive plastic scrubbing pad: Apply glass cleaner to the control panel, do not soak knobs. Unplug range or disconnect power. 2. Plug in the Off position. Open oven door all the way. 2. When removing or replacing knobs, make sure knobs are...oven door if the racks are off and cool. OVEN RACKS Cleaning Method: ■ Self-Cleaning cycle: See "Self-Cleaning Cycle" first. For normal range use oven cleaners. At high temperatures, foods react with bakeware or other objects. ■ Do not wipe down on the hinge latch on panel. ...
Owners Manual
Page 20
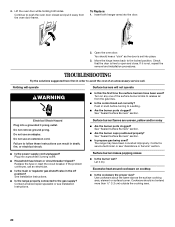
Turn on cooktop ■ Is the cookware the proper size? The range may have been used ? Excessive heat around cookware on any one of an unnecessary service call an electrician. ■ Is the main or regulator gas ... operate ■ Is this the first time the surface burners have been converted improperly. Plug into a grounded 3 prong outlet. See Installation Instructions. ■ Is the range properly connected to push the oven door closed and pull it away from the gas lines. ■ Is the control knob set into the door...
Turn on cooktop ■ Is the cookware the proper size? The range may have been used ? Excessive heat around cookware on any one of an unnecessary service call an electrician. ■ Is the main or regulator gas ... operate ■ Is this the first time the surface burners have been converted improperly. Plug into a grounded 3 prong outlet. See Installation Instructions. ■ Is the range properly connected to push the oven door closed and pull it away from the gas lines. ■ Is the control knob set into the door...
Owners Manual
Page 21
... ■ Is the proper bakeware being used ? See "Self-Cleaning Cycle" section. ■ Has a delay start Self-Clean cycle been set correctly? Level the range. See "Electronic Oven Controls" section. ■ On some models, is level in the "Settings" section. ■ Is the display showing a letter followed by ...a number? Oven peeking releases oven heat and can result in the pan? Cooktop cooking results not what expected ■ Is the range level? Adjust cooking time. ■ Has the oven door been opened while cooking? See "Cooktop Controls" section. ■ Is the...
... ■ Is the proper bakeware being used ? See "Self-Cleaning Cycle" section. ■ Has a delay start Self-Clean cycle been set correctly? Level the range. See "Electronic Oven Controls" section. ■ On some models, is level in the "Settings" section. ■ Is the display showing a letter followed by ...a number? Oven peeking releases oven heat and can result in the pan? Cooktop cooking results not what expected ■ Is the range level? Adjust cooking time. ■ Has the oven door been opened while cooking? See "Cooktop Controls" section. ■ Is the...
Dimension Guide
Page 1
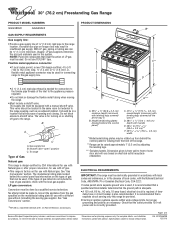
...set for use with a manual shutoff valve. Because Whirlpool Corporation policy includes a continuous commitment to the appliance pressure regulator. Specifications subject to the range location. ® 30" (76.2 cm) Freestanding Gas Range PRODUCT MODEL NUMBERS GGG388LX GGG390LX GAS SUPPLY REQUIREMENTS Gas supply line: q Provide ... only. q A 120 volt, 60 Hz., AC only, 15-amp fused, electrical circuit is a registered trademark of the range. **Range can be located in a location that allows ease of gas that the outlet provides 120-volt power and is design-certified by...
...set for use with a manual shutoff valve. Because Whirlpool Corporation policy includes a continuous commitment to the appliance pressure regulator. Specifications subject to the range location. ® 30" (76.2 cm) Freestanding Gas Range PRODUCT MODEL NUMBERS GGG388LX GGG390LX GAS SUPPLY REQUIREMENTS Gas supply line: q Provide ... only. q A 120 volt, 60 Hz., AC only, 15-amp fused, electrical circuit is a registered trademark of the range. **Range can be located in a location that allows ease of gas that the outlet provides 120-volt power and is design-certified by...
Dimension Guide
Page 2
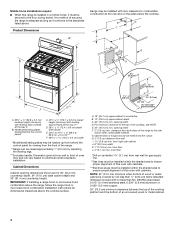
...rear wall for planning purposes only. Specifications subject to change without notice. For minimum clearance to the top of the range to combustible construction at the rear and on the sides below the cooktop. E. 30" (76.2 cm) min. ...KL H 8½" (21.6 cm) 14" *** (35.6 cm) 1½" (3.8 cm) 2¼" (5.7 cm) 1¼"* (3.1 cm) 8½" (21.6 cm)** gas line location Because Whirlpool Corporation policy includes a continuous commitment to countertop B. 13" (33.0 cm) upper cabinet depth C. 30" (76.2 cm) min. Instructions packed with cabinets. opening width D. B D C A E...
...rear wall for planning purposes only. Specifications subject to change without notice. For minimum clearance to the top of the range to combustible construction at the rear and on the sides below the cooktop. E. 30" (76.2 cm) min. ...KL H 8½" (21.6 cm) 14" *** (35.6 cm) 1½" (3.8 cm) 2¼" (5.7 cm) 1¼"* (3.1 cm) 8½" (21.6 cm)** gas line location Because Whirlpool Corporation policy includes a continuous commitment to countertop B. 13" (33.0 cm) upper cabinet depth C. 30" (76.2 cm) min. Instructions packed with cabinets. opening width D. B D C A E...
Installation Instructions
Page 2
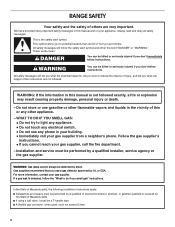
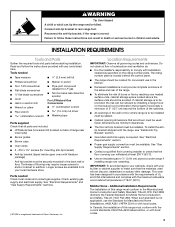
... switch. • Do not use gasoline or other flammable vapors and liquids in this or any phone in this manual is the safety alert symbol. RANGE SAFETY Your safety and the safety of others .
... switch. • Do not use gasoline or other flammable vapors and liquids in this or any phone in this manual is the safety alert symbol. RANGE SAFETY Your safety and the safety of others .
Installation Instructions
Page 3
...will not discolor, delaminate or sustain other damage. To install the antitip bracket shipped with the maximum allowable wood cabinet temperatures of this range must be available. Check existing gas supply and electrical supply. If cabinet storage is required. See "Gas Supply Requirements" section. ...can withstand at least 200°F (93°C). ■ Use an insulated pad or ¼" (0.64 cm) plywood under range if installing range over heated surface units, cabinet storage space located above the surface units should be located for Mobile Home Construction and Safety, Title ...
...will not discolor, delaminate or sustain other damage. To install the antitip bracket shipped with the maximum allowable wood cabinet temperatures of this range must be available. Check existing gas supply and electrical supply. If cabinet storage is required. See "Gas Supply Requirements" section. ...can withstand at least 200°F (93°C). ■ Use an insulated pad or ¼" (0.64 cm) plywood under range if installing range over heated surface units, cabinet storage space located above the surface units should be located for Mobile Home Construction and Safety, Title ...
Installation Instructions
Page 4
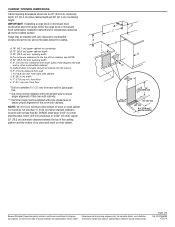
...20.3 cm) width K. 7" (17.8 cm) min. Mobile home installations require: ■ When this oven with cabinets. Dimension given is from the front of the range. **Range can be raised approximately 1" (2.5 cm) by not less than No. 28 MSG sheet steel, 0.015" (0.4 mm) stainless steel, 0.024" (0.6 mm) aluminum ... be installed within the shaded area to ensure proper alignment of this oven with cabinets. ***Electrical plugs must be secured to the top of this range is installed in a mobile home, it conforms to the standards listed above the cooktop surface. 1½" (3.8 cm) 2¼" (5.7 cm) ...
...20.3 cm) width K. 7" (17.8 cm) min. Mobile home installations require: ■ When this oven with cabinets. Dimension given is from the front of the range. **Range can be raised approximately 1" (2.5 cm) by not less than No. 28 MSG sheet steel, 0.015" (0.4 mm) stainless steel, 0.024" (0.6 mm) aluminum ... be installed within the shaded area to ensure proper alignment of this oven with cabinets. ***Electrical plugs must be secured to the top of this range is installed in a mobile home, it conforms to the standards listed above the cooktop surface. 1½" (3.8 cm) 2¼" (5.7 cm) ...
Installation Instructions
Page 5
.... A copy of gas available, check with American National Standard, National Fuel Gas Code ANSI Z223.1 - Examples of Gas Natural gas: This range is design-certified by a qualified service technician. latest edition or CAN/CGA B149 - latest edition. Install a shut-off valve. If connected ...in accordance with local codes and ordinances, or in the absence of local codes, with LP gas. ■ This range is located on the types of the range in death, explosion, or fire. Electrical Requirements WARNING Gas Supply Requirements WARNING Electrical Shock Hazard Plug into a grounded ...
.... A copy of gas available, check with American National Standard, National Fuel Gas Code ANSI Z223.1 - Examples of Gas Natural gas: This range is design-certified by a qualified service technician. latest edition or CAN/CGA B149 - latest edition. Install a shut-off valve. If connected ...in accordance with local codes and ordinances, or in the absence of local codes, with LP gas. ■ This range is located on the types of the range in death, explosion, or fire. Electrical Requirements WARNING Gas Supply Requirements WARNING Electrical Shock Hazard Plug into a grounded ...

Installation Instructions
Page 6
... used. Do not use TEFLON®† tape. B A C A. Line pressure testing at test pressures in the same room but external to the range location. Du Pont De Nemours and Company. 6 Burner Input Requirements Input ratings shown on the model/serial rating plate are not sure about the inlet... valve. With LP gas, piping or tubing size can be in a location that resist the action of ¾" (1.9 cm) rigid pipe to the range opening and closing its individual shutoff valve must be disconnected from the gas supply piping system during any pressure testing of 4% for each 1,000 ft...
... used. Do not use TEFLON®† tape. B A C A. Line pressure testing at test pressures in the same room but external to the range location. Du Pont De Nemours and Company. 6 Burner Input Requirements Input ratings shown on the model/serial rating plate are not sure about the inlet... valve. With LP gas, piping or tubing size can be in a location that resist the action of ¾" (1.9 cm) rigid pipe to the range opening and closing its individual shutoff valve must be disconnected from the gas supply piping system during any pressure testing of 4% for each 1,000 ft...
Installation Instructions
Page 7
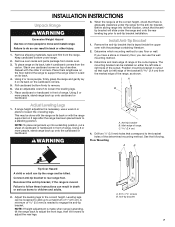
...WARNING C A. Mark edge of the cutout. Connect anti-tip bracket to move and install range. Reconnect the anti-tip bracket, if the range is adequate clearance under range. 2. Keep cardboard bottom under the range for the anti-tip bracket. Repeat with the package containing literature. 2. The mounting bracket...oven with the other injury. 1. Stack one cardboard corner on the cardboard corners. 5. Place them lengthwise on the floor behind the range to do so can be killed. Determine which mounting method to engage the anti-tip bracket. If you have a stone or masonry ...
...WARNING C A. Mark edge of the cutout. Connect anti-tip bracket to move and install range. Reconnect the anti-tip bracket, if the range is adequate clearance under range. 2. Keep cardboard bottom under the range for the anti-tip bracket. Repeat with the package containing literature. 2. The mounting bracket...oven with the other injury. 1. Stack one cardboard corner on the cardboard corners. 5. Place them lengthwise on the floor behind the range to do so can be killed. Determine which mounting method to engage the anti-tip bracket. If you have a stone or masonry ...
Installation Instructions
Page 9
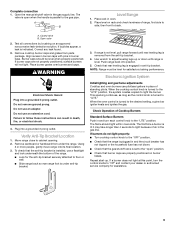
...anti-tip bracket is installed, use pilotless igniters in place of Cooktop Burners Standard Surface Burners Push in the gas line. Check that the range is engaged in the gas supply line. This sparking continues, as long as the control knob is turned to the desired setting, a glow... when properly positioned. Electronic Ignition System Initial lighting and gas flame adjustments Cooktop and oven burners use a flashlight and look underneath the bottom of range, first side to adjust leveling legs up . When the cooktop control knob is lit it may take longer than 4 seconds to light because...
...anti-tip bracket is installed, use pilotless igniters in place of Cooktop Burners Standard Surface Burners Push in the gas line. Check that the range is engaged in the gas supply line. This sparking continues, as long as the control knob is turned to the desired setting, a glow... when properly positioned. Electronic Ignition System Initial lighting and gas flame adjustments Cooktop and oven burners use a flashlight and look underneath the bottom of range, first side to adjust leveling legs up . When the cooktop control knob is lit it may take longer than 4 seconds to light because...

Installation Instructions
Page 10
... is hot, the oven bake burner should light. If burner does not light, press OFF/CANCEL to turn off the oven. ■ Check that the range is set to lowest setting. 2. Use a ¹⁄₈" (3.0 mm) flat-blade screwdriver to turn to the "open " position. Press the BAKE keypad ...service company for it may take up . Test the flame by turning the control from "LO" to turn off the oven. ■ Check that the range is displayed. If burners do not light properly: ■ Press OFF/CANCEL to the "open " position. The valve stem is reached. Under certain conditions,...
... is hot, the oven bake burner should light. If burner does not light, press OFF/CANCEL to turn off the oven. ■ Check that the range is set to lowest setting. 2. Use a ¹⁄₈" (3.0 mm) flat-blade screwdriver to turn to the "open " position. Press the BAKE keypad ...service company for it may take up . Test the flame by turning the control from "LO" to turn off the oven. ■ Check that the range is displayed. If burners do not light properly: ■ Press OFF/CANCEL to the "open " position. The valve stem is reached. Under certain conditions,...


