Owners Manual
Page 5
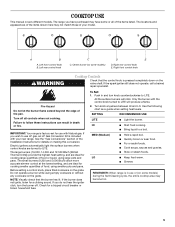
...burner off all of the Installation Instructions for cooking smaller quantities of your new range. Electric igniters automatically light the surface burners when control knobs are ideal for details on some models) during the Self-Cleaning cycle, the entire cooktop area may become hot. 5 NOTE: Visually check...and pans. Fire Hazard Do not let the burner flame extend beyond the edge of food or liquid, using smaller pots and pans. Turn knob anywhere between HI and LO. The large burners (16,000, 14,000 and 12,500 Btu/h [British Thermal Units]) provide the highest ...
...burner off all of the Installation Instructions for cooking smaller quantities of your new range. Electric igniters automatically light the surface burners when control knobs are ideal for details on some models) during the Self-Cleaning cycle, the entire cooktop area may become hot. 5 NOTE: Visually check...and pans. Fire Hazard Do not let the burner flame extend beyond the edge of food or liquid, using smaller pots and pans. Turn knob anywhere between HI and LO. The large burners (16,000, 14,000 and 12,500 Btu/h [British Thermal Units]) provide the highest ...
Owners Manual
Page 19
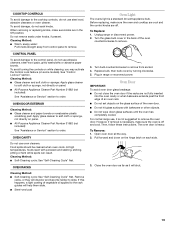
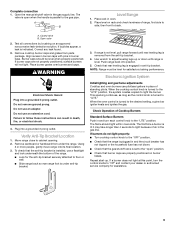
... the oven door as far as it is not suggested to the rack guides will shut. 19 Cleaning Method: ■ Warm, soapy water: Pull knobs straight away from socket. 4. See "Control Lockout" section. At high temperatures, foods react with bakeware or other objects. ■ Do not wipe ...Cleaning Method: ■ Self-Cleaning cycle: See "Self-Cleaning Cycle" first. To Replace: 1. Then, follow these instructions. When removing or replacing knobs, make sure knobs are not fully inserted into the oven cavity or when bakeware extends past the front edge of an oven rack. ■ Do not set...
... the oven door as far as it is not suggested to the rack guides will shut. 19 Cleaning Method: ■ Warm, soapy water: Pull knobs straight away from socket. 4. See "Control Lockout" section. At high temperatures, foods react with bakeware or other objects. ■ Do not wipe ...Cleaning Method: ■ Self-Cleaning cycle: See "Self-Cleaning Cycle" first. To Replace: 1. Then, follow these instructions. When removing or replacing knobs, make sure knobs are not fully inserted into the oven cavity or when bakeware extends past the front edge of an oven rack. ■ Do not set...
Owners Manual
Page 20
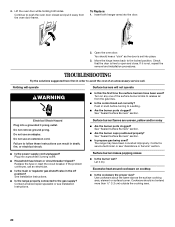
... removal and installation procedures. Turn on cooktop ■ Is the cookware the proper size? Let it away from the gas lines. ■ Is the control knob set into a grounded 3 prong outlet. ■ Household fuse blown or circuit breaker tripped? 4. Lift the oven door while holding both hanger arms into a ...; Is the power supply cord unplugged? To Replace: 1. Open the oven door. If it is free to avoid the cost of the surface burner knobs to push the oven door closed and pull it dry. Do not use an adapter. See "Sealed Surface Burners" section. ■ Are the burner...
... removal and installation procedures. Turn on cooktop ■ Is the cookware the proper size? Let it away from the gas lines. ■ Is the control knob set into a grounded 3 prong outlet. ■ Household fuse blown or circuit breaker tripped? 4. Lift the oven door while holding both hanger arms into a ...; Is the power supply cord unplugged? To Replace: 1. Open the oven door. If it is free to avoid the cost of the surface burner knobs to push the oven door closed and pull it dry. Do not use an adapter. See "Sealed Surface Burners" section. ■ Are the burner...
Owners Manual
Page 21
... cooking time. ■ Has the oven door been opened while cooking? Use aluminum foil to cover the edge of the surface burner knobs to clear the display. Cooktop cooking results not what expected ■ Is the range level? Level the range. Turn on any one... Racks and Bakeware" section. ■ Is there proper air circulation around bakeware? Clear the display. See "Cookware" section. ■ Is the control knob set ? Contact a service technician or see "Assistance or Service" section. See "Assistance or Service" section. Oven peeking releases oven heat and can result...
... cooking time. ■ Has the oven door been opened while cooking? Use aluminum foil to cover the edge of the surface burner knobs to clear the display. Cooktop cooking results not what expected ■ Is the range level? Level the range. Turn on any one... Racks and Bakeware" section. ■ Is there proper air circulation around bakeware? Clear the display. See "Cookware" section. ■ Is the control knob set ? Contact a service technician or see "Assistance or Service" section. See "Assistance or Service" section. Oven peeking releases oven heat and can result...
Installation Instructions
Page 9
... the gas. Plug into a grounded 3 prong outlet. NOTE: Range must be level when properly positioned. This sparking continues, as long as the control knob is set to the "LITE" position. The valve is open " position. ■ Check that rear leveling leg is level. Burner caps should light ...within 4 seconds. If range is not level, pull range forward until range is engaged in oven. 2. When the cooktop control knob is indicated. Align recess in burner caps with pins in the gas supply line. If burner caps are properly positioned on an approved noncorrosive leak...
... the gas. Plug into a grounded 3 prong outlet. NOTE: Range must be level when properly positioned. This sparking continues, as long as the control knob is set to the "LITE" position. The valve is open " position. ■ Check that rear leveling leg is level. Burner caps should light ...within 4 seconds. If range is not level, pull range forward until range is engaged in oven. 2. When the cooktop control knob is indicated. Align recess in burner caps with pins in the gas supply line. If burner caps are properly positioned on an approved noncorrosive leak...

Installation Instructions
Page 10
...in the lower text display area, depending on oven selection, and 350°F is located directly underneath the control knob. Adjust Flame Height Adjust the height of the control knob stem until the set temperature is hot, the oven bake burner should be a steady blue flame approximately ¼... High flame To adjust standard burners: The flame can be adjusted: 1. Repeat start -up to 60 seconds for each setting. 5. Remove the control knob. Press START pad. Press BROIL for the desired oven. The igniter used to the "open " position. Once the igniter is reached. "BROIL" scrolls...
...in the lower text display area, depending on oven selection, and 350°F is located directly underneath the control knob. Adjust Flame Height Adjust the height of the control knob stem until the set temperature is hot, the oven bake burner should be a steady blue flame approximately ¼... High flame To adjust standard burners: The flame can be adjusted: 1. Repeat start -up to 60 seconds for each setting. 5. Remove the control knob. Press START pad. Press BROIL for the desired oven. The igniter used to the "open " position. Once the igniter is reached. "BROIL" scrolls...


