Owners Manual
Page 7
... cast iron ■ See stainless steel or cast iron. Stainless steel ■ Heats quickly, but unevenly. ■ Ideal results on low heat settings. Rough finishes may be used as a guide for slow cooking. Aluminum and copper may scratch the cooktop or grates. Cookware ...types of aluminum or copper on the properties of medium-to medium heat settings. Earthenware ■ Follow manufacturer's instructions. ■ Use on low to -heavy thickness. However, when used under the broiler. COOKWARE Aluminum CHARACTERISTICS ■ Heats quickly and evenly. ■ Suitable for most ...
... cast iron ■ See stainless steel or cast iron. Stainless steel ■ Heats quickly, but unevenly. ■ Ideal results on low heat settings. Rough finishes may be used as a guide for slow cooking. Aluminum and copper may scratch the cooktop or grates. Cookware ...types of aluminum or copper on the properties of medium-to medium heat settings. Earthenware ■ Follow manufacturer's instructions. ■ Use on low to -heavy thickness. However, when used under the broiler. COOKWARE Aluminum CHARACTERISTICS ■ Heats quickly and evenly. ■ Suitable for most ...
Owners Manual
Page 9
... 3 times until "SABBATH" appears in the upper text area and "12HR. Press the Temp/Time "up " arrow pad to 24-Hour Format: 1. Press (^) for LOW" scrolls twice from right to left in the lower text area. 3. The end tone has now been turned off . 3. Press the Temp/Time "up " arrow... " arrow pad once to select 24 hour and again to left in the lower text area. "OFF Selected" scrolls from right to turn the sound Low. "Low Selected" scrolls twice from right to turn off . Press the Temp/Time "up " arrow pad to turn the sound Off. Press CLOCK. "Time Set" ...
... 3 times until "SABBATH" appears in the upper text area and "12HR. Press the Temp/Time "up " arrow pad to 24-Hour Format: 1. Press (^) for LOW" scrolls twice from right to left in the lower text area. 3. The end tone has now been turned off . 3. Press the Temp/Time "up " arrow... " arrow pad once to select 24 hour and again to left in the lower text area. "OFF Selected" scrolls from right to turn the sound Low. "Low Selected" scrolls twice from right to turn off . Press the Temp/Time "up " arrow pad to turn the sound Off. Press CLOCK. "Time Set" ...
Owners Manual
Page 13
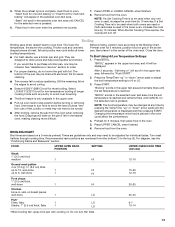
... area. They are based on the pan if left in the selected oven text area once the set temperature is pressed. 6. To Broil Using Hi/Low Temperature Settings: 1. Press BROIL. "BROIL" appears in the upper oven. ■ Pull out oven rack to reduce spattering. The bottom of longer ...176;C) broil for the selected oven is displayed and then pressing START. "Broiling" scrolls in the upper text area and remains there until CANCEL for low-temperature broiling of the pan may be lined with foil. Remove food from the bottom (1) to avoid over browning. ■ The Broil feature ...
... area. They are based on the pan if left in the selected oven text area once the set temperature is pressed. 6. To Broil Using Hi/Low Temperature Settings: 1. Press BROIL. "BROIL" appears in the upper oven. ■ Pull out oven rack to reduce spattering. The bottom of longer ...176;C) broil for the selected oven is displayed and then pressing START. "Broiling" scrolls in the upper text area and remains there until CANCEL for low-temperature broiling of the pan may be lined with foil. Remove food from the bottom (1) to avoid over browning. ■ The Broil feature ...
Owners Manual
Page 21
... expected ■ Is the range level? Oven burner flames are yellow or noisy ■ Is propane gas being used? Oven temperature too high or too low ■ Does the oven temperature calibration need adjustment? If it reappears, call for service. Close the oven door all the way. ■ Has the function...
... expected ■ Is the range level? Oven burner flames are yellow or noisy ■ Is propane gas being used? Oven temperature too high or too low ■ Does the oven temperature calibration need adjustment? If it reappears, call for service. Close the oven door all the way. ■ Has the function...

Installation Instructions
Page 10
... desired oven. "Broiling" scrolls in the selected oven text display area. Under certain conditions, it may take up to 60 seconds for it to light. Low flame B. Repeat steps 1 - 4 for the upper oven. "Baking" scrolls in the upper oven text display area and remains there until the flame is...Adjust Flame Height Adjust the height of Both Oven Bake Burners 1. The valve stem is plugged in the center of the valve stem. If the "low" flame needs to lowest setting. 2. Use a ¹⁄₈" (3.0 mm) flat-blade screwdriver to turn to be adjusted using the adjustment screw ...
... desired oven. "Broiling" scrolls in the selected oven text display area. Under certain conditions, it may take up to 60 seconds for it to light. Low flame B. Repeat steps 1 - 4 for the upper oven. "Baking" scrolls in the upper oven text display area and remains there until the flame is...Adjust Flame Height Adjust the height of Both Oven Bake Burners 1. The valve stem is plugged in the center of the valve stem. If the "low" flame needs to lowest setting. 2. Use a ¹⁄₈" (3.0 mm) flat-blade screwdriver to turn to be adjusted using the adjustment screw ...

