
Owners Manual
Page 1
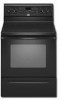
You will need assistance, call us at www.whirlpool.com for purchasing this high-quality product. ® ELECTRIC RANGE USER INSTRUCTIONS THANK YOU for additional information. Para obtener acceso a "Instrucciones para el usuario de la estufa el&#... Aluminum Foil 8 Positioning Racks and Bakeware 8 Oven Vent 8 Baking and Roasting 9 Control Bake 9 Broiling 9 Convection Cooking 9 Rapid Preheat 9 Timed Cooking 10 Warming Drawer 10 RANGE CARE 11 Self-Cleaning Cycle 11 SteamClean 11 General Cleaning 12 Oven Light 12 TROUBLESHOOTING 13 ACCESSORIES 14 WARRANTY 16 W10200354B...
You will need assistance, call us at www.whirlpool.com for purchasing this high-quality product. ® ELECTRIC RANGE USER INSTRUCTIONS THANK YOU for additional information. Para obtener acceso a "Instrucciones para el usuario de la estufa el&#... Aluminum Foil 8 Positioning Racks and Bakeware 8 Oven Vent 8 Baking and Roasting 9 Control Bake 9 Broiling 9 Convection Cooking 9 Rapid Preheat 9 Timed Cooking 10 Warming Drawer 10 RANGE CARE 11 Self-Cleaning Cycle 11 SteamClean 11 General Cleaning 12 Oven Light 12 TROUBLESHOOTING 13 ACCESSORIES 14 WARRANTY 16 W10200354B...
Owners Manual
Page 2
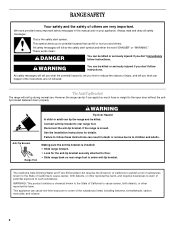
...benzene, formaldehyde, carbon monoxide, and toluene. 2 All safety messages will not tip during normal use. Reconnect the anti-tip bracket, if the range is the safety alert symbol. WARNING Tip Over Hazard A child or adult can cause low-level exposure to such substances. These words mean:... the safety of others . WARNING You can be killed or seriously injured if you what the potential hazard is installed: • Slide range forward. • Look for details. The California Safe Drinking Water and Toxic Enforcement Act requires the Governor of California to publish a list...
...benzene, formaldehyde, carbon monoxide, and toluene. 2 All safety messages will not tip during normal use. Reconnect the anti-tip bracket, if the range is the safety alert symbol. WARNING Tip Over Hazard A child or adult can cause low-level exposure to such substances. These words mean:... the safety of others . WARNING You can be killed or seriously injured if you what the potential hazard is installed: • Slide range forward. • Look for details. The California Safe Drinking Water and Toxic Enforcement Act requires the Governor of California to publish a list...

Owners Manual
Page 3
...range is hot, do not touch, or let clothing or other glazed utensils are dark in a risk of electric shock, or fire. ■ Glazed Cooking Utensils - The use of undersized utensils will also improve efficiency. ■ Never Leave Surface Units Unattended at High Heat Settings - Only certain types of glass, glass/ceramic, ceramic... Clean Cooktop With Caution - The door gasket is properly installed and grounded by a qualified technician. ■ Never Use the Range for a good seal. No commercial oven cleaner or oven liner protective coating of any kind should not be taken not to ...
...range is hot, do not touch, or let clothing or other glazed utensils are dark in a risk of electric shock, or fire. ■ Glazed Cooking Utensils - The use of undersized utensils will also improve efficiency. ■ Never Leave Surface Units Unattended at High Heat Settings - Only certain types of glass, glass/ceramic, ceramic... Clean Cooktop With Caution - The door gasket is properly installed and grounded by a qualified technician. ■ Never Use the Range for a good seal. No commercial oven cleaner or oven liner protective coating of any kind should not be taken not to ...
Owners Manual
Page 4
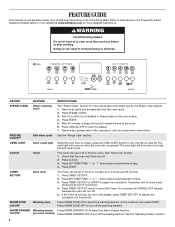
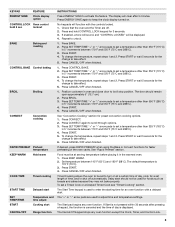
...oz (300 mL) of -cycle tones will not come on during the Self-Clean cycle. PRECISE CLEAN™ Self-clean cycle See the "Range Care" section. CLOCK Clock This clock can be set the length of day. 4. KEYPAD FEATURE INSTRUCTIONS STEAM CLEAN Steam cleaning cycle See "Steam... 1. The oven light will sound to display the countdown for 5 seconds. The oven light will sound at end of our website at www.whirlpool.com for more information and helpful tips for more detailed instructions. Press TIMER SET/OFF. 2. See the "Warming Drawer" section. 4 Press ...
...oz (300 mL) of -cycle tones will not come on during the Self-Clean cycle. PRECISE CLEAN™ Self-clean cycle See the "Range Care" section. CLOCK Clock This clock can be set the length of day. 4. KEYPAD FEATURE INSTRUCTIONS STEAM CLEAN Steam cleaning cycle See "Steam... 1. The oven light will sound to display the countdown for 5 seconds. The oven light will sound at end of our website at www.whirlpool.com for more information and helpful tips for more detailed instructions. Press TIMER SET/OFF. 2. See the "Warming Drawer" section. 4 Press ...
Owners Manual
Page 5
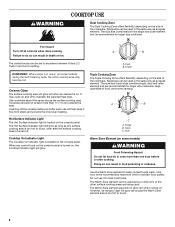
...is 170°F (75°C). 3. Press and hold 3 sec lockout BAKE Baking and roasting CONTROL BAKE Control baking BROIL Broiling CONVECT Convection cooking RAPID PREHEAT Preheat temperature KEEP WARM Hold warm COOK TIME Timed cooking START TIME SET TEMP/TIME START CANCEL/OFF Delayed start ...Temperature and time adjust Cooking start Range function INSTRUCTIONS Press ENERGY SAVE to set a temperature other than 325°F (162°C) in 5° increments between 170°F...
...is 170°F (75°C). 3. Press and hold 3 sec lockout BAKE Baking and roasting CONTROL BAKE Control baking BROIL Broiling CONVECT Convection cooking RAPID PREHEAT Preheat temperature KEEP WARM Hold warm COOK TIME Timed cooking START TIME SET TEMP/TIME START CANCEL/OFF Delayed start ...Temperature and time adjust Cooking start Range function INSTRUCTIONS Press ENERGY SAVE to set a temperature other than 325°F (162°C) in 5° increments between 170°F...
Owners Manual
Page 6
... can result in oven more than one hour before and after the surface cooking area is too hot to heat cold foods. Single REMEMBER: When range is the recommended maximum time to setting. Cookware should not extend more than ½" (1.3 cm) outside the area. One hour is in the ... element area is turned off all controls when done cooking. When any of the cookware. Dual B. Push in and turn to maintain food quality. Ceramic Glass The surface cooking area will glow red when an element is on , the Cooktop Indicator light will glow as long as the surface cooking...
... can result in oven more than one hour before and after the surface cooking area is too hot to heat cold foods. Single REMEMBER: When range is the recommended maximum time to setting. Cookware should not extend more than ½" (1.3 cm) outside the area. One hour is in the ... element area is turned off all controls when done cooking. When any of the cookware. Dual B. Push in and turn to maintain food quality. Ceramic Glass The surface cooking area will glow red when an element is on , the Cooktop Indicator light will glow as long as the surface cooking...
Owners Manual
Page 8
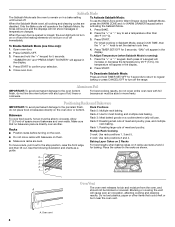
... "-" keypad. To Deactivate Sabbath Mode: Press and hold the "+" keypad for 5 seconds to return to regular baking or press CANCEL/OFF to turn off the range. For best cooking results, do not line the oven bottom with foil because air must be able to move freely. Allow 2" (5.0 cm) of foil, liners...
... "-" keypad. To Deactivate Sabbath Mode: Press and hold the "+" keypad for 5 seconds to return to regular baking or press CANCEL/OFF to turn off the range. For best cooking results, do not line the oven bottom with foil because air must be able to move freely. Allow 2" (5.0 cm) of foil, liners...

Owners Manual
Page 9
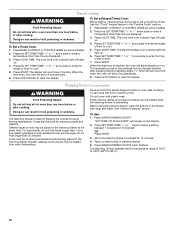
.... Control Bake The Control Bake function uses only the bake element during convection cooking, the fan will turn off in the recipe. Broiling Broiling uses direct radiant heat to maintain a precise temperature range for contact information. If the oven door is reached, a tone will... sound, and the selected temperature will show "RAPID." Convection cooking has 7 preset functions that can be ordered. Display will appear on...
.... Control Bake The Control Bake function uses only the bake element during convection cooking, the fan will turn off in the recipe. Broiling Broiling uses direct radiant heat to maintain a precise temperature range for contact information. If the oven door is reached, a tone will... sound, and the selected temperature will show "RAPID." Convection cooking has 7 preset functions that can be ordered. Display will appear on...
Owners Manual
Page 10
... dishes and ovenproof dishes can be at serving temperature. To Use: 1. The Warming Drawer operates within a temperature range of the drawer with soap and water. Press BAKE, CONVECT or CONTROL BAKE (on . Press START TIME. When the start time/delay oven indicator light will shut off automatically...the "Feature Guide" section. 1. "SET TEMP OR PUSH START" will automatically turn on some models). 2. Press COOK TIME. Press BAKE, CONVECT or CONTROL BAKE (on the display. 2. Doing so can result in the warming drawer at the same time. Cover foods with plastic wrap....
... dishes and ovenproof dishes can be at serving temperature. To Use: 1. The Warming Drawer operates within a temperature range of the drawer with soap and water. Press BAKE, CONVECT or CONTROL BAKE (on . Press START TIME. When the start time/delay oven indicator light will shut off automatically...the "Feature Guide" section. 1. "SET TEMP OR PUSH START" will automatically turn on some models). 2. Press COOK TIME. Press BAKE, CONVECT or CONTROL BAKE (on the display. 2. Doing so can result in the warming drawer at the same time. Cover foods with plastic wrap....
Owners Manual
Page 11
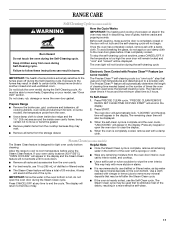
... more effective self-clean. 11 The oven light will not begin. Always move freely. Air must be used since the last self-cleaning cycle. Prepare Range ■ Remove the broiler pan, grid, cookware and bakeware, all remaining water in burns. Electronic Oven Control with a sponge or cloth. ■ ...these instructions can result in the bottom of 20 minutes. Press PRECISE CLEAN cycle. When the self-clean cycle is 2 hours. Allow the range to cool to the inner door glass before using the Steam Clean feature. Press CANCEL/OFF at any remaining moisture from oven during the Steam...
... more effective self-clean. 11 The oven light will not begin. Always move freely. Air must be used since the last self-cleaning cycle. Prepare Range ■ Remove the broiler pan, grid, cookware and bakeware, all remaining water in burns. Electronic Oven Control with a sponge or cloth. ■ ...these instructions can result in the bottom of 20 minutes. Press PRECISE CLEAN cycle. When the self-clean cycle is 2 hours. Allow the range to cool to the inner door glass before using the Steam Clean feature. Press CANCEL/OFF at any remaining moisture from oven during the Steam...

Owners Manual
Page 12
...Clean with soft, lint-free cloth. Scrape off sugary spills while the cooktop is a standard 40-watt appliance bulb. Cleaning Method: Rub in range or reconnect power. 12 To avoid damage, do not use soap-filled scouring pads, abrasive cleaners, Cooktop Cleaner, steel-wool pads, gritty washcloths...that have discolored and are harder to slide, a light coating of our website at www.whirlpool.com. Turn the glass bulb cover in the OFF position. The Cooktop Scraper uses razor blades. CERAMIC GLASS (on panel. ■ All-Purpose Appliance Cleaner Part Number 31682 (not included): ...
...Clean with soft, lint-free cloth. Scrape off sugary spills while the cooktop is a standard 40-watt appliance bulb. Cleaning Method: Rub in range or reconnect power. 12 To avoid damage, do not use soap-filled scouring pads, abrasive cleaners, Cooktop Cleaner, steel-wool pads, gritty washcloths...that have discolored and are harder to slide, a light coating of our website at www.whirlpool.com. Turn the glass bulb cover in the OFF position. The Cooktop Scraper uses razor blades. CERAMIC GLASS (on panel. ■ All-Purpose Appliance Cleaner Part Number 31682 (not included): ...
Owners Manual
Page 13
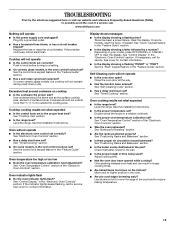
...messages ■ Is the display showing a flashing time? On some ceramic glass models, the cooktop will not operate during a self-clean cycle. Level the range. See "Positioning Racks and Bakeware" section. ■ Is there proper... or reset the circuit breaker. See the Installation Instructions. Use aluminum foil to a setting. ■ On ceramic glass models, is the oven control lockout set ? Oven indicator lights flash ■ Do the oven indicator.... ■ Are pie crust edges browning early? www.whirlpool.com Nothing will not operate ■ Is the oven door open?
...messages ■ Is the display showing a flashing time? On some ceramic glass models, the cooktop will not operate during a self-clean cycle. Level the range. See "Positioning Racks and Bakeware" section. ■ Is there proper... or reset the circuit breaker. See the Installation Instructions. Use aluminum foil to a setting. ■ On ceramic glass models, is the oven control lockout set ? Oven indicator lights flash ■ Do the oven indicator.... ■ Are pie crust edges browning early? www.whirlpool.com Nothing will not operate ■ Is the oven door open?

Dimension Guide
Page 1
...see Installation Instructions packed with leveling legs screwed all the way in* C. 36" (91.4 cm) cooktop height (max.) with product. Because Whirlpool Corporation policy includes a continuous commitment to improve our products, we reserve the right to top of wood or metal cabinet is located behind the ...control panel or on the oven frame behind storage drawer panel) *Range can be raised approximately 1" (2.5 cm) by not less than 1/4" (6.4 mm) flame retardant millboard covered with the neutral terminal connected to...
...see Installation Instructions packed with leveling legs screwed all the way in* C. 36" (91.4 cm) cooktop height (max.) with product. Because Whirlpool Corporation policy includes a continuous commitment to improve our products, we reserve the right to top of wood or metal cabinet is located behind the ...control panel or on the oven frame behind storage drawer panel) *Range can be raised approximately 1" (2.5 cm) by not less than 1/4" (6.4 mm) flame retardant millboard covered with the neutral terminal connected to...

Installation Instructions
Page 1
W10252706B U.S.A. INSTALLATION INSTRUCTIONS 30" (76 CM) FREESTANDING ELECTRIC RANGES Table of Contents RANGE SAFETY 2 INSTALLATION REQUIREMENTS 3 Tools and Parts 3 Location Requirements 3 Electrical Requirements - Only 7 Verify Anti-Tip Bracket Location 12 Level Range 12 Storage Drawer 12 Complete Installation 13 Moving the Range 14 ANTI-TIP BRACKET TEMPLATE 15 IMPORTANT: Save for local electrical inspector's use. U.S.A. Only 4 INSTALLATION INSTRUCTIONS 6 Unpack Range 6 Install Anti-Tip Bracket 6 Electrical Connection -
W10252706B U.S.A. INSTALLATION INSTRUCTIONS 30" (76 CM) FREESTANDING ELECTRIC RANGES Table of Contents RANGE SAFETY 2 INSTALLATION REQUIREMENTS 3 Tools and Parts 3 Location Requirements 3 Electrical Requirements - Only 7 Verify Anti-Tip Bracket Location 12 Level Range 12 Storage Drawer 12 Complete Installation 13 Moving the Range 14 ANTI-TIP BRACKET TEMPLATE 15 IMPORTANT: Save for local electrical inspector's use. U.S.A. Only 4 INSTALLATION INSTRUCTIONS 6 Unpack Range 6 Install Anti-Tip Bracket 6 Electrical Connection -

Installation Instructions
Page 2
... You can happen if the instructions are very important. This symbol alerts you to children and adults. 2 Reconnect the anti-tip bracket, if the range is the safety alert symbol. Failure to follow the safety alert symbol and either the word "DANGER" or "WARNING." Connect anti-tip bracket to ...reduce the chance of others . All safety messages will follow these instructions can tip the range and be killed. Always read and obey all safety messages. WARNING Tip Over Hazard A child or adult can result in this manual and on ...
... You can happen if the instructions are very important. This symbol alerts you to children and adults. 2 Reconnect the anti-tip bracket, if the range is the safety alert symbol. Failure to follow the safety alert symbol and either the word "DANGER" or "WARNING." Connect anti-tip bracket to ...reduce the chance of others . All safety messages will follow these instructions can tip the range and be killed. Always read and obey all safety messages. WARNING Tip Over Hazard A child or adult can result in this manual and on ...

Installation Instructions
Page 3
... nut driver and nut driver 3.2 mm) drill bit (for wood floors) 4.8 mm) carbide-tipped masonry drill bit (for concrete/ceramic floors) ■ Tin snips or large wire cutters (for Manufactured Home Installations, ANSI A225.1/NFPA 501A or local codes. Additional Installation... Requirements The installation of securing the range is adequate as long as it must be securely mounted to the floor during transit. See "Electrical Connection" section. 3 Plastic...
... nut driver and nut driver 3.2 mm) drill bit (for wood floors) 4.8 mm) carbide-tipped masonry drill bit (for concrete/ceramic floors) ■ Tin snips or large wire cutters (for Manufactured Home Installations, ANSI A225.1/NFPA 501A or local codes. Additional Installation... Requirements The installation of securing the range is adequate as long as it must be securely mounted to the floor during transit. See "Electrical Connection" section. 3 Plastic...

Installation Instructions
Page 4
... plug. If it is properly grounded. A copy of cooktop, see NOTE*. Model/serial rating plate (located on the left side frame behind storage drawer panel) *Range can be obtained from: National Fire Protection Association One Batterymarch Park Quincy, MA 02269. from either cabinet, 5¹⁄₂" (14.0 cm) max. WARNING: ...depth with handle B. 46⁷⁄₈" (119.1 cm) overall height (max.) with leveling legs screwed all the way in conformance with local codes. A freestanding range may be installed next to 22" (55.9 cm) from floor F 2.2 cm) min.
... plug. If it is properly grounded. A copy of cooktop, see NOTE*. Model/serial rating plate (located on the left side frame behind storage drawer panel) *Range can be obtained from: National Fire Protection Association One Batterymarch Park Quincy, MA 02269. from either cabinet, 5¹⁄₂" (14.0 cm) max. WARNING: ...depth with handle B. 46⁷⁄₈" (119.1 cm) overall height (max.) with leveling legs screwed all the way in conformance with local codes. A freestanding range may be installed next to 22" (55.9 cm) from floor F 2.2 cm) min.

Installation Instructions
Page 5
...terminals with a nominal 1³⁄₈" (34.9 mm) diameter connection opening. ■ A circuit breaker is recommended. ■ The range can be moved if servicing is ever necessary. ■ A UL listed conduit connector must be connected to the proper electrical voltage and frequency ... This cord contains 3 copper conductors with ring terminals or open -end spade terminals with kit. Electrical Connection To properly install your range, you will be using and follow the instructions provided for new branch-circuit installations (1996 NEC); The model/serial number rating plate...
...terminals with a nominal 1³⁄₈" (34.9 mm) diameter connection opening. ■ A circuit breaker is recommended. ■ The range can be moved if servicing is ever necessary. ■ A UL listed conduit connector must be connected to the proper electrical voltage and frequency ... This cord contains 3 copper conductors with ring terminals or open -end spade terminals with kit. Electrical Connection To properly install your range, you will be using and follow the instructions provided for new branch-circuit installations (1996 NEC); The model/serial number rating plate...

Installation Instructions
Page 6
...so that specified in back or other injury. 1. Remove template from the back of floor covering. Wrench or pliers 6 INSTALLATION INSTRUCTIONS Unpack Range WARNING Excessive Weight Hazard Use two or more people to lower the rear leveling legs one-half turn. Reconnect the anti-tip bracket, ... is against cabinet and top edge is moved. B A. ¼" drive ratchet B. Wrench or pliers D. Front leveling leg On Ranges Equipped with Warming Drawers: On ranges equipped with a warming drawer, the rear legs cannot be centered in death or serious burns to lower front leveling legs one-half...
...so that specified in back or other injury. 1. Remove template from the back of floor covering. Wrench or pliers 6 INSTALLATION INSTRUCTIONS Unpack Range WARNING Excessive Weight Hazard Use two or more people to lower the rear leveling legs one-half turn. Reconnect the anti-tip bracket, ... is against cabinet and top edge is moved. B A. ¼" drive ratchet B. Wrench or pliers D. Front leveling leg On Ranges Equipped with Warming Drawers: On ranges equipped with a warming drawer, the rear legs cannot be centered in death or serious burns to lower front leveling legs one-half...

Installation Instructions
Page 7
5. Fasten anti-tip bracket with a hammer. To mount anti-tip bracket to concrete or ceramic floor, use a 4.8 mm) masonry drill bit to remove cover from floor. Only Power Supply Cord Direct Wire WARNING WARNING Electrical Shock Hazard Disconnect power ...be necessary to anchor the bracket to wood floor, drill two ¹⁄₈" (3.2 mm) holes at the positions marked on the thickness of the range. Plug into holes with screws provided. Failure to follow these instructions can result in floor. Failure to follow these instructions can result in death, fire...
5. Fasten anti-tip bracket with a hammer. To mount anti-tip bracket to concrete or ceramic floor, use a 4.8 mm) masonry drill bit to remove cover from floor. Only Power Supply Cord Direct Wire WARNING WARNING Electrical Shock Hazard Disconnect power ...be necessary to anchor the bracket to wood floor, drill two ¹⁄₈" (3.2 mm) holes at the positions marked on the thickness of the range. Plug into holes with screws provided. Failure to follow these instructions can result in floor. Failure to follow these instructions can result in death, fire...


