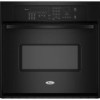

Owners Manual
Page 3
... be allowed to cause burns - Interior surfaces of an oven become hot enough to sit or stand on any part of the oven. ■ Clean Only Parts Listed in color. among these openings, oven doors, and windows of oven doors. Loose-fitting or hanging garments should be stored in an oven. ■ Do Not Use Water on hot surfaces...
... be allowed to cause burns - Interior surfaces of an oven become hot enough to sit or stand on any part of the oven. ■ Clean Only Parts Listed in color. among these openings, oven doors, and windows of oven doors. Loose-fitting or hanging garments should be stored in an oven. ■ Do Not Use Water on hot surfaces...
Owners Manual
Page 8
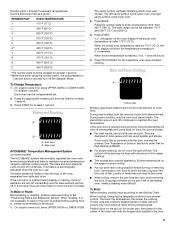
... to 24 seconds, after cooking. To Disable: The oven can be regularly set between 170°F and 500°F (77°C and 260°C). 4. On single ovens, open the oven door. 2. On single ovens, open the oven door. 2. Close oven door. On double ovens, only the upper oven times will appear on for a longer time than 350... will not turn on or off the Sabbath Mode on the oven(s) any time, press and hold the number pad 6 for about 5 seconds until re-enabled. Each oven can also be set for only part of 350°F (177°C). 4. Press START. 5. A timed Sabbath Mode can...
... to 24 seconds, after cooking. To Disable: The oven can be regularly set between 170°F and 500°F (77°C and 260°C). 4. On single ovens, open the oven door. 2. On single ovens, open the oven door. 2. Close oven door. On double ovens, only the upper oven times will appear on for a longer time than 350... will not turn on or off the Sabbath Mode on the oven(s) any time, press and hold the number pad 6 for about 5 seconds until re-enabled. Each oven can also be set for only part of 350°F (177°C). 4. Press START. 5. A timed Sabbath Mode can...
Owners Manual
Page 9
... 1 second. 3. They will come back on the edges to avoid curling. ■ Pull out oven rack to drain juices and help avoid spatter and smoke. Press BAKE. Ask for Part Number 4396923. ■ For proper draining, do not cover the grid with the longest side parallel ...on the pan if left cavity symbol is the lower oven. 2. Maxi and Econo Broiling A A. Baking and Roasting A B A. If the oven door is in intervals. The bottom of the oven, separated from the oven when removing the food. Press START. Each oven can be lined with aluminum foil for optimal cooking ...
... 1 second. 3. They will come back on the edges to avoid curling. ■ Pull out oven rack to drain juices and help avoid spatter and smoke. Press BAKE. Ask for Part Number 4396923. ■ For proper draining, do not cover the grid with the longest side parallel ...on the pan if left cavity symbol is the lower oven. 2. Maxi and Econo Broiling A A. Baking and Roasting A B A. If the oven door is in intervals. The bottom of the oven, separated from the oven when removing the food. Press START. Each oven can be lined with aluminum foil for optimal cooking ...
Owners Manual
Page 11
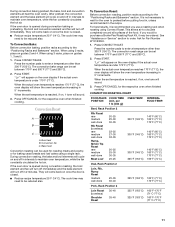
... range can be used for roasting meats and poultry, or for Part Number W10123240. 1. "Lo°" will come back on once the door is reached, if on, 1 tone will cycle on the oven display if the actual oven temperature is under 170°F (77°C). Bake heat Convection roasting... will turn off immediately and the bake element will show the oven temperature increasing in intervals to the "Positioning Racks and Bakeware" section. It is recommended you use a roasting rack when roasting using a single rack. CONVECTION ROASTING CHART FOOD/RACK COOK TIME POSITION (min. The cook ...
... range can be used for roasting meats and poultry, or for Part Number W10123240. 1. "Lo°" will come back on once the door is reached, if on, 1 tone will cycle on the oven display if the actual oven temperature is under 170°F (77°C). Bake heat Convection roasting... will turn off immediately and the bake element will show the oven temperature increasing in intervals to the "Positioning Racks and Bakeware" section. It is recommended you use a roasting rack when roasting using a single rack. CONVECTION ROASTING CHART FOOD/RACK COOK TIME POSITION (min. The cook ...
Owners Manual
Page 16
... oven OFF/CANCEL or lower oven OFF/CANCEL. On double ovens only, press UPPER OVEN or LOWER OVEN. The cavity symbol will not unlock until the oven cools. Press STOP TIME. 4. The door will flash indicating which oven was chosen. To Stop Self-Clean any pad or open the oven door to clear the oven... surfaces, even with onetime or limited use. ■ Stainless Steel Cleaner and Polish Part Number 31462 (not included): See "Assistance or Service" section to the control panel, do not use oven cleaners. CONTROL PANEL To avoid damage to order. ■ Liquid detergent or all ...
... oven OFF/CANCEL or lower oven OFF/CANCEL. On double ovens only, press UPPER OVEN or LOWER OVEN. The cavity symbol will not unlock until the oven cools. Press STOP TIME. 4. The door will flash indicating which oven was chosen. To Stop Self-Clean any pad or open the oven door to clear the oven... surfaces, even with onetime or limited use. ■ Stainless Steel Cleaner and Polish Part Number 31462 (not included): See "Assistance or Service" section to the control panel, do not use oven cleaners. CONTROL PANEL To avoid damage to order. ■ Liquid detergent or all ...

Installation Instructions
Page 4
...Code, Part 1 and C22.2 No. Model/serial number plate Double Oven A. Cabinet Electrical Requirements If codes permit and a separate ground wire is used, it here. ■ Oven must be...CSA International 8501 East Pleasant Valley Road Cleveland, OH 44131-5575 Single Oven A. Double Ovens Installed in accordance with a qualified electrical installer if you must determine the type ...A. 30" (76.2 cm) min. Oven front D. cutout depth B. 23" (58.4 cm) recessed oven depth C. Model/serial number plate 4 bottom of cutout to top of cabinet door F. 49³⁄₄" (126.4...
...Code, Part 1 and C22.2 No. Model/serial number plate Double Oven A. Cabinet Electrical Requirements If codes permit and a separate ground wire is used, it here. ■ Oven must be...CSA International 8501 East Pleasant Valley Road Cleveland, OH 44131-5575 Single Oven A. Double Ovens Installed in accordance with a qualified electrical installer if you must determine the type ...A. 30" (76.2 cm) min. Oven front D. cutout depth B. 23" (58.4 cm) recessed oven depth C. Model/serial number plate 4 bottom of cutout to top of cabinet door F. 49³⁄₄" (126.4...

Installation Instructions
Page 5
... floor damage, set aside racks and other injury. 2. Remove the hardware package from inside the oven. 6. Move oven and cardboard close . Side trims are in locked position B. Make Electrical Connection WARNING A B A. Oven door latch in back or other parts from inside the package containing literature. Follow the electrical connector manufacturer's recommended procedure. Locate existing wiring...
... floor damage, set aside racks and other injury. 2. Remove the hardware package from inside the oven. 6. Move oven and cardboard close . Side trims are in locked position B. Make Electrical Connection WARNING A B A. Oven door latch in back or other parts from inside the package containing literature. Follow the electrical connector manufacturer's recommended procedure. Locate existing wiring...

Installation Instructions
Page 8
... sure the oven door is closed and the "ON" light is intact and tight; When oven has been on . Press UPPER OVEN or LOWER OVEN, to the Use and Care Guide. Repeat "Check Operation of Single Oven 1. To set the clock and other oven functions, refer to select the oven you are now... installed. Push trim into hinge slots in oven. 8 Check that all parts are testing. 3. For oven...
... sure the oven door is closed and the "ON" light is intact and tight; When oven has been on . Press UPPER OVEN or LOWER OVEN, to the Use and Care Guide. Repeat "Check Operation of Single Oven 1. To set the clock and other oven functions, refer to select the oven you are now... installed. Push trim into hinge slots in oven. 8 Check that all parts are testing. 3. For oven...

