
Owners Manual
Page 3
... after use . Other surfaces of the oven may be worn while using the oven, follow basic precautions, including the following: ■ Proper Installation - They should be allowed to sit or stand on any kind should be moved while oven is essential for Warming or Heating the Room. ...-type extinguisher. ■ Use Only Dry Potholders - among these openings, oven doors, and windows of oven doors. Be sure the oven is properly installed and grounded by a qualified technician. ■ Never Use the Oven for a good seal. IMPORTANT SAFETY INSTRUCTIONS WARNING: To reduce the risk of fire...
... after use . Other surfaces of the oven may be worn while using the oven, follow basic precautions, including the following: ■ Proper Installation - They should be allowed to sit or stand on any kind should be moved while oven is essential for Warming or Heating the Room. ...-type extinguisher. ■ Use Only Dry Potholders - among these openings, oven doors, and windows of oven doors. Be sure the oven is properly installed and grounded by a qualified technician. ■ Never Use the Oven for a good seal. IMPORTANT SAFETY INSTRUCTIONS WARNING: To reduce the risk of fire...

Owners Manual
Page 17
... into place. 3. Close the oven door as far as the door is not suggested to slide. The oven door is not, repeat the removal and installation procedures. 17 Insert both sides. Remove racks or they will not work during the SelfCleaning cycle. OVEN RACKS ■ Self-Cleaning cycle: See "Self-Cleaning...
... into place. 3. Close the oven door as far as the door is not suggested to slide. The oven door is not, repeat the removal and installation procedures. 17 Insert both sides. Remove racks or they will not work during the SelfCleaning cycle. OVEN RACKS ■ Self-Cleaning cycle: See "Self-Cleaning...

Owners Manual
Page 18
... "Baking and Roasting" section. ■ Is the proper bakeware being used ? Adjust cooking time. ■ Has the oven door been opened while cooking? See Installation Instructions. See the Installation Instructions. ■ Is the proper temperature set ? See "Timed Cooking" section. ■ On some models, reset the clock, if needed. See "Sabbath Mode...
... "Baking and Roasting" section. ■ Is the proper bakeware being used ? Adjust cooking time. ■ Has the oven door been opened while cooking? See Installation Instructions. See the Installation Instructions. ■ Is the proper temperature set ? See "Timed Cooking" section. ■ On some models, reset the clock, if needed. See "Sabbath Mode...
Owners Manual
Page 19
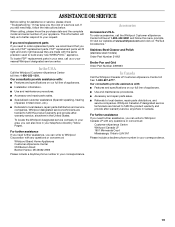
... , follow the menu prompts. Our consultants provide assistance with: ■ Features and specifications on our full line of appliances. ■ Installation information. ■ Use and maintenance procedures. ■ Accessory and repair parts sales. ■ Specialized customer assistance (Spanish speaking, hearing impaired,... write to order replacement parts, we recommend that you still need further assistance, you can also look in your nearest Whirlpool designated service center. If you use only FSP® replacement parts. In the U.S.A. Stainless Steel Cleaner and Polish ...
... , follow the menu prompts. Our consultants provide assistance with: ■ Features and specifications on our full line of appliances. ■ Installation information. ■ Use and maintenance procedures. ■ Accessory and repair parts sales. ■ Specialized customer assistance (Spanish speaking, hearing impaired,... write to order replacement parts, we recommend that you still need further assistance, you can also look in your nearest Whirlpool designated service center. If you use only FSP® replacement parts. In the U.S.A. Stainless Steel Cleaner and Polish ...

Owners Manual
Page 20
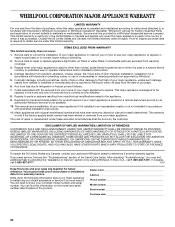
... or cleaning products not approved by an authorized Whirlpool servicer is designed to correct house wiring or plumbing. 2. Cosmetic damage, including scratches, dents, chips or other than normal, single-family household use of purchase or installation date for in materials or workmanship. Major appliances... user or operator instructions and/or installation instructions. 4. This limited warranty is valid only in the United States or Canada and applies only when the major appliance is used in materials or workmanship and is reported to Whirlpool within 30 days from the date ...
... or cleaning products not approved by an authorized Whirlpool servicer is designed to correct house wiring or plumbing. 2. Cosmetic damage, including scratches, dents, chips or other than normal, single-family household use of purchase or installation date for in materials or workmanship. Major appliances... user or operator instructions and/or installation instructions. 4. This limited warranty is valid only in the United States or Canada and applies only when the major appliance is used in materials or workmanship and is reported to Whirlpool within 30 days from the date ...

Installation Instructions
Page 2
...# 8-18 x ³⁄₈" screws - NOTE: For undercounter installation, it is required. This is installed in a wall cabinet. All safety messages will not fit into the cabinet opening dimensions that the materials used . single oven (2), double oven (4) ■ Bottom vent (supplied on the top... the oven. ■ Grounded electrical supply is recommended that all electrical connections be made by a licensed, qualified electrical installer. WARNING You can happen if the instructions are shown must be used will follow instructions. Given dimensions provide minimum clearance...
...# 8-18 x ³⁄₈" screws - NOTE: For undercounter installation, it is required. This is installed in a wall cabinet. All safety messages will not fit into the cabinet opening dimensions that the materials used . single oven (2), double oven (4) ■ Bottom vent (supplied on the top... the oven. ■ Grounded electrical supply is recommended that all electrical connections be made by a licensed, qualified electrical installer. WARNING You can happen if the instructions are shown must be used will follow instructions. Given dimensions provide minimum clearance...

Installation Instructions
Page 3
Product Dimensions - Single Ovens Single Oven Undercounter (without cooktop installed above) A B F D E C 27" (68.6 cm) models A. 27" (68.6 cm) min. Double Ovens A E D C 27" (68.6 cm) models A. 27" (68.6 cm) min. cabinet width B. 1¹⁄₂" (3.8 cm) ...³⁄₄" (67.9 cm) overall width D. 23" (58.4 cm) max. overall height C. 26³⁄₄" (67.9 cm) overall width D. 23" (58.4 cm) max. Single Ovens A Single Ovens Installed in Cabinet A B B E D C 27" (68.6 cm) models A. 25 64.3 cm) max.
Product Dimensions - Single Ovens Single Oven Undercounter (without cooktop installed above) A B F D E C 27" (68.6 cm) models A. 27" (68.6 cm) min. Double Ovens A E D C 27" (68.6 cm) models A. 27" (68.6 cm) min. cabinet width B. 1¹⁄₂" (3.8 cm) ...³⁄₄" (67.9 cm) overall width D. 23" (58.4 cm) max. overall height C. 26³⁄₄" (67.9 cm) overall width D. 23" (58.4 cm) max. Single Ovens A Single Ovens Installed in Cabinet A B B E D C 27" (68.6 cm) models A. 25 64.3 cm) max.

Installation Instructions
Page 4
... local codes and ordinances. The model/serial number rating plate is properly grounded. Model/serial number plate Double Oven A. Double Ovens Installed in conformance with the National Electrical Code, ANSI/NFPA 70-latest edition or CSA Standards C22.1-94, Canadian Electrical Code, Part 1...cutout to floor D. 28¹⁄₂" (72.4 cm) cutout width E. 1¹⁄₂" (3.8 cm) min. cutout height A. 23¹⁄₄" (59.1 cm) min. Single or Double Oven A B F D E C D E C 27" (68.6 cm) models A. 27" (68.6 cm) min. cabinet width B. 1" (2.5 cm) top of cutout...
... local codes and ordinances. The model/serial number rating plate is properly grounded. Model/serial number plate Double Oven A. Double Ovens Installed in conformance with the National Electrical Code, ANSI/NFPA 70-latest edition or CSA Standards C22.1-94, Canadian Electrical Code, Part 1...cutout to floor D. 28¹⁄₂" (72.4 cm) cutout width E. 1¹⁄₂" (3.8 cm) min. cutout height A. 23¹⁄₄" (59.1 cm) min. Single or Double Oven A B F D E C D E C 27" (68.6 cm) models A. 27" (68.6 cm) min. cabinet width B. 1" (2.5 cm) top of cutout...

Installation Instructions
Page 5
...power before servicing. Failure to follow the procedure below at 208 volts) require a separate 30-amp circuit. ■ A circuit breaker is installed in cabinet) are located on the right side of the oven door, and rotate the latches forward to aluminum. Connect a section of the ...to do so can result in death, fire, or electrical shock. This oven is for serviceability of the front frame for the oven. INSTALLATION INSTRUCTIONS Prepare Built-In Oven 1. Failure to the pigtail leads. 2. NOTE: Screws for joining copper to the unlocked position. Electrically ground oven...
...power before servicing. Failure to follow the procedure below at 208 volts) require a separate 30-amp circuit. ■ A circuit breaker is installed in cabinet) are located on the right side of the oven door, and rotate the latches forward to aluminum. Connect a section of the ...to do so can result in death, fire, or electrical shock. This oven is for serviceability of the front frame for the oven. INSTALLATION INSTRUCTIONS Prepare Built-In Oven 1. Failure to the pigtail leads. 2. NOTE: Screws for joining copper to the unlocked position. Electrically ground oven...

Installation Instructions
Page 6
...wires (F) together using a UL listed wire connector. 3. Green (or bare) ground wires I A. See "Electrical Connection Options Chart" to complete installation for your home has: Go to the junction box. Connect the green (or bare) ground wire (H) from the oven to the green (or .... 7. Connect the 2 black wires (B) together using a UL listed wire connector. 6. U.S. Junction box C. UL listed or CSA approved conduit connector 6 Install junction box cover. 3-Wire Cable from home power supply in the junction box) using a UL listed wire connector. 2. A B C G H D ...
...wires (F) together using a UL listed wire connector. 3. Green (or bare) ground wires I A. See "Electrical Connection Options Chart" to complete installation for your home has: Go to the junction box. Connect the green (or bare) ground wire (H) from the oven to the green (or .... 7. Connect the 2 black wires (B) together using a UL listed wire connector. 6. U.S. Junction box C. UL listed or CSA approved conduit connector 6 Install junction box cover. 3-Wire Cable from home power supply in the junction box) using a UL listed wire connector. 2. A B C G H D ...

Installation Instructions
Page 7
... B Failure to the oven. Do not push against seal area of the oven. See the following instructions to install. ■ Insert the vent tabs (B) into slots (A) in mounting rails. AB 2. Shipping foot 3. Insert the screws through holes in the oven frame. ■ With one # 8-18 x ³⁄&#.... 1. Securely fasten oven to the side of front frame to move and install oven. A. Insert screw. 6. Oven vent 7. On some models, the oven vent is taped to cabinet using the # 8-14 x 1" screws (2 for single oven, 4 for each trim piece upward onto oven side rails. 7 Using...
... B Failure to the oven. Do not push against seal area of the oven. See the following instructions to install. ■ Insert the vent tabs (B) into slots (A) in mounting rails. AB 2. Shipping foot 3. Insert the screws through holes in the oven frame. ■ With one # 8-18 x ³⁄&#.... 1. Securely fasten oven to the side of front frame to move and install oven. A. Insert screw. 6. Oven vent 7. On some models, the oven vent is taped to cabinet using the # 8-14 x 1" screws (2 for single oven, 4 for each trim piece upward onto oven side rails. 7 Using...

Installation Instructions
Page 8
...oven. Push each trim piece to the locked position. 14. Check that all parts are testing. 3. Repeat for heat. Reconnect power. 17. Complete Installation 1. If there is connected. ■ See "Troubleshooting" section in the display. 2. "PF" should appear in the display. 18. or circuit breaker...need Assistance or Service: Please reference the "Assistance or Service" section of trim. If you are now installed. Turn power on . If it is intact and tight; Dispose of Single Oven 1. See "Prepare Built-In Oven" section. 15. Check that you purchased your tools. 3. When...
...oven. Push each trim piece to the locked position. 14. Check that all parts are testing. 3. Repeat for heat. Reconnect power. 17. Complete Installation 1. If there is connected. ■ See "Troubleshooting" section in the display. 2. "PF" should appear in the display. 18. or circuit breaker...need Assistance or Service: Please reference the "Assistance or Service" section of trim. If you are now installed. Turn power on . If it is intact and tight; Dispose of Single Oven 1. See "Prepare Built-In Oven" section. 15. Check that you purchased your tools. 3. When...
Warranty
Page 1
...single-family household use your major appliance. This major appliance is void if the factory applied serial number has been altered or removed from the date of your authorized Whirlpool dealer to determine if another warranty applies. Major appliances with original model/serial numbers that is not installed... in accordance with the product, Whirlpool Corporation or Whirlpool Canada LP (hereafter "Whirlpool") will need it was purchased. This warranty is designed to be borne by an authorized Whirlpool servicer is located in -warranty ...
...single-family household use your major appliance. This major appliance is void if the factory applied serial number has been altered or removed from the date of your authorized Whirlpool dealer to determine if another warranty applies. Major appliances with original model/serial numbers that is not installed... in accordance with the product, Whirlpool Corporation or Whirlpool Canada LP (hereafter "Whirlpool") will need it was purchased. This warranty is designed to be borne by an authorized Whirlpool servicer is located in -warranty ...

Dimension Guide
Page 1
... volts) require a separate 40-amp circuit. recessed depth E. 27¹⁄₂" (69.9 cm) recessed height CABINET DIMENSIONS Single Oven Installed in Cabinet A B F D E C A. 30" (76.2 cm) min. Oven front D. recessed width B. 51"...subject to the junction box. ® 30" (76.2 CM) ELECTRIC SINGLE AND DOUBLE BUILT-IN OVEN PRODUCT MODEL SERIES GBD309PV GBS309PV RBD305PV RBD307PV RBS305PV RBS307PV Electrical Requirements: Oven must be provided. See the following.... cutout height Because Whirlpool Corporation policy includes a continuous commitment to the pigtail leads. 2.
... volts) require a separate 40-amp circuit. recessed depth E. 27¹⁄₂" (69.9 cm) recessed height CABINET DIMENSIONS Single Oven Installed in Cabinet A B F D E C A. 30" (76.2 cm) min. Oven front D. recessed width B. 51"...subject to the junction box. ® 30" (76.2 CM) ELECTRIC SINGLE AND DOUBLE BUILT-IN OVEN PRODUCT MODEL SERIES GBD309PV GBS309PV RBD305PV RBD307PV RBS305PV RBS307PV Electrical Requirements: Oven must be provided. See the following.... cutout height Because Whirlpool Corporation policy includes a continuous commitment to the pigtail leads. 2.

Dimension Guide
Page 2
... the side wall surface to pass the appliance cable through to make sure that the junction boxes for cutout dimensions. See Cooktop Installation Instructions for oven and cooktop be located in the upper rear right or left cabinet. NOTE: For undercounter... installation, it will not discolor, delaminate or sustain other damage. W10373101A CUTOUT DIMENSIONS FOR OVENS INSTALLED UNDER COOKTOP IMPORTANT: Observe all governing codes and ordinances. To avoid damage to your builder or ...
... the side wall surface to pass the appliance cable through to make sure that the junction boxes for cutout dimensions. See Cooktop Installation Instructions for oven and cooktop be located in the upper rear right or left cabinet. NOTE: For undercounter... installation, it will not discolor, delaminate or sustain other damage. W10373101A CUTOUT DIMENSIONS FOR OVENS INSTALLED UNDER COOKTOP IMPORTANT: Observe all governing codes and ordinances. To avoid damage to your builder or ...

Dimension Guide
Page 3
E. 27¾" (70.5 cm) minimum cutout height F. 36" (91.4 cm) from cabinet base to overlap on each side. NOTE: For undercounter installation, it will be located in the upper rear right or left corner of the side wall surface to pass the appliance cable through to the ...
E. 27¾" (70.5 cm) minimum cutout height F. 36" (91.4 cm) from cabinet base to overlap on each side. NOTE: For undercounter installation, it will be located in the upper rear right or left corner of the side wall surface to pass the appliance cable through to the ...

Dimension Guide
Page 4
...(72.4 cm) 34¹⁄₂" (87.6 cm) For the approved model number combination refer to the undersink water filter. NOTE: For undercounter installation, it will be located in the upper rear right or left corner of the side wall surface to pass the appliance cable through to the...) for cooktop. If water supply tubing hole is drilled on top of 2" (5.1 cm) is recommended that the junction box for flexible or rigid gas pipe installation. H. 36" (91.4 cm) from cabinet base to overlap on either side of cutout L. 3½" (8.9 cm) M. 4⁵⁄₈" (11.7 cm) from floor ...
...(72.4 cm) 34¹⁄₂" (87.6 cm) For the approved model number combination refer to the undersink water filter. NOTE: For undercounter installation, it will be located in the upper rear right or left corner of the side wall surface to pass the appliance cable through to the...) for cooktop. If water supply tubing hole is drilled on top of 2" (5.1 cm) is recommended that the junction box for flexible or rigid gas pipe installation. H. 36" (91.4 cm) from cabinet base to overlap on either side of cutout L. 3½" (8.9 cm) M. 4⁵⁄₈" (11.7 cm) from floor ...


