
User Guide
Page 29
...computer for the first time 52 Opening the display panel 52 Your computer's features and specifications ....53 Turning on the power 54 Using the Toshiba Dual Pointing Device 55 Using the TouchPad 55 Disabling or enabling the Dual Pointing Device.56 Installing a memory module 57 Removing a memory module... an external USB keyboard 73 Connecting an external USB mouse 73 Connecting a printer 74 Setting up a printer 75 Using your computer in tablet mode 76 Using external display devices 78 Directing the display output when you turn on the computer 78 Adjusting the quality of the external...
...computer for the first time 52 Opening the display panel 52 Your computer's features and specifications ....53 Turning on the power 54 Using the Toshiba Dual Pointing Device 55 Using the TouchPad 55 Disabling or enabling the Dual Pointing Device.56 Installing a memory module 57 Removing a memory module... an external USB keyboard 73 Connecting an external USB mouse 73 Connecting a printer 74 Setting up a printer 75 Using your computer in tablet mode 76 Using external display devices 78 Directing the display output when you turn on the computer 78 Adjusting the quality of the external...

User Guide
Page 32
... Uploading and downloading files from the Internet 156 Exploring audio features 157 Using external speakers or headphones..........157 Recording sounds 158 Using a microphone 158 Using tablet mode 159 Preparing to use the tablet 160 Using the Toshiba tablet pen 162
... Uploading and downloading files from the Internet 156 Exploring audio features 157 Using external speakers or headphones..........157 Recording sounds 158 Using a microphone 158 Using tablet mode 159 Preparing to use the tablet 160 Using the Toshiba tablet pen 162
User Guide
Page 34
... mode 187 Mouse Utility 187 TOSHIBA Hardware Setup 188 The Toshiba Rotation Utility 190 Tablet and Pen Settings 192 Cross Menu Utility 193 Creating a New Menu 194 TOSHIBA Tablet Access Code Utility 195 TOSHIBA Zooming Utility 196 TOSHIBA Button Controls 198 CD/DVD Drive Acoustic Silencer 199 TOSHIBA Accessibility 200 Toshiba Mobile Extension 201 TOSHIBA SD Memory Boot Utility 202...
... mode 187 Mouse Utility 187 TOSHIBA Hardware Setup 188 The Toshiba Rotation Utility 190 Tablet and Pen Settings 192 Cross Menu Utility 193 Creating a New Menu 194 TOSHIBA Tablet Access Code Utility 195 TOSHIBA Zooming Utility 196 TOSHIBA Button Controls 198 CD/DVD Drive Acoustic Silencer 199 TOSHIBA Accessibility 200 Toshiba Mobile Extension 201 TOSHIBA SD Memory Boot Utility 202...
User Guide
Page 38
... configurations, prices, system/ component/options availability are designed for a product Series. While Toshiba has made every effort at the time of publication to ensure the accuracy of powerful ...configuration information are all the features and specifications listed or illustrated. With your new Toshiba notebook computer, your computer, or to information can accompany you wherever you go.... about the features and specifications on your particular model, please visit Toshiba's Web site at pcsupport.toshiba.com. 38 For more detailed information about your access to stay ...
... configurations, prices, system/ component/options availability are designed for a product Series. While Toshiba has made every effort at the time of publication to ensure the accuracy of powerful ...configuration information are all the features and specifications listed or illustrated. With your new Toshiba notebook computer, your computer, or to information can accompany you wherever you go.... about the features and specifications on your particular model, please visit Toshiba's Web site at pcsupport.toshiba.com. 38 For more detailed information about your access to stay ...

User Guide
Page 47
... checking for your computer and click Next. Click Next to continue. The first time you turn on your computer, a keyboard, which is used with the tablet pen, appears on your screen. Getting Started Setting up your software. 1 From the welcome screen, click Next to enter the Setup Wizard. 2 Confirm acceptance of...
... checking for your computer and click Next. Click Next to continue. The first time you turn on your computer, a keyboard, which is used with the tablet pen, appears on your screen. Getting Started Setting up your software. 1 From the welcome screen, click Next to enter the Setup Wizard. 2 Confirm acceptance of...
User Guide
Page 53
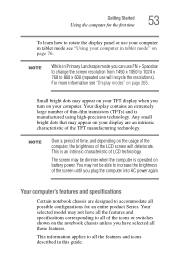
... screen resolution from 1450 x 1050 to 1024 x 768 to all the features and specifications corresponding to 800 x 600 (repeated use your computer in tablet mode see "Display modes" on your computer. You may appear on your TFT display when you have all of LCD technology. Your display contains an...the features and icons described in Primary Landscape mode you plug the computer into AC power again. For more information see "Using your computer in tablet mode" on battery power. Small bright dots may not be dimmer when the computer is operated on page 76. NOTE Over a period of ...
... screen resolution from 1450 x 1050 to 1024 x 768 to all the features and specifications corresponding to 800 x 600 (repeated use your computer in tablet mode see "Display modes" on your computer. You may appear on your TFT display when you have all of LCD technology. Your display contains an...the features and icons described in Primary Landscape mode you plug the computer into AC power again. For more information see "Using your computer in tablet mode" on battery power. Small bright dots may not be dimmer when the computer is operated on page 76. NOTE Over a period of ...

User Guide
Page 59
... cover Sample base of the computer 6 Using a standard Phillips No. 1 screwdriver, unscrew the screw that the computer display is properly closed and is not in tablet mode. Getting Started Installing a memory module 59 4 Close the display panel and remove any cables you turn the computer over, make sure that secures the...
... cover Sample base of the computer 6 Using a standard Phillips No. 1 screwdriver, unscrew the screw that the computer display is properly closed and is not in tablet mode. Getting Started Installing a memory module 59 4 Close the display panel and remove any cables you turn the computer over, make sure that secures the...

User Guide
Page 76
Do not apply excessive force or speed. When rotating the LCD screen of your computer, be sure to use your system in tablet mode, open your computer, carefully rotate the screen clockwise 180 degrees, and fold the screen down on top of your computer's features is a convertible ...display that you are rotating the display in the correct direction. 76 Getting Started Using your computer in tablet mode Using your computer in tablet mode One of the keyboard. If you start to turn the display and it does not rotate easily, stop and verify that allows...
Do not apply excessive force or speed. When rotating the LCD screen of your computer, be sure to use your system in tablet mode, open your computer, carefully rotate the screen clockwise 180 degrees, and fold the screen down on top of your computer's features is a convertible ...display that you are rotating the display in the correct direction. 76 Getting Started Using your computer in tablet mode Using your computer in tablet mode One of the keyboard. If you start to turn the display and it does not rotate easily, stop and verify that allows...

User Guide
Page 77
...159. NOTE Included with them. For more detailed information on using the computer in tablet mode To remove the tablet pen press once on the end of the pen to make Hot Key assignments, access other Toshiba utilities, and create your computer is the Cross Menu application which allows you to extend... it and then pull it out from the right side of the system. Getting Started Using your computer in tablet mode 77 Sample using the computer in...
...159. NOTE Included with them. For more detailed information on using the computer in tablet mode To remove the tablet pen press once on the end of the pen to make Hot Key assignments, access other Toshiba utilities, and create your computer is the Cross Menu application which allows you to extend... it and then pull it out from the right side of the system. Getting Started Using your computer in tablet mode 77 Sample using the computer in...

User Guide
Page 80
NOTE The computer must be tilted to be in tablet mode, you press the ESC/Display Rotation button. If the computer is similar to a joystick. To scroll between menu options on the Cross-Functional menu, ...
NOTE The computer must be tilted to be in tablet mode, you press the ESC/Display Rotation button. If the computer is similar to a joystick. To scroll between menu options on the Cross-Functional menu, ...

User Guide
Page 82
...; If you have work in progress and you are not connected to a network, use the Hibernate command to save your selection. The Windows® XP Tablet PC Edition You can change the display output with the LCD Display Stretch option enabled and the Display area (resolution) set to 800 x 600. Turning...
...; If you have work in progress and you are not connected to a network, use the Hibernate command to save your selection. The Windows® XP Tablet PC Edition You can change the display output with the LCD Display Stretch option enabled and the Display area (resolution) set to 800 x 600. Turning...

User Guide
Page 98
98 Learning the Basics Printing your work Verify that the Windows® XP Tablet PC Edition operating system is not on, turn it . The program displays a Print dialog box. 3 Click OK to handle your file correctly. For information on ...
98 Learning the Basics Printing your work Verify that the Windows® XP Tablet PC Edition operating system is not on, turn it . The program displays a Print dialog box. 3 Click OK to handle your file correctly. For information on ...

User Guide
Page 108
The Windows® XP Tablet PC Edition operating system uses Turn Off if you were previously using any of these options to consider when choosing Turn Off or Shut down: &#...
The Windows® XP Tablet PC Edition operating system uses Turn Off if you were previously using any of these options to consider when choosing Turn Off or Shut down: &#...

User Guide
Page 133
133 Mobile Computing Changing the battery 4 Turn the computer over , make sure that the computer display is properly closed and is not in tablet mode. Before you . Sample unlocking the battery 6 Slide the release latch to the screen. 5 Slide the battery lock away from you turn the computer over . Setting the computer down on the display may cause damage to the left. Releasing the battery
133 Mobile Computing Changing the battery 4 Turn the computer over , make sure that the computer display is properly closed and is not in tablet mode. Before you . Sample unlocking the battery 6 Slide the release latch to the screen. 5 Slide the battery lock away from you turn the computer over . Setting the computer down on the display may cause damage to the left. Releasing the battery

User Guide
Page 140
Windows® XP special features The Windows® XP Tablet PC Edition operating system offers you several new features and enhancements, including: ❖ New system file protection ❖ A system restore function which allows you will ...
Windows® XP special features The Windows® XP Tablet PC Edition operating system offers you several new features and enhancements, including: ❖ New system file protection ❖ A system restore function which allows you will ...

User Guide
Page 142
... on Properties. 142 Exploring Your Computer's Features Personalizing your desktop To customize your desktop. Bringing the world to your desktop With the Windows® Professional Tablet Edition operating system you can set up your desktop is to turn on the Web content interface: 1 Point to an empty space on the desktop...
... on Properties. 142 Exploring Your Computer's Features Personalizing your desktop To customize your desktop. Bringing the world to your desktop With the Windows® Professional Tablet Edition operating system you can set up your desktop is to turn on the Web content interface: 1 Point to an empty space on the desktop...

User Guide
Page 151
... Adapter and click Disable. 6 Click Yes to a network, it waits for communications Using the Ethernet LAN Port If your operating system is Windows® XP Tablet PC Edition, you can connect your computer starts, the Windows® operating system attempts to contact a Dynamic Host Configuration Protocol (DHCP) server. Using Wireless LAN...
... Adapter and click Disable. 6 Click Yes to a network, it waits for communications Using the Ethernet LAN Port If your operating system is Windows® XP Tablet PC Edition, you can connect your computer starts, the Windows® operating system attempts to contact a Dynamic Host Configuration Protocol (DHCP) server. Using Wireless LAN...

User Guide
Page 159
... One of the system. For more information on those applications, see the documentation provided with the tablet feature of your computer might be set to Mute. Your computer came with applications already installed specifically designed to use any other tool ...damage the display. Use the included electronic pen to All Programs, Accessories, Entertainment, and then click Volume Control. 159 Exploring Your Computer's Features Using tablet mode 3 Click the Record button and speak normally into the microphone. To check this, click Start, point to write on your computer's features ...
... One of the system. For more information on those applications, see the documentation provided with the tablet feature of your computer might be set to Mute. Your computer came with applications already installed specifically designed to use any other tool ...damage the display. Use the included electronic pen to All Programs, Accessories, Entertainment, and then click Volume Control. 159 Exploring Your Computer's Features Using tablet mode 3 Click the Record button and speak normally into the microphone. To check this, click Start, point to write on your computer's features ...

User Guide
Page 160
... from the keyboard. Do not apply excessive force or speed. Sample rotating the display panel clockwise 180o 160 Exploring Your Computer's Features Using tablet mode Preparing to use the tablet 1 Press the display panel release button and lift the display panel. 2 Slide the power switch to the right and hold it does...
... from the keyboard. Do not apply excessive force or speed. Sample rotating the display panel clockwise 180o 160 Exploring Your Computer's Features Using tablet mode Preparing to use the tablet 1 Press the display panel release button and lift the display panel. 2 Slide the power switch to the right and hold it does...

User Guide
Page 161
For more information on changing tablet screen settings see "The Toshiba Rotation Utility" on an external monitor in tablet position. The display latch will automatically rotate to an external monitor, use the Cross Menu button (the Cross-Functional button) and select the .... 6 To send the video to primary portrait view. Any other orientation will display the external video resolution incorrectly. 161 Exploring Your Computer's Features Using tablet mode 4 Rotate the display latch so it points toward the back of the display panel. 5 Fold the display panel down flat By default, the...
For more information on changing tablet screen settings see "The Toshiba Rotation Utility" on an external monitor in tablet position. The display latch will automatically rotate to an external monitor, use the Cross Menu button (the Cross-Functional button) and select the .... 6 To send the video to primary portrait view. Any other orientation will display the external video resolution incorrectly. 161 Exploring Your Computer's Features Using tablet mode 4 Rotate the display latch so it points toward the back of the display panel. 5 Fold the display panel down flat By default, the...

