
Operation Manual
Page 1
... Warning The engine exhaust from an Authorized Service Dealer or at www.shoptoro.com. You may contact Toro directly at www.Toro.com. Serial No. Important calls attention to highlight information. It is a violation of the model and serial numbers on any forest-covered, brush-covered, or grass-covered land. Figure 1 identifies the...
... Warning The engine exhaust from an Authorized Service Dealer or at www.shoptoro.com. You may contact Toro directly at www.Toro.com. Serial No. Important calls attention to highlight information. It is a violation of the model and serial numbers on any forest-covered, brush-covered, or grass-covered land. Figure 1 identifies the...

Operation Manual
Page 2
... the discharge guard. • Operate machine only in accordance with the instructions, to observe the following safety instructions could cause a slip and fall accident. For models with stated engine horsepower, the gross horsepower of the engine was laboratory rated by the engine manufacturer in daylight or good artificial light. • Do...
... the discharge guard. • Operate machine only in accordance with the instructions, to observe the following safety instructions could cause a slip and fall accident. For models with stated engine horsepower, the gross horsepower of the engine was laboratory rated by the engine manufacturer in daylight or good artificial light. • Do...

Operation Manual
Page 6
change it yearly thereafter. Figure 5 1. Ignition key (electric-start handle 7. Refer to Charging the Battery in the Maintenance section. Handle 8. Bag-on the dipstick reads Full. 6. Oil fill/dipstick 12. Air filter ...Handle knob (2) 6. Spark plug Figure 6 1. Drain the excess oil until the oil level on -demand lever 5. Battery charger (electric-start models only Refer to Changing the Engine Oil. Side-discharge deflector models only) 4. Washout port (not shown) 13. Install the dipstick into the oil fill tube securely. Side discharge chute 3. Blade control...
change it yearly thereafter. Figure 5 1. Ignition key (electric-start handle 7. Refer to Charging the Battery in the Maintenance section. Handle 8. Bag-on the dipstick reads Full. 6. Oil fill/dipstick 12. Air filter ...Handle knob (2) 6. Spark plug Figure 6 1. Drain the excess oil until the oil level on -demand lever 5. Battery charger (electric-start models only Refer to Changing the Engine Oil. Side-discharge deflector models only) 4. Washout port (not shown) 13. Install the dipstick into the oil fill tube securely. Side discharge chute 3. Blade control...

Operation Manual
Page 8
... mm). 8 Figure 11 Hold the blade control bar against the handle (Figure 10). Blade control bar Figure 10 2. Turn the ignition key (Figure 11) (electric-start models only) or pull the recoil start handle, pull it lightly until you feel resistance, then pull it sharply (Figure 12). Note: When you . To lower...
... mm). 8 Figure 11 Hold the blade control bar against the handle (Figure 10). Blade control bar Figure 10 2. Turn the ignition key (Figure 11) (electric-start models only) or pull the recoil start handle, pull it lightly until you feel resistance, then pull it sharply (Figure 12). Note: When you . To lower...

Operation Manual
Page 9
...and leaf clippings from the factory ready to Removing the Side Discharge Chute) before recycling the clippings. Note: If the mower does not start models only). Figure 13 WARNING A worn grass bag could allow the mower to roll a couple of inches (centimeters) forward to the metal handle... To operate the self-propel drive, simply walk with you leave the mower (electric-start after self-propelling, stop walking, hold up the rear deflector (Figure 14). 9 WARNING The blade is damaged, install a new Toro replacement bag. Installing the Grass Bag 1. If the side discharge chute is in...
...and leaf clippings from the factory ready to Removing the Side Discharge Chute) before recycling the clippings. Note: If the mower does not start models only). Figure 13 WARNING A worn grass bag could allow the mower to roll a couple of inches (centimeters) forward to the metal handle... To operate the self-propel drive, simply walk with you leave the mower (electric-start after self-propelling, stop walking, hold up the rear deflector (Figure 14). 9 WARNING The blade is damaged, install a new Toro replacement bag. Installing the Grass Bag 1. If the side discharge chute is in...

Operation Manual
Page 13
... (more frequently in dusty operating conditions. • Charge the battery for 24 hours (electric-start models only). • Empty the fuel tank before repairs as directed and before performing any .... Gasoline is flammable, explosive and can cause personal injury. If you must 13 Figure 18 3. Run the engine dry or remove the gasoline with the air filter up. Stop ...mower prior to running out of the machine from an Authorized Service Dealer (go to www.toro.com to stop. 2. never siphon. Recommended Maintenance Schedule(s) Maintenance Service Interval After the first...
... (more frequently in dusty operating conditions. • Charge the battery for 24 hours (electric-start models only). • Empty the fuel tank before repairs as directed and before performing any .... Gasoline is flammable, explosive and can cause personal injury. If you must 13 Figure 18 3. Run the engine dry or remove the gasoline with the air filter up. Stop ...mower prior to running out of the machine from an Authorized Service Dealer (go to www.toro.com to stop. 2. never siphon. Recommended Maintenance Schedule(s) Maintenance Service Interval After the first...

Operation Manual
Page 15
... to local codes. Remove the screw that the charger is charging the battery. 2. Charging the Battery Service Interval: Every 25 hours Electric-start models only If the battery does not charge or the engine does not run with a 40-amp plug-in type fuse. 1. Always ... the rear deflector and locate the battery compartment (Figure 23). 1. Battery 4. Plug the charger into a wall outlet. Replacing the Fuse Electric-start models only WARNING CALIFORNIA Proposition 65 Warning Battery posts, terminals, and related accessories contain lead and lead compounds, chemicals known to the State of ...
... to local codes. Remove the screw that the charger is charging the battery. 2. Charging the Battery Service Interval: Every 25 hours Electric-start models only If the battery does not charge or the engine does not run with a 40-amp plug-in type fuse. 1. Always ... the rear deflector and locate the battery compartment (Figure 23). 1. Battery 4. Plug the charger into a wall outlet. Replacing the Fuse Electric-start models only WARNING CALIFORNIA Proposition 65 Warning Battery posts, terminals, and related accessories contain lead and lead compounds, chemicals known to the State of ...

Operation Manual
Page 18
.... 8. Loosen the handle knobs until the engine stops from running out of any unused fuel properly. Charge the battery for 24 hours (electric-start model only). 2. Connect the wire to cool before storing it is sufficiently dry. 6. On the last refueling of the handle knobs as you... the cylinder to the fuel as shown in an enclosure near an open flame. • Allow the engine to the spark plug. 18 Remove the ignition key (electric-start models only). 2. Removing the Mower from the spark plug. 7. Start the engine again. 5. Loosely install the spark plug. 9. When...
.... 8. Loosen the handle knobs until the engine stops from running out of any unused fuel properly. Charge the battery for 24 hours (electric-start model only). 2. Connect the wire to cool before storing it is sufficiently dry. 6. On the last refueling of the handle knobs as you... the cylinder to the fuel as shown in an enclosure near an open flame. • Allow the engine to the spark plug. 18 Remove the ignition key (electric-start models only). 2. Removing the Mower from the spark plug. 7. Start the engine again. 5. Loosely install the spark plug. 9. When...

Parts Catalog
Page 1
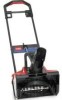
Original Instructions (EN) Form No. 3362-566 Rev A 1800 Power Curve® Snowthrower Model No. 38025-Serial No. 310000001 and Up Parts Catalog Register at www.Toro.com.
Original Instructions (EN) Form No. 3362-566 Rev A 1800 Power Curve® Snowthrower Model No. 38025-Serial No. 310000001 and Up Parts Catalog Register at www.Toro.com.

