
Operation Manual
Page 1
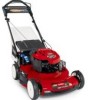
This rotary-blade, walk-behind lawn mower is intended to be used by the safety alert symbol (Figure 2), which signals a hazard that may have the model and serial numbers ...Warning The engine exhaust from an Authorized Service Dealer or at www.Toro.com. Figure 1 identifies the location of the model and serial numbers on residential properties. Serial No. Other states or ...a spark arrester muffler. 22in Recycler® Lawn Mower Model No. 20332-Serial No. 312000001 and Up Model No. 20334-Serial No. 312000001 and Up Model No. 20352-Serial No. 312000001 and Up Form No. 3371...
This rotary-blade, walk-behind lawn mower is intended to be used by the safety alert symbol (Figure 2), which signals a hazard that may have the model and serial numbers ...Warning The engine exhaust from an Authorized Service Dealer or at www.Toro.com. Figure 1 identifies the location of the model and serial numbers on residential properties. Serial No. Other states or ...a spark arrester muffler. 22in Recycler® Lawn Mower Model No. 20332-Serial No. 312000001 and Up Model No. 20334-Serial No. 312000001 and Up Model No. 20352-Serial No. 312000001 and Up Form No. 3371...

Operation Manual
Page 2
... the cause immediately. Stop machine if anyone . walk; Operation on all instructions on this potential, comply with SAE J1940. For models with stated engine horsepower, the gross horsepower of ... • Read, understand, and follow this machine. • Clear the area of lawn mower will be thrown by the manufacturer. Keep clear of the discharge opening at the time of your... of accessories. Read and understand the contents of slopes; Failure to potential personal injury hazards. Avoid discharging material against a wall or obstruction. Material may be sure of production...
... the cause immediately. Stop machine if anyone . walk; Operation on all instructions on this potential, comply with SAE J1940. For models with stated engine horsepower, the gross horsepower of ... • Read, understand, and follow this machine. • Clear the area of lawn mower will be thrown by the manufacturer. Keep clear of the discharge opening at the time of your... of accessories. Read and understand the contents of slopes; Failure to potential personal injury hazards. Avoid discharging material against a wall or obstruction. Material may be sure of production...

Operation Manual
Page 6
... Charging the Battery in the Maintenance section. Handle 8. Oil fill/dipstick 12. Recoil start models only) 6 Cutting height lever (4) 2. Side-discharge deflector models only) 4. Handle knob (2) 6. Battery charger (electric-start handle 7. Spark plug Figure 6 1. Figure 5 1. Ignition key (electric-start models only Refer to Changing the Engine Oil. Washout port (not shown) 13. Bag...
... Charging the Battery in the Maintenance section. Handle 8. Oil fill/dipstick 12. Recoil start models only) 6 Cutting height lever (4) 2. Side-discharge deflector models only) 4. Handle knob (2) 6. Battery charger (electric-start handle 7. Spark plug Figure 6 1. Figure 5 1. Ignition key (electric-start models only Refer to Changing the Engine Oil. Washout port (not shown) 13. Bag...

Operation Manual
Page 8
Starting the Engine 1. To lower the mower, move the front cutting height levers rearward and the rear cutting height levers forward. Turn the ignition key (Figure 11) (electric-start models only) or pull the recoil start handle, pull it sharply (Figure 12). Raise the mower Figure 9 2. and 4 inches (102 ...mm). 8 Figure 11 Note: To raise the mower, move the front cutting height levers forward and the rear ...
Starting the Engine 1. To lower the mower, move the front cutting height levers rearward and the rear cutting height levers forward. Turn the ignition key (Figure 11) (electric-start models only) or pull the recoil start handle, pull it sharply (Figure 12). Raise the mower Figure 9 2. and 4 inches (102 ...mm). 8 Figure 11 Note: To raise the mower, move the front cutting height levers forward and the rear ...

Operation Manual
Page 9
...a new Toro replacement bag. If the side-discharge chute is in serious personal injury or death to Removing the Side Discharge Chute) before leaving the operating position. contacting the blade can also try reaching just under the personal pace handle to the metal handle and push the mower forward a ...the mower, remove it (refer to disengage the wheel drive. If the side discharge chute is sharp; Check the grass bag frequently. Note: If the mower does not start models only). Note: Remove the ignition key when you (Figure 13). Figure 12 Stopping the Engine To stop walking,...
...a new Toro replacement bag. If the side-discharge chute is in serious personal injury or death to Removing the Side Discharge Chute) before leaving the operating position. contacting the blade can also try reaching just under the personal pace handle to the metal handle and push the mower forward a ...the mower, remove it (refer to disengage the wheel drive. If the side discharge chute is sharp; Check the grass bag frequently. Note: If the mower does not start models only). Note: Remove the ignition key when you (Figure 13). Figure 12 Stopping the Engine To stop walking,...

Operation Manual
Page 13
...). • Clean the air cooling system; Gasoline is flammable, explosive and can cause personal injury. Recommended Maintenance Schedule(s) Maintenance Service Interval After the first 5 hours Before each use... the mower. • Replace the air filter; tip the mower prior to running out of the machine from an Authorized Service Dealer (go to www.toro.com to stop. 2. WARNING Tipping the mower may ...allow the fuel tank to your engine operator's manual for 24 hours (electric-start models only). • Empty the fuel tank before repairs as directed and before performing...
...). • Clean the air cooling system; Gasoline is flammable, explosive and can cause personal injury. Recommended Maintenance Schedule(s) Maintenance Service Interval After the first 5 hours Before each use... the mower. • Replace the air filter; tip the mower prior to running out of the machine from an Authorized Service Dealer (go to www.toro.com to stop. 2. WARNING Tipping the mower may ...allow the fuel tank to your engine operator's manual for 24 hours (electric-start models only). • Empty the fuel tank before repairs as directed and before performing...

Operation Manual
Page 15
...Raise the rear deflector and locate the battery compartment (Figure 23). 1. Battery compartment Figure 22 2. Connect the charger to the mower wire harness located below the ignition key (Figure 22). • A green light indicates that the charger is fully charged or ...a sheltered area and charge the battery at room temperature (70° or 22° C) whenever possible. 1. Replacing the Fuse Electric-start models only WARNING CALIFORNIA Proposition 65 Warning Battery posts, terminals, and related accessories contain lead and lead compounds, chemicals known to the State of the lead...
...Raise the rear deflector and locate the battery compartment (Figure 23). 1. Battery compartment Figure 22 2. Connect the charger to the mower wire harness located below the ignition key (Figure 22). • A green light indicates that the charger is fully charged or ...a sheltered area and charge the battery at room temperature (70° or 22° C) whenever possible. 1. Replacing the Fuse Electric-start models only WARNING CALIFORNIA Proposition 65 Warning Battery posts, terminals, and related accessories contain lead and lead compounds, chemicals known to the State of the lead...

Operation Manual
Page 18
...4. Connect the wire to the spark plug. 18 Dispose of the handle knobs as you must store the mower in your automobile. Run the mower until you can no longer start models only). 2. Important: Route the cables to the outside of any unused fuel properly. To unfold the handle.... 6. When you must charge the battery every 90 days (electric-start model only). 2. If you can move the upper handle freely. 3. Loosen the handle knobs until the engine stops from Storage 1. Preparing the Mower for Storage WARNING Gasoline vapors can damage the cables, causing an unsafe operating...
...4. Connect the wire to the spark plug. 18 Dispose of the handle knobs as you must store the mower in your automobile. Run the mower until you can no longer start models only). 2. Important: Route the cables to the outside of any unused fuel properly. To unfold the handle.... 6. When you must charge the battery every 90 days (electric-start model only). 2. If you can move the upper handle freely. 3. Loosen the handle knobs until the engine stops from Storage 1. Preparing the Mower for Storage WARNING Gasoline vapors can damage the cables, causing an unsafe operating...

Parts Catalog
Page 1
Original Instructions (EN) *3371-852* B Form No. 3371-852 Rev B 22in Recycler® Lawn Mower Model No. 20352-Serial No. 312000001 and Up Parts Catalog Register at www.Toro.com.
Original Instructions (EN) *3371-852* B Form No. 3371-852 Rev B 22in Recycler® Lawn Mower Model No. 20352-Serial No. 312000001 and Up Parts Catalog Register at www.Toro.com.


