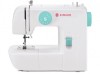
Instruction Manual and Troubleshooting Guide
Page 4
... the cord. - if it must be replaced by the manufacturer or its service agent or a similarly qualified person, in the needle area, such as threading needle, changing needle, threading bobbin, or changing presser foot, etc. - Always use bent needles. - Do not unplug by pulling on the foot control. - It may deflect the...
Instruction Manual and Troubleshooting Guide
Page 16
...the Machine...2/4 Connecting Machine to Power Source ...6 Two Step Presser Foot Lifter...8 Accessories ...9 Threading the Machine Winding the Bobbin ...11 Inserting the Bobbin ...13 Threading the Upper Thread ...15 Raising the Bobbin Thread...17 Thread Tension ...19 Sewing How to Choose Your Pattern...21 Sewing Straight Stitch ...23 Reverse Sewing/... Removing the Work/ Cutting the Thread 25 Blind Hem...27 Sew 4-step Buttonholes ...29 Sewing on Buttons ...31 Zippers and piping...33 Free Motion Darning, ...
Instruction Manual and Troubleshooting Guide
Page 19
Thread cutter 9 5. Bobbin winder stopper 5 10. Presser foot 2 6. Removable extension table/ accessory box 4 8. Pattern selector dial 6 11. Face plate 8 1 4. Needle plate 3 10 7. Reverse sewing lever 7 2 Thread guide 11 9. EN Principal Parts of the Machine 1. Thread take-up lever 2. Thread tension dial 3.
Instruction Manual and Troubleshooting Guide
Page 21
Handle 13. Handwheel 13 18 16. Spool pins 12 15. Foot control 19 21. Bobbin thread guide 15 19. Power cord 16 17 20 21 4 Bobbin winder spindle 14. Presser foot lifter 20. EN Principal Parts of the Machine 12. Main plug socket 14 18. Power switch 17.
Instruction Manual and Troubleshooting Guide
Page 28
...rotates slowly. Press the pedal again. Release the thread and cut thread. (8) - Release the pedal and cut as close as illustrated and place on foot control pedal. (7) - Thread bobbin as possible to left (sewing position). 6 11 2 4 5 7 8 9 Step on spindle. (4) - Wind thread clockwise around bobbin winder tension discs. (3) - ... in "bobbin winding" 3 position, the machine will not sew and the hand wheel will not turn. Place the thread and spool pin felt (a) onto the spool pin. (1) - To start sewing, push the bobbin winder spindle to right. (5) - Hold...
Instruction Manual and Troubleshooting Guide
Page 30
... the bobbin case into place (4). Remove the extension table, then open hinged latch. (5) - Hold the bobbin case by the open the hinged cover. (1) - Pull the thread through the slit and under the finger, while holding the bobbin down in the case until... thread clicks into the shuttle, so that the thread runs in a clockwise direction (arrow). (3) - Leave a 6 inch tail of thread. - a - Pull the bobbin case tab (a) and remove the bobbin case. (2) - EN Inserting the Bobbin When inserting or removing the...
Instruction Manual and Troubleshooting Guide
Page 32
... process it is strongly suggested you turn off the power before threading. - Draw thread from right to left channel. (5) During this movement pass thread from spool through the slotted eye of thread to length with built in thread cutter. (8) 15 Now pass thread behind the thin wire needle clamp guide (7) and then down ...right channel and up left through the thread guide to the upper thread guide. (4) - Raise the presser foot to release the tension discs. (2) Note: For safety, it is important to carry out correctly as by raising...
Instruction Manual and Troubleshooting Guide
Page 34
Turn the handwheel (1) towards you (counterclockwise) lowering, then raising needle. Note: If it is difficult to raise the bobbin thread, check to make sure the thread is not trapped by the hinged cover or the Removable Extension Table. 1 Gently pull on the upper thread to bring the bobbin thread up through the needle plate hole. (2) Lay both threads to the back under the presser foot. (3) 2 3 17 EN Raising the Bobbin Thread Hold the upper thread with the left hand.
Instruction Manual and Troubleshooting Guide
Page 36
...A balanced tension (identical stitches both top and bottom) A is correct, the thread will drop too much. Normal thread tension for all sewing will always obtain a nicer stitch and less fabric puckering when the upper thread appears on the bottom side of the bobbin case. Turn 4 dial to lower... no single tension setting appropriate for straight stitch sewing. For zig zag and decorative sewing stitch functions, thread tension should generally be between "3" and "5". - Thread tension too loose for straight stitch sewing. - If the tension is too loose, it by about ...