

VPC-FH1 Owners Manual English
Page 3
... be recycled and/or reused. This will be disposed of them correctly at a certain concentration. SANYO FISHER Sales (Europe) GmbH Stahlgruberring 4, D-81829 München, Germany SANYO Electric Co., Ltd. 1-1, Sanyo-cho, Daito City, Osaka 574-8534, Japan FOR RUSSIAN USERS This product is certified by the... Cd: cadmium, Pb: lead In the European Union there are separate collection systems for used electrical and electronic equipment, batteries and accumulators. Note: If a chemical symbol is printed beneath the symbol mark, this chemical symbol means that electrical and electronic equipment...
... be recycled and/or reused. This will be disposed of them correctly at a certain concentration. SANYO FISHER Sales (Europe) GmbH Stahlgruberring 4, D-81829 München, Germany SANYO Electric Co., Ltd. 1-1, Sanyo-cho, Daito City, Osaka 574-8534, Japan FOR RUSSIAN USERS This product is certified by the... Cd: cadmium, Pb: lead In the European Union there are separate collection systems for used electrical and electronic equipment, batteries and accumulators. Note: If a chemical symbol is printed beneath the symbol mark, this chemical symbol means that electrical and electronic equipment...

VPC-FH1 Owners Manual English
Page 7
... to the Playback Screen. 2 Select the image to play back. REC/PLAY button SET button 2009.12.24 18:41 Full-HD 6.5MB OK 100-0006 00:00:05 Orange frame Remaining battery power idication English vi Before capturing those important shots, be sure to first take a test shot to confirm that your... camera is set up or down to move the orange frame to the image you wish to play back. h Toggle the SET button left, right, up and ready to go i Sanyo...
... to the Playback Screen. 2 Select the image to play back. REC/PLAY button SET button 2009.12.24 18:41 Full-HD 6.5MB OK 100-0006 00:00:05 Orange frame Remaining battery power idication English vi Before capturing those important shots, be sure to first take a test shot to confirm that your... camera is set up or down to move the orange frame to the image you wish to play back. h Toggle the SET button left, right, up and ready to go i Sanyo...
VPC-FH1 Owners Manual English
Page 22
... be used with this camera 16 What "card" means in this manual 16 GETTING THE MOST OUT OF YOUR CAMERA 17 High-quality images with "Full High Definition 17 Includes SIMPLE mode for quick-and-easy operation 18 Image stabilizer for sharp pictures 18 Sharp face shots 19 Xacti Library feature... NAMES 22 Camera 22 Remote control unit 24 INSTALLING THE CARD 25 PREPARING THE REMOTE CONTROL UNIT 27 Prepare the battery 27 How to use the remote control unit 28 CHARGING THE BATTERY PACK 30 About recharging 34 About the temperature alert icon 34 TURNING THE CAMERA ON AND OFF 35 Turning...
... be used with this camera 16 What "card" means in this manual 16 GETTING THE MOST OUT OF YOUR CAMERA 17 High-quality images with "Full High Definition 17 Includes SIMPLE mode for quick-and-easy operation 18 Image stabilizer for sharp pictures 18 Sharp face shots 19 Xacti Library feature... NAMES 22 Camera 22 Remote control unit 24 INSTALLING THE CARD 25 PREPARING THE REMOTE CONTROL UNIT 27 Prepare the battery 27 How to use the remote control unit 28 CHARGING THE BATTERY PACK 30 About recharging 34 About the temperature alert icon 34 TURNING THE CAMERA ON AND OFF 35 Turning...

VPC-FH1 Owners Manual English
Page 25
... time 140 For audio recordings 141 CHECKING THE REMAINING BATTERY PACK CHARGE 142 „ OTHER DEVICES AND CONNECTIONS CONNECTING TO A TV CONNECTING TO A STANDARD VIDEO INPUT TERMINAL ..........144 ENJOY HIGHER IMAGE QUALITY 145 Connect to the S-VIDEO terminal 145 Connect to the 480p/720p/1080i/1080p terminal 146 Connecting to the HDMI terminal 147...
... time 140 For audio recordings 141 CHECKING THE REMAINING BATTERY PACK CHARGE 142 „ OTHER DEVICES AND CONNECTIONS CONNECTING TO A TV CONNECTING TO A STANDARD VIDEO INPUT TERMINAL ..........144 ENJOY HIGHER IMAGE QUALITY 145 Connect to the S-VIDEO terminal 145 Connect to the 480p/720p/1080i/1080p terminal 146 Connecting to the HDMI terminal 147...

VPC-FH1 Owners Manual English
Page 26
... QUESTIONS 153 TROUBLESHOOTING 161 Camera 161 Notes regarding the Scene Select feature and filters 172 SPECIFICATIONS 174 Camera 174 Camera connectors 178 Battery life 179 Possible No. of Images/Possible Shooting Time/ Possible Recording Time 180 Remote control unit 181 Concerning the multi-indicator 182... Supplied AC adaptor 183 Supplied Li-ion battery pack 183 Others 184 Before capturing those important shots, be sure to first take a test shot to comfirm that your camera is...
... QUESTIONS 153 TROUBLESHOOTING 161 Camera 161 Notes regarding the Scene Select feature and filters 172 SPECIFICATIONS 174 Camera 174 Camera connectors 178 Battery life 179 Possible No. of Images/Possible Shooting Time/ Possible Recording Time 180 Remote control unit 181 Concerning the multi-indicator 182... Supplied AC adaptor 183 Supplied Li-ion battery pack 183 Others 184 Before capturing those important shots, be sure to first take a test shot to comfirm that your camera is...

VPC-FH1 Owners Manual English
Page 32
CHECKING THE INCLUDED ACCESSORIES i Grip belt (page 13): 1 i Xacti Software CD (CD-ROM) (page 4 in the Xacti Software CD INSTRUCTION MANUAL): 1 i Li-ion battery pack (page 31): 1 i Dedicated S-AV interface cable (pages 144 and 145): 1 i Dedicated USB interface cable (page 7 in the Xacti Software CD INSTRUCTION MANUAL): 1 i Dedicated component cable (page 146): 1 i AC adaptor and power cord (page 32): 1 11 English
CHECKING THE INCLUDED ACCESSORIES i Grip belt (page 13): 1 i Xacti Software CD (CD-ROM) (page 4 in the Xacti Software CD INSTRUCTION MANUAL): 1 i Li-ion battery pack (page 31): 1 i Dedicated S-AV interface cable (pages 144 and 145): 1 i Dedicated USB interface cable (page 7 in the Xacti Software CD INSTRUCTION MANUAL): 1 i Dedicated component cable (page 146): 1 i AC adaptor and power cord (page 32): 1 11 English

VPC-FH1 Owners Manual English
Page 33
The lithium battery used in this booklet carefully before using the camera. i Xacti Library Instruction Manual English 12 i Remote control unit (pages 24, 27 to 29 and 72): 1 ...
The lithium battery used in this booklet carefully before using the camera. i Xacti Library Instruction Manual English 12 i Remote control unit (pages 24, 27 to 29 and 72): 1 ...

VPC-FH1 Owners Manual English
Page 36
...your camera lens to a wide-angle lens. i Filter Set VCP-F03SET C-PL filter and lens protector set. 15 English i Lithium-ion Battery Charger VAR-L50 Battery charger for the supplied or separately sold accessories i Mini HDMI cable VCP-HDMI02 Cable for connecting to a telephoto lens. i Wide Conversion ...L07W1 Converts your camera lens to the HDMI terminal on the camera. ABOUT THE SEPARATELY SOLD ACCESSORIES AND THE CARD Separately sold lithium-ion battery pack (DB-L50A). i Super Wide Conversion Lens VCP-L04SW This conversion lens has an even wider angle of view than the Wide ...
...your camera lens to a wide-angle lens. i Filter Set VCP-F03SET C-PL filter and lens protector set. 15 English i Lithium-ion Battery Charger VAR-L50 Battery charger for the supplied or separately sold accessories i Mini HDMI cable VCP-HDMI02 Cable for connecting to a telephoto lens. i Wide Conversion ...L07W1 Converts your camera lens to the HDMI terminal on the camera. ABOUT THE SEPARATELY SOLD ACCESSORIES AND THE CARD Separately sold lithium-ion battery pack (DB-L50A). i Super Wide Conversion Lens VCP-L04SW This conversion lens has an even wider angle of view than the Wide ...

VPC-FH1 Owners Manual English
Page 43
SETUP SETUP SETUP PARTS NAMES Camera Front Zoom switch [T/]]/[W/P] Monitor unit Lens Remote control sensor Grip belt holder Microphone Flash Bottom Microphone Tripod stand hole Battery cover English 22
SETUP SETUP SETUP PARTS NAMES Camera Front Zoom switch [T/]]/[W/P] Monitor unit Lens Remote control sensor Grip belt holder Microphone Flash Bottom Microphone Tripod stand hole Battery cover English 22

VPC-FH1 Owners Manual English
Page 44
PARTS NAMES Rear ON/OFF button COMPONENT/AV terminal Speaker Multi-indicator Grip belt holder Monitor USB terminal HDMI terminal Card slot cover DC IN terminal cover Battery cover lock [ ] button REC/PLAY button [ ] button 23 English MENU button SET button
PARTS NAMES Rear ON/OFF button COMPONENT/AV terminal Speaker Multi-indicator Grip belt holder Monitor USB terminal HDMI terminal Card slot cover DC IN terminal cover Battery cover lock [ ] button REC/PLAY button [ ] button 23 English MENU button SET button

VPC-FH1 Owners Manual English
Page 48
... insert it with the camera. h While pressing the tab, pull the battery slot out. 1 Insert a new battery. PREPARING THE REMOTE CONTROL UNIT The remote control unit can be used to replace the CR2025 battery used in the remote control unit at the time of use). Insulating sheet...take pictures and play them back with the (+) mark facing up. (+) mark Battery slot tab 2 Remove the battery. 2 Re-insert the battery slot. 27 English Remove the old battery Insert a new battery 1 Pull out the battery slot. h The remote control unit becomes operable when the insulating sheet is ...
... insert it with the camera. h While pressing the tab, pull the battery slot out. 1 Insert a new battery. PREPARING THE REMOTE CONTROL UNIT The remote control unit can be used to replace the CR2025 battery used in the remote control unit at the time of use). Insulating sheet...take pictures and play them back with the (+) mark facing up. (+) mark Battery slot tab 2 Remove the battery. 2 Re-insert the battery slot. 27 English Remove the old battery Insert a new battery 1 Pull out the battery slot. h The remote control unit becomes operable when the insulating sheet is ...

VPC-FH1 Owners Manual English
Page 50
h The remote control codes are retained even if the batteries in the remote control unit or camera are replaced. h If the remote control codes for the remote control unit and the camera and do not ... remote control unit is receiving correctly. PREPARING THE REMOTE CONTROL UNIT Changing the remote control code The remote control unit will also work with other Sanyo cameras that can be used .
h The remote control codes are retained even if the batteries in the remote control unit or camera are replaced. h If the remote control codes for the remote control unit and the camera and do not ... remote control unit is receiving correctly. PREPARING THE REMOTE CONTROL UNIT Changing the remote control code The remote control unit will also work with other Sanyo cameras that can be used .

VPC-FH1 Owners Manual English
Page 51
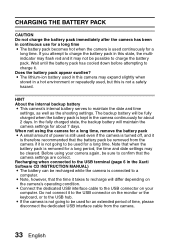
Battery cover 2 1 Battery cover lock English 30 SETUP CHARGING THE BATTERY PACK Please charge the supplied battery pack before using it (1), and pull out the battery cover toward the bottom of the camera (2). h The battery cover comes off. Install the battery pack in the camera, and connect the AC adaptor to the camera can also be supplied from a power outlet when the AC adaptor is connected. 1 While pressing the battery cover lock, slide it . Power to charge the battery.
Battery cover 2 1 Battery cover lock English 30 SETUP CHARGING THE BATTERY PACK Please charge the supplied battery pack before using it (1), and pull out the battery cover toward the bottom of the camera (2). h The battery cover comes off. Install the battery pack in the camera, and connect the AC adaptor to the camera can also be supplied from a power outlet when the AC adaptor is connected. 1 While pressing the battery cover lock, slide it . Power to charge the battery.

VPC-FH1 Owners Manual English
Page 52
Battery pack h Raise the edge of the battery pack to remove it. 31 English CHARGING THE BATTERY PACK 2 Insert the battery pack, then replace the battery cover.
Battery pack h Raise the edge of the battery pack to remove it. 31 English CHARGING THE BATTERY PACK 2 Insert the battery pack, then replace the battery cover.

VPC-FH1 Owners Manual English
Page 53
When charging is lit red. To power outlet Multi-indicator English 32 h During charging, the multi-indicator is completed, the indicator turns off. How to open the DC IN terminal cover DC IN terminal 1 Use fingernail to a power outlet. h The charging time is not installed correctly. h Charging begins. h The multi-indicator flashes red if the battery pack is defective or is approx. 200 minutes. Make sure that the battery pack is correctly installed. SETUP 3 Use the power cord to connect the AC adaptor to open. 2 Open downwards.
When charging is lit red. To power outlet Multi-indicator English 32 h During charging, the multi-indicator is completed, the indicator turns off. How to open the DC IN terminal cover DC IN terminal 1 Use fingernail to a power outlet. h The charging time is not installed correctly. h Charging begins. h The multi-indicator flashes red if the battery pack is defective or is approx. 200 minutes. Make sure that the battery pack is correctly installed. SETUP 3 Use the power cord to connect the AC adaptor to open. 2 Open downwards.
VPC-FH1 Owners Manual English
Page 54
... i Connect the dedicated USB interface cable to the USB connector on the camera's operating condition. HINT About the internal backup battery i This camera's internal battery serves to be cleared. When not using your computer. Before using the camera for an extended period of power is not ...disconnect the dedicated USB interface cable from the camera if it is therefore recommended that the camera settings are correct. Wait until the battery pack has cooled down before attempting to be removed from the camera. 33 English Recharging when connected to the USB terminal (page...
... i Connect the dedicated USB interface cable to the USB connector on the camera's operating condition. HINT About the internal backup battery i This camera's internal battery serves to be cleared. When not using your computer. Before using the camera for an extended period of power is not ...disconnect the dedicated USB interface cable from the camera if it is therefore recommended that the camera settings are correct. Wait until the battery pack has cooled down before attempting to be removed from the camera. 33 English Recharging when connected to the USB terminal (page...

VPC-FH1 Owners Manual English
Page 55
...when the \ icon is high (that you discontinue use , if the temperature of the battery or inside the camera (excluding the battery) rises, a temperature alert icon \ will appear as the \ icon remains flashing). h During video recording, a countdown indicator will turn the camera off , or when the power save ...to flash, and the camera will show the time starting about 15 seconds before resuming use , if the temperature of the battery or inside the camera (excluding the battery) rises, a \ icon lights on the monitor. The camera cannot be turned on until the temperature has dropped (or...
...when the \ icon is high (that you discontinue use , if the temperature of the battery or inside the camera (excluding the battery) rises, a temperature alert icon \ will appear as the \ icon remains flashing). h During video recording, a countdown indicator will turn the camera off , or when the power save ...to flash, and the camera will show the time starting about 15 seconds before resuming use , if the temperature of the battery or inside the camera (excluding the battery) rises, a \ icon lights on the monitor. The camera cannot be turned on until the temperature has dropped (or...

VPC-FH1 Owners Manual English
Page 57
.../OFF button. h When the MENU button is active, you can specify the time elapsed before the power save mode is active In order to preserve battery pack power, the power save (sleep) function will become active about 5 minutes after about 12 hours. SETUP Turning on the camera when the power save...
.../OFF button. h When the MENU button is active, you can specify the time elapsed before the power save mode is active In order to preserve battery pack power, the power save (sleep) function will become active about 5 minutes after about 12 hours. SETUP Turning on the camera when the power save...

VPC-FH1 Owners Manual English
Page 61
...the SET button. h The current date and time settings are still correct after replacing the battery pack and before shooting or recording of any type (follow step 1). HINT i Under normal conditions, while the battery pack is completed. h The screen to change, and make the correction. SETUP 5 Press... the MENU button. English 40 h The date and time setting is being replaced, an internal battery will last for about 7 days). It is a small chance the settings may be lost (the backup will maintain the date and time settings. However...
...the SET button. h The current date and time settings are still correct after replacing the battery pack and before shooting or recording of any type (follow step 1). HINT i Under normal conditions, while the battery pack is completed. h The screen to change, and make the correction. SETUP 5 Press... the MENU button. English 40 h The date and time setting is being replaced, an internal battery will last for about 7 days). It is a small chance the settings may be lost (the backup will maintain the date and time settings. However...

VPC-FH1 Owners Manual English
Page 67
h h: The video clip size is 640 × 480 pixels, recorded at 60 fields/sec. The captured still image size is 1600 × 1200 (4:3) pixels. 2 Focus range (page .... ;: The flash does not operate even in dark situations. 4 S N (page 43) h Set to record. The captured still image size is 3264 × 2448 (4:3) pixels. i i: The video clip size is 1920 × 1080 pixels, recorded at 30 frames/sec. SETUP 1 Recording size (page 60) h Select the...
h h: The video clip size is 640 × 480 pixels, recorded at 60 fields/sec. The captured still image size is 1600 × 1200 (4:3) pixels. 2 Focus range (page .... ;: The flash does not operate even in dark situations. 4 S N (page 43) h Set to record. The captured still image size is 3264 × 2448 (4:3) pixels. i i: The video clip size is 1920 × 1080 pixels, recorded at 30 frames/sec. SETUP 1 Recording size (page 60) h Select the...


