
Service Manual
Page 10
... There are lots kinds of the cavity requires beautiful in look, durable when use non - A good designed oven cavity should be less reflect, and distribute evenly in the wave guide. plating steel, and have the power control function. Turntable supporter 6. loss and heat - This is always conducted (...at the same input power, the larger the cavity, the less the energy density a unit volume would have in the cavity repeatedly, those microwave oven which haven't been absorbed will be reflect to the magnetron. Moreover, too big of the cavity would work to turn off for 15.5...
... There are lots kinds of the cavity requires beautiful in look, durable when use non - A good designed oven cavity should be less reflect, and distribute evenly in the wave guide. plating steel, and have the power control function. Turntable supporter 6. loss and heat - This is always conducted (...at the same input power, the larger the cavity, the less the energy density a unit volume would have in the cavity repeatedly, those microwave oven which haven't been absorbed will be reflect to the magnetron. Moreover, too big of the cavity would work to turn off for 15.5...

Service Manual
Page 11
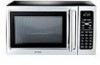
... window to made it is sealed at this chapter. It is called "CURRENT-RESISTANT". current-resistant constructure front door plate Fig.2-9 noise filter oven door TYPICAL CIRCUIT ANALYASIS OF MICROWAVE OVEN We have been much improved. Especially, after a long time using, the microwave leakage would also cause large amount of steel filament or a thin metal...
... window to made it is sealed at this chapter. It is called "CURRENT-RESISTANT". current-resistant constructure front door plate Fig.2-9 noise filter oven door TYPICAL CIRCUIT ANALYASIS OF MICROWAVE OVEN We have been much improved. Especially, after a long time using, the microwave leakage would also cause large amount of steel filament or a thin metal...

Service Manual
Page 13
...with a pointed plier, then the hook combination. Take off the two screws at right above of the door. Clamp the window plate with the door out of the oven together, and take off . Then tighten each hook on the window to the arrow direction, and take out the cover. Push...to 4-5) (a) Fig.4-3 (b) 1. Apply proper silicon grease or lubricating grease on the door as 12 Take off the hinge (up ) oven 5. Take off the back protective paper of the window, then the sides of plastics, and is made of adhesive tape as FIG.4 - 2, then install the...
...with a pointed plier, then the hook combination. Take off the two screws at right above of the door. Clamp the window plate with the door out of the oven together, and take off . Then tighten each hook on the window to the arrow direction, and take out the cover. Push...to 4-5) (a) Fig.4-3 (b) 1. Apply proper silicon grease or lubricating grease on the door as 12 Take off the hinge (up ) oven 5. Take off the back protective paper of the window, then the sides of plastics, and is made of adhesive tape as FIG.4 - 2, then install the...
