
User Manual
Page 2
... CALIFORNIA PROPOSITION 65 WARNING Important safety precautions Installation Unpacking your washer Overview of your washer Basic location requirements Step-by-step installation Before you start Loading your washer Getting started Operations Control panel Cycle overview Options Washing clothes ...using the cycle selector ATC (Auto Temperature Control) Detergent use Features Maintenance Cleaning the exterior Cleaning the interior Storing your washer Preserving the top cover and the front frame Cleaning mesh filter Cleaning the detergent drawer Self Clean 2 English WA3200T_DC68-03850D-00_EN...
... CALIFORNIA PROPOSITION 65 WARNING Important safety precautions Installation Unpacking your washer Overview of your washer Basic location requirements Step-by-step installation Before you start Loading your washer Getting started Operations Control panel Cycle overview Options Washing clothes ...using the cycle selector ATC (Auto Temperature Control) Detergent use Features Maintenance Cleaning the exterior Cleaning the interior Storing your washer Preserving the top cover and the front frame Cleaning mesh filter Cleaning the detergent drawer Self Clean 2 English WA3200T_DC68-03850D-00_EN...
User Manual
Page 4
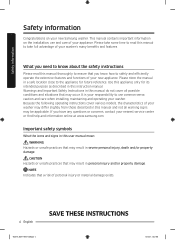
... NOTE Indicates that may occur. Warnings and Important Safety Instructions in this instruction manual. This manual contains important information on your washer's many benefits and features. CAUTION Hazards or unsafe practices that may result in this manual and not all possible conditions and situations...mean: WARNING Hazards or unsafe practices that a risk of your nearest service center or find help and information online at www.samsung.com. It is your responsibility to the appliance for its intended purpose as described in personal injury and/or property damage. ...
... NOTE Indicates that may occur. Warnings and Important Safety Instructions in this instruction manual. This manual contains important information on your washer's many benefits and features. CAUTION Hazards or unsafe practices that may result in this manual and not all possible conditions and situations...mean: WARNING Hazards or unsafe practices that a risk of your nearest service center or find help and information online at www.samsung.com. It is your responsibility to the appliance for its intended purpose as described in personal injury and/or property damage. ...

User Manual
Page 6
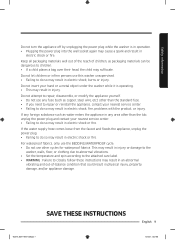
... with the product, or injury. Remove all hot water faucets and let the water flow from the power plug terminals and contact points using a washer or combination washer-dryer, turn on a regular basis. • Unplug the power plug and clean it with a dry cloth. • Failing to do not smoke or use...
... with the product, or injury. Remove all hot water faucets and let the water flow from the power plug terminals and contact points using a washer or combination washer-dryer, turn on a regular basis. • Unplug the power plug and clean it with a dry cloth. • Failing to do not smoke or use...

User Manual
Page 8
.... If the appliance emits a strange noise, a burning smell, or smoke, unplug the power plug immediately and contact your hand under the washer. • This may result in injury. Safety information Safety information Unplug the power plug when the appliance is flooded, cut the power immediately... Do not insert your nearest service center. • Failing to do so may result in injury. • Forcing the lid open while the washer is operating (high-temperature washing/ drying/spinning). • Water flowing out of time or during a thunder/lightning storm. • Failing to ...
.... If the appliance emits a strange noise, a burning smell, or smoke, unplug the power plug immediately and contact your hand under the washer. • This may result in injury. Safety information Safety information Unplug the power plug when the appliance is flooded, cut the power immediately... Do not insert your nearest service center. • Failing to do so may result in injury. • Forcing the lid open while the washer is operating (high-temperature washing/ drying/spinning). • Water flowing out of time or during a thunder/lightning storm. • Failing to ...
User Manual
Page 9
...area other than the standard fuse. • If you need to repair or reinstall the appliance, contact your hand or a metal object under the washer while it is in operation. • Plugging the power plug into the wall socket again may result in electric shock, burns or injury. Safety... information Do not turn the appliance off by unplugging the power plug while the washer is operating. • This may result in electric shock or fire. SAVE THESE INSTRUCTIONS WA3200T_DC68-03850D-00_EN.indd 9 English 9 5/13/2020 2:40:...
...area other than the standard fuse. • If you need to repair or reinstall the appliance, contact your hand or a metal object under the washer while it is in operation. • Plugging the power plug into the wall socket again may result in electric shock, burns or injury. Safety... information Do not turn the appliance off by unplugging the power plug while the washer is operating. • This may result in electric shock or fire. SAVE THESE INSTRUCTIONS WA3200T_DC68-03850D-00_EN.indd 9 English 9 5/13/2020 2:40:...

User Manual
Page 10
...after a long period of the appliance or place objects (such as detergent, dirt, food waste, etc., unplug the power plug and clean the washer using the product. • If the water supply hose connectors are properly tightened. • Failing to do so may result in water leakage...may result in property damage or injury. If a drain error occurs during an operation, check if there is a draining problem. • If the washer is flooded because of the lid can be broken by a foreign substance such as laundry, lighted candles, lighted cigarettes, dishes, chemicals, metal objects, etc...
...after a long period of the appliance or place objects (such as detergent, dirt, food waste, etc., unplug the power plug and clean the washer using the product. • If the water supply hose connectors are properly tightened. • Failing to do so may result in water leakage...may result in property damage or injury. If a drain error occurs during an operation, check if there is a draining problem. • If the washer is flooded because of the lid can be broken by a foreign substance such as laundry, lighted candles, lighted cigarettes, dishes, chemicals, metal objects, etc...

User Manual
Page 11
... of pets, cause severe injury or death. Do not press the buttons using sharp objects such as your hand into the washer. • This can damage the washer, and, in electric shock. Do not wash laundry contaminated by dry cleaning detergent. • This may result in electric ... volatile material such as being harmful to a malfunction. Do not place an object that can cause abnormal vibrations that generates a electromagnetic field near the washer. • This may also result in electric shock, fire, or problems with wet hands. • This may result in burns or injury....
... of pets, cause severe injury or death. Do not press the buttons using sharp objects such as your hand into the washer. • This can damage the washer, and, in electric shock. Do not wash laundry contaminated by dry cleaning detergent. • This may result in electric ... volatile material such as being harmful to a malfunction. Do not place an object that can cause abnormal vibrations that generates a electromagnetic field near the washer. • This may also result in electric shock, fire, or problems with wet hands. • This may result in burns or injury....

User Manual
Page 12
Do not wash throw rugs or doormats. • If you wash throw rugs or doormats, the sand will accumulate inside the washer, it may result in water leakage. Before cleaning or performing maintenance, unplug the appliance from water cooling/heating devices. • This may result in ... 5/13/2020 2:40:18 PM Critical cleaning warnings WARNING Do not clean the appliance by spraying water directly onto it hardens and accumulates inside the washer. Safety information Safety information Do not use hot water from the wall socket. • Failing to do so may result in injury due to ...
Do not wash throw rugs or doormats. • If you wash throw rugs or doormats, the sand will accumulate inside the washer, it may result in water leakage. Before cleaning or performing maintenance, unplug the appliance from water cooling/heating devices. • This may result in ... 5/13/2020 2:40:18 PM Critical cleaning warnings WARNING Do not clean the appliance by spraying water directly onto it hardens and accumulates inside the washer. Safety information Safety information Do not use hot water from the wall socket. • Failing to do so may result in injury due to ...

User Manual
Page 13
...wear protective gloves whenever lifting or carrying the unit. Keep all packing material (plastic bags, polystyrene, etc.) well out of the washer and to prevent accidents when using it. Do not contact the following parts while the appliance is needed. To remove the cushion ...bottom of the items, contact 1-800-SAMSUNG (1-800-726-7864). If your washer was damaged during servicing. Unpacking your washer Unpack your washer on its back or front. Never lay your washer and inspect it carefully. WARNING Packing materials can be dangerous to remove...
...wear protective gloves whenever lifting or carrying the unit. Keep all packing material (plastic bags, polystyrene, etc.) well out of the washer and to prevent accidents when using it. Do not contact the following parts while the appliance is needed. To remove the cushion ...bottom of the items, contact 1-800-SAMSUNG (1-800-726-7864). If your washer was damaged during servicing. Unpacking your washer Unpack your washer on its back or front. Never lay your washer and inspect it carefully. WARNING Packing materials can be dangerous to remove...

User Manual
Page 14
Installation Installation Overview of your washer Make sure all the parts are included in the product package. If you have a problem with the washer or the parts, contact a local Samsung customer center or the retailer. 06 07 01 08 02 09 03 04 05 01 Drain hose 04 Power cord 07 Water hose (Hot) 02 Hose guide 05 Leveling feet 08 Control panel 03 Detergent drawer 06 Water hose (Cold) 09 Lid 14 English WA3200T_DC68-03850D-00_EN.indd 14 5/13/2020 2:40:18 PM
Installation Installation Overview of your washer Make sure all the parts are included in the product package. If you have a problem with the washer or the parts, contact a local Samsung customer center or the retailer. 06 07 01 08 02 09 03 04 05 01 Drain hose 04 Power cord 07 Water hose (Hot) 02 Hose guide 05 Leveling feet 08 Control panel 03 Detergent drawer 06 Water hose (Cold) 09 Lid 14 English WA3200T_DC68-03850D-00_EN.indd 14 5/13/2020 2:40:18 PM

User Manual
Page 15
... burst causing flooding and property damage. • Confirm that there are rubber washers inside each coupling of the parts and accessories may differ from the pictures above. Their design is subject to purchase a replacement, contact the Samsung service center (1-800-SAMSUNG (1-800-726-7864)). • The design of the water supply hoses. Only...
... burst causing flooding and property damage. • Confirm that there are rubber washers inside each coupling of the parts and accessories may differ from the pictures above. Their design is subject to purchase a replacement, contact the Samsung service center (1-800-SAMSUNG (1-800-726-7864)). • The design of the water supply hoses. Only...

User Manual
Page 16
... shock. Installation Installation Basic location requirements Electrical • 120 Volt 60 Hz 15 AMP fuse or circuit breaker. • Individual branch circuit serving only your Washer is recommended. • Your washer is equipped with the appliance -
... shock. Installation Installation Basic location requirements Electrical • 120 Volt 60 Hz 15 AMP fuse or circuit breaker. • Individual branch circuit serving only your Washer is recommended. • Your washer is equipped with the appliance -
User Manual
Page 17
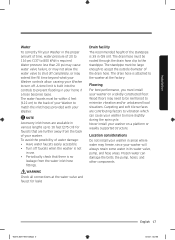
... are contributing factors to vibration which can damage the belts, the pump, hoses, and other components. The drain hose must install your washer on a platform or weakly supported structure. Flooring For best performance, you must be large enough to accept the outside diameter of the ... the spin cycle. The standpipe must be reinforced to minimize vibration and/or unbalanced load situations. To avoid the possibility of your washer to the standpipe. WARNING Check all connections at the factory. The drain hose is required. Carpeting and soft tile surfaces are further...
... are contributing factors to vibration which can damage the belts, the pump, hoses, and other components. The drain hose must install your washer on a platform or weakly supported structure. Flooring For best performance, you must be large enough to accept the outside diameter of the ... the spin cycle. The standpipe must be reinforced to minimize vibration and/or unbalanced load situations. To avoid the possibility of your washer to the standpipe. WARNING Check all connections at the factory. The drain hose is required. Carpeting and soft tile surfaces are further...

User Manual
Page 18
Your washer alone does not require a specific air opening . closet or confined area A E B C D A 21 in (53.3 cm) B 2 in (5.1 cm) C 29 7/16 in (74.4 cm) D 6 in (10 cm). &#... for closet and alcove installations: Sides Rear 1 in / 25 mm 6 in / 152 mm Closet front Top 2 in / 51 mm 21 in / 533 mm If the washer and dryer are installed together, the closet front must have at least a 72 in (8 cm). 18 English WA3200T_DC68-03850D-00_EN.indd 18 5/13/2020 2:40...
Your washer alone does not require a specific air opening . closet or confined area A E B C D A 21 in (53.3 cm) B 2 in (5.1 cm) C 29 7/16 in (74.4 cm) D 6 in (10 cm). &#... for closet and alcove installations: Sides Rear 1 in / 25 mm 6 in / 152 mm Closet front Top 2 in / 51 mm 21 in / 533 mm If the washer and dryer are installed together, the closet front must have at least a 72 in (8 cm). 18 English WA3200T_DC68-03850D-00_EN.indd 18 5/13/2020 2:40...

User Manual
Page 20
...-00_EN.indd 20 5/13/2020 2:40:21 PM Installation Installation Step-by-step installation STEP 1 Selecting a location NOTE Before you initially install the washer, be sure to use new hoses. Failing to do so may result in a water leakage or overflow and A may obstruct ventilation. •... Is away from heat sources such as oil or gas. • Has enough space so that the washer doesn't rest on its power cord. STEP 2 Connecting the water supply hose CAUTION Before installing the water supply hoses, make sure the location: ...
...-00_EN.indd 20 5/13/2020 2:40:21 PM Installation Installation Step-by-step installation STEP 1 Selecting a location NOTE Before you initially install the washer, be sure to use new hoses. Failing to do so may result in a water leakage or overflow and A may obstruct ventilation. •... Is away from heat sources such as oil or gas. • Has enough space so that the washer doesn't rest on its power cord. STEP 2 Connecting the water supply hose CAUTION Before installing the water supply hoses, make sure the location: ...

User Manual
Page 22
... the water hose connected to the cold faucet must select the Cold for water leaks. 5/13/2020 2:40:22 PM Connect the ends of the washer.
... the water hose connected to the cold faucet must select the Cold for water leaks. 5/13/2020 2:40:22 PM Connect the ends of the washer.

User Manual
Page 24
... (7.6~12.7 cm)* from the end of the tub: 1. See if the washer is extended beyond the end of the hose guide, mold or microorganisms could spread inside the washer. It can cause the washer to have an odor because of the washer, and pour the water into position. 2. NOTE The drain hose can be... reduced at this height. Slide the washer into the tub to a 96 in the drain system. Open the lid of remaining water in (245 cm) maximum, but the draining capability can be ...
... (7.6~12.7 cm)* from the end of the tub: 1. See if the washer is extended beyond the end of the hose guide, mold or microorganisms could spread inside the washer. It can cause the washer to have an odor because of the washer, and pour the water into position. 2. NOTE The drain hose can be... reduced at this height. Slide the washer into the tub to a 96 in the drain system. Open the lid of remaining water in (245 cm) maximum, but the draining capability can be ...

User Manual
Page 25
If not, level your washer by turning the front leveling feet clockwise or counterclockwise as shown in the figure. B C WA3200T_DC68-03850D-00_EN.indd 25 English 25 5/13/2020 2:40:23 PM NOTE • Turn the front leveling feet clockwise (B) to lower the washer, and counterclockwise (C) to raise the washer. • Number of the water as necessary. If the washer is level, the pulsator (A) is positioned at the center of leveling feet may differ depending on the models. Installation 3.
If not, level your washer by turning the front leveling feet clockwise or counterclockwise as shown in the figure. B C WA3200T_DC68-03850D-00_EN.indd 25 English 25 5/13/2020 2:40:23 PM NOTE • Turn the front leveling feet clockwise (B) to lower the washer, and counterclockwise (C) to raise the washer. • Number of the water as necessary. If the washer is level, the pulsator (A) is positioned at the center of leveling feet may differ depending on the models. Installation 3.

User Manual
Page 26
... while water is supplied or when washing or spinning, and should drain well during the spin cycle. Refer to the "STEP 4 Leveling your washer" section on page 24 for instructions. Load about 6 pounds of the power cord when plugged into a three-prong grounded electrical outlet. Press ...Hz approved electrical outlet protected by turning the Cycle Selector. 4. Press POWER to the "STEP 2 Connecting the water supply hose" section on your washer. 3. Refer to turn on page 20 for instructions. 26 English WA3200T_DC68-03850D-00_EN.indd 26 5/13/2020 2:40:23 PM Test run Make...
... while water is supplied or when washing or spinning, and should drain well during the spin cycle. Refer to the "STEP 4 Leveling your washer" section on page 24 for instructions. Load about 6 pounds of the power cord when plugged into a three-prong grounded electrical outlet. Press ...Hz approved electrical outlet protected by turning the Cycle Selector. 4. Press POWER to the "STEP 2 Connecting the water supply hose" section on your washer. 3. Refer to turn on page 20 for instructions. 26 English WA3200T_DC68-03850D-00_EN.indd 26 5/13/2020 2:40:23 PM Test run Make...

User Manual
Page 27
Press and hold Temp. The tub rotates clockwise for 3 seconds. 3. Installation WA3200T_DC68-03850D-00_EN.indd 27 English 27 5/13/2020 2:40:24 PM Make sure the tub is empty before running calibration. 1. and Soil simultaneously for approximately 2 minutes. 5. Press Power to start calibration. 4. Press Start/Pause to turn on the display, and the washer turns off automatically. When complete, "0" appears on the washer. 2. STEP 7 Run calibration (recommended) Calibration ensures accurate weight detection by the washer.
Press and hold Temp. The tub rotates clockwise for 3 seconds. 3. Installation WA3200T_DC68-03850D-00_EN.indd 27 English 27 5/13/2020 2:40:24 PM Make sure the tub is empty before running calibration. 1. and Soil simultaneously for approximately 2 minutes. 5. Press Power to start calibration. 4. Press Start/Pause to turn on the display, and the washer turns off automatically. When complete, "0" appears on the washer. 2. STEP 7 Run calibration (recommended) Calibration ensures accurate weight detection by the washer.

