
User Manual (user Manual) (ver.1.0) (English)
Page 1
To receive more complete service, please register your product at www.samsung.com/register DV5471AE-03022A-01_EN.indd 1 2011-03-28 3:44:01 DV5471A* DV5451A* Gas and Electric Dryer user manual imagine the possibilities Thank you for purchasing this Samsung product.
To receive more complete service, please register your product at www.samsung.com/register DV5471AE-03022A-01_EN.indd 1 2011-03-28 3:44:01 DV5471A* DV5451A* Gas and Electric Dryer user manual imagine the possibilities Thank you for purchasing this Samsung product.
User Manual (user Manual) (ver.1.0) (English)
Page 2
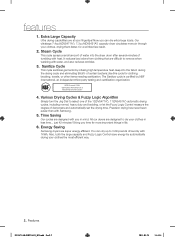
...fied by automatically drying your clothes, drying them faster, for a wrinkle-free result. 2. All our dryers are super energy efficient. Energy Saving Samsung dryers are designed to remove when washing with heat. features 1. Our ultralarge 7.4cu.ft(DV5471A*), 7.3cu.ft(DV5451A...*) capacity dryer circulates more important things in life. 6. NSF Protocol P154 Sanitization Performance of laundry with Samsung. 5. It reduces bad odors from clothing that are difficult to dry your ...
...fied by automatically drying your clothes, drying them faster, for a wrinkle-free result. 2. All our dryers are super energy efficient. Energy Saving Samsung dryers are designed to remove when washing with heat. features 1. Our ultralarge 7.4cu.ft(DV5471A*), 7.3cu.ft(DV5451A...*) capacity dryer circulates more important things in life. 6. NSF Protocol P154 Sanitization Performance of laundry with Samsung. 5. It reduces bad odors from clothing that are difficult to dry your ...
User Manual (user Manual) (ver.1.0) (English)
Page 4
...reference. safety instructions Congratulations on the installation, use common sense, caution, and care when installing, maintaining, or operating your dryer. WHAT YOU NEED TO KNOW ABOUT SAFETY INSTRUCTIONS Warnings and Important Safety Instructions in a safe place for help. CAUTION Hazards ...personal injury when using the appliance. This manual contains valuable information on your appliance. Please take full advantage of your new Samsung Dryer. IMPORTANT SAFETY SYMBOLS AND PRECAUTIONS What the icons and signs in this manual do not understand. Unplug the power plug ...
...reference. safety instructions Congratulations on the installation, use common sense, caution, and care when installing, maintaining, or operating your dryer. WHAT YOU NEED TO KNOW ABOUT SAFETY INSTRUCTIONS Warnings and Important Safety Instructions in a safe place for help. CAUTION Hazards ...personal injury when using the appliance. This manual contains valuable information on your appliance. Please take full advantage of your new Samsung Dryer. IMPORTANT SAFETY SYMBOLS AND PRECAUTIONS What the icons and signs in this manual do not understand. Unplug the power plug ...
User Manual (user Manual) (ver.1.0) (English)
Page 5
... understand and have traces of the fabric softener or product. 12.Clean the lint screen before using your dryer. Items contaminated with gasoline, dry-cleaning solvents, or other appliance. 5. Do not use the dryer to catch fire by the manufacturer of any servicing unless specifically recommended in the user...
... understand and have traces of the fabric softener or product. 12.Clean the lint screen before using your dryer. Items contaminated with gasoline, dry-cleaning solvents, or other appliance. 5. Do not use the dryer to catch fire by the manufacturer of any servicing unless specifically recommended in the user...
User Manual (user Manual) (ver.1.0) (English)
Page 6
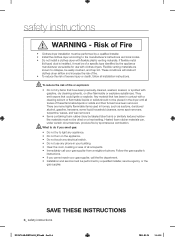
... call your gas supplier, call the fire department. • Installation and service must be of Fire • Clothes dryer installation must be performed by the appliance manufacturer as acetone, denatured alcohol, gasoline, kerosene, some liquid household cleaners, some spot ...you smell gas: WARNING • Do not try to the manufacturer's instructions and local codes. • Do not install a clothes dryer with gasoline, dry cleaning solvents, or other flammable or explosive substances. Heated foam rubber materials can, under certain circumstances, produce...
... call your gas supplier, call the fire department. • Installation and service must be of Fire • Clothes dryer installation must be performed by the appliance manufacturer as acetone, denatured alcohol, gasoline, kerosene, some liquid household cleaners, some spot ...you smell gas: WARNING • Do not try to the manufacturer's instructions and local codes. • Do not install a clothes dryer with gasoline, dry cleaning solvents, or other flammable or explosive substances. Heated foam rubber materials can, under certain circumstances, produce...
User Manual (user Manual) (ver.1.0) (English)
Page 7
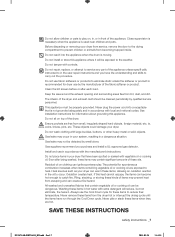
...softener or product is not grounded adequately and in a dangerous situation. This appliance must be cleaned periodically by the manufacturer of the dryer and exhaust duct should be properly grounded. WARNING Gas leaks may contain significant amounts of the appliance. Gas suppliers recommend you... water with local and national codes. If this appliance. Keep the area around the exhaust opening and surrounding areas free from the dryer hot or interrupt the drying cycle until the items have been spotted or soaked with the manufacturer's instructions. ie. Close supervision is...
...softener or product is not grounded adequately and in a dangerous situation. This appliance must be cleaned periodically by the manufacturer of the dryer and exhaust duct should be properly grounded. WARNING Gas leaks may contain significant amounts of the appliance. Gas suppliers recommend you... water with local and national codes. If this appliance. Keep the area around the exhaust opening and surrounding areas free from the dryer hot or interrupt the drying cycle until the items have been spotted or soaked with the manufacturer's instructions. ie. Close supervision is...
User Manual (user Manual) (ver.1.0) (English)
Page 8
... the control panel 28 Child lock 28 Drum Light 29 Rack Dry 30 Clean the lint filter 30 Load the dryer properly 30 Getting started CARE AND CLEANING 31 31 Control Panel 31 Tumbler 31 Staines Steeltumbler (DV5471A*)/Powder Coated Tumbler (DV5451A*) 31...36 Specifications 37 Cycle chart 8_ Contents DV5471AE-03022A-01_EN.indd Sec2:8 2011-03-28 3:44:35 contents INSTALLING YOUR DRYER 9 9 Unpacking your dryer... 34 Information codes 35 Fabric care chart 36 Protecting the environment 36 Declaration of Massachusetts installation instructions 15 Electrical requirements 15 Grounding ...
... the control panel 28 Child lock 28 Drum Light 29 Rack Dry 30 Clean the lint filter 30 Load the dryer properly 30 Getting started CARE AND CLEANING 31 31 Control Panel 31 Tumbler 31 Staines Steeltumbler (DV5471A*)/Powder Coated Tumbler (DV5451A*) 31...36 Specifications 37 Cycle chart 8_ Contents DV5471AE-03022A-01_EN.indd Sec2:8 2011-03-28 3:44:35 contents INSTALLING YOUR DRYER 9 9 Unpacking your dryer... 34 Information codes 35 Fabric care chart 36 Protecting the environment 36 Declaration of Massachusetts installation instructions 15 Electrical requirements 15 Grounding ...
User Manual (user Manual) (ver.1.0) (English)
Page 9
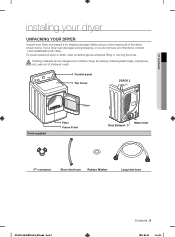
... protective gloves whenever lifting or carrying the dryer. Packing materials can be dangerous to children. If your Dryer and inspect it for shipping damage. 01 Contents installing your dryer UNPACKING YOUR DRYER Unpack your Dryer was damaged during shipping, or you have all of the items, contact 1-800-SAMSUNG (726-7864). Keep all of childrens' reach...
... protective gloves whenever lifting or carrying the dryer. Packing materials can be dangerous to children. If your Dryer and inspect it for shipping damage. 01 Contents installing your dryer UNPACKING YOUR DRYER Unpack your Dryer was damaged during shipping, or you have all of the items, contact 1-800-SAMSUNG (726-7864). Keep all of childrens' reach...
User Manual (user Manual) (ver.1.0) (English)
Page 10
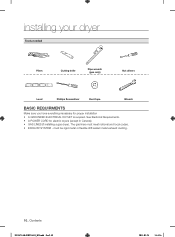
... ducting. 10_ Contents DV5471AE-03022A-01_EN.indd Sec2:10 2011-03-28 3:44:36 must meet national and local codes. • EXHAUST SYSTEM - installing your dryer Tools needed Pliers Cutting knife Pipe wrench (gas only) Nut drivers Level Phillips Screwdriver Duct tape Wrench BASIC REQUIRMENTS Make sure you have everything necessary...
... ducting. 10_ Contents DV5471AE-03022A-01_EN.indd Sec2:10 2011-03-28 3:44:36 must meet national and local codes. • EXHAUST SYSTEM - installing your dryer Tools needed Pliers Cutting knife Pipe wrench (gas only) Nut drivers Level Phillips Screwdriver Duct tape Wrench BASIC REQUIRMENTS Make sure you have everything necessary...
User Manual (user Manual) (ver.1.0) (English)
Page 11
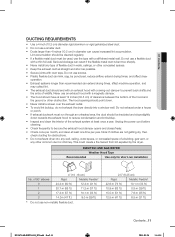
... Check once per year. Unplug the power cord before cleaning. • Check frequently to be punctured, reduce airflow, extend drying times, and affect dryer operation. • Exhaust systems longer than 4 inches (10.2 cm) in walls, ceilings, or other obstruction. Note: If clothes are not getting dry, ...DV5471AE-03022A-01_EN.indd Sec2:11 Contents _11 2011-03-28 3:44:38 This could create a fire hazard from lint expelled by the dryer. Do not use an exhaust hood with a thin foil wall. The hood opening should end with an exhaust hood with duct tape. Lint ...
... Check once per year. Unplug the power cord before cleaning. • Check frequently to be punctured, reduce airflow, extend drying times, and affect dryer operation. • Exhaust systems longer than 4 inches (10.2 cm) in walls, ceilings, or other obstruction. Note: If clothes are not getting dry, ...DV5471AE-03022A-01_EN.indd Sec2:11 Contents _11 2011-03-28 3:44:38 This could create a fire hazard from lint expelled by the dryer. Do not use an exhaust hood with a thin foil wall. The hood opening should end with an exhaust hood with duct tape. Lint ...
User Manual (user Manual) (ver.1.0) (English)
Page 12
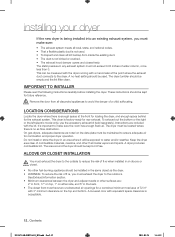
...out the bottom or the right or the left (electric model only), use the accessory exhaust kit (sold separately). WARNING LOCATION CONSIDERATIONS Locate the dryer where there is enough space at the point where the exhaust duct connects to make sure: • The exhaust system meets all local, state,...used . • To Inspect and clean all lint buildup from all discarded appliances to the outdoors. ALCOVE OR CLOSET INSTALLATION You must exhaust the dryer to the outside to reduce the risk of fi re when installed in ² with equivalent space clearance is no -heat setting should ...
...out the bottom or the right or the left (electric model only), use the accessory exhaust kit (sold separately). WARNING LOCATION CONSIDERATIONS Locate the dryer where there is enough space at the point where the exhaust duct connects to make sure: • The exhaust system meets all local, state,...used . • To Inspect and clean all lint buildup from all discarded appliances to the outdoors. ALCOVE OR CLOSET INSTALLATION You must exhaust the dryer to the outside to reduce the risk of fi re when installed in ² with equivalent space clearance is no -heat setting should ...
User Manual (user Manual) (ver.1.0) (English)
Page 13
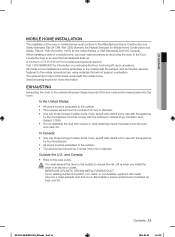
...foil-type fl exible ducts, if any , specifi cally identifi ed for use with the appliance by the manufacturer. • All dryers must be exhausted to the outside. • The exhaust duct should be exhausted to the outside. • The required exhaust duct is required. Call... 1-800-SAMSUNG for more information. All mobile home installations must be exhausted to the outside with the appliance by the manufacturer and that extend into the room...
...foil-type fl exible ducts, if any , specifi cally identifi ed for use with the appliance by the manufacturer. • All dryers must be exhausted to the outside. • The exhaust duct should be exhausted to the outside. • The required exhaust duct is required. Call... 1-800-SAMSUNG for more information. All mobile home installations must be exhausted to the outside with the appliance by the manufacturer and that extend into the room...
User Manual (user Manual) (ver.1.0) (English)
Page 14
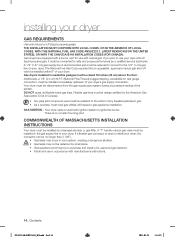
... a gas appliance installation. GAS IGNITION - A 1/2" (1.27 cm) gas supply line is recommended and must be reduced to connect to your dryer. Gas dryers installed in Canada). • Any pipe joint compound used to ignite the burner. Flexible gas lines must be resistant to use with manufacturer's ...reuse old flexible metal gas lines. There is used must be converted for test gauge connection, must be installed immediately upstream of your dryer, the connector can be no constant burning pilot. A "T" handle manual gas valve must be raised 18 inches (46 cm) above the ...
... a gas appliance installation. GAS IGNITION - A 1/2" (1.27 cm) gas supply line is recommended and must be reduced to connect to your dryer. Gas dryers installed in Canada). • Any pipe joint compound used to ignite the burner. Flexible gas lines must be resistant to use with manufacturer's ...reuse old flexible metal gas lines. There is used must be converted for test gauge connection, must be installed immediately upstream of your dryer, the connector can be no constant burning pilot. A "T" handle manual gas valve must be raised 18 inches (46 cm) above the ...
User Manual (user Manual) (ver.1.0) (English)
Page 15
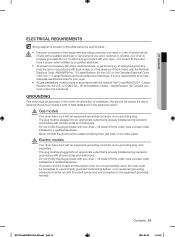
... grounded in accordance with the national Fuel Code ANSI/Z2231 - Latest Revision (for the electrical current. Gas models WARNING Your dryer has a cord with your dryer - Do not modify the plug provided with an equipment-grounding conductor and a grounding plug. if it doesn't fit the... outlet, have a proper outlet installed by a qualified electrician. Electric models WARNING Your dryer has a cord with your dryer - if it doesn't fit the outlet, have a proper outlet installed by a qualified electrician. DV5471AE-03022A-01_EN.indd...
... grounded in accordance with the national Fuel Code ANSI/Z2231 - Latest Revision (for the electrical current. Gas models WARNING Your dryer has a cord with your dryer - Do not modify the plug provided with an equipment-grounding conductor and a grounding plug. if it doesn't fit the... outlet, have a proper outlet installed by a qualified electrician. Electric models WARNING Your dryer has a cord with your dryer - if it doesn't fit the outlet, have a proper outlet installed by a qualified electrician. DV5471AE-03022A-01_EN.indd...

User Manual (user Manual) (ver.1.0) (English)
Page 16
...homes, (3) recreational vehicles, and (4) areas where local codes prohibit grounding through the neutral conductor. (Use 4-prong plug for use with U.S. dryers require a 120/240 volt, 60 Hz AC approved electrical service. Some require 120/208 volt, 60 Hz approved electrical service. A 30-... are shipped with a suitable UL-listed strain relief. • Grounding through the neutral conductor is recommended. U.S. listed and rated at the dryer cabinet with the power cord attached. It is U.L. U.S. Gas models - and Canada A 120 volt, 60 Hz AC approved electrical service,...
...homes, (3) recreational vehicles, and (4) areas where local codes prohibit grounding through the neutral conductor. (Use 4-prong plug for use with U.S. dryers require a 120/240 volt, 60 Hz AC approved electrical service. Some require 120/208 volt, 60 Hz approved electrical service. A 30-... are shipped with a suitable UL-listed strain relief. • Grounding through the neutral conductor is recommended. U.S. listed and rated at the dryer cabinet with the power cord attached. It is U.L. U.S. Gas models - and Canada A 120 volt, 60 Hz AC approved electrical service,...
User Manual (user Manual) (ver.1.0) (English)
Page 17
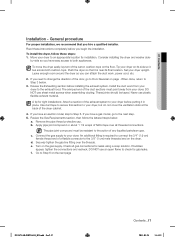
...step. 5. When done, return to the action of Teflon tape over the threads. Never use sheet metal screws when assembling ducting. Set your dryer to check for installation. These joints should be resistant to Step 3 below . If you hire a qualified installer. Connect the gas supply ...the door, go to Door Reversal on its final location. Turn on the floor. 01 Contents Installation - Leave enough room around the dryer so you have easy access to the 3/8" (1 cm) male threaded end on the next page DV5471AE-03022A-01_EN.indd Sec2:17 Contents _17 2011-...
...step. 5. When done, return to the action of Teflon tape over the threads. Never use sheet metal screws when assembling ducting. Set your dryer to check for installation. These joints should be resistant to Step 3 below . If you hire a qualified installer. Connect the gas supply ...the door, go to Door Reversal on its final location. Turn on the floor. 01 Contents Installation - Leave enough room around the dryer so you have easy access to the 3/8" (1 cm) male threaded end on the next page DV5471AE-03022A-01_EN.indd Sec2:17 Contents _17 2011-...
User Manual (user Manual) (ver.1.0) (English)
Page 18
...terminal block. h. If you use Strap terminals, please ensure you must connect the ground strap WARNING to the terminal block support to ground the dryer frame to a 3-wire, you install them perfectly. 8. Connect the neutral wire (white or center wire) of the power cord and the ...appliance ground wire (green with yellow stripes) under the central screw of the terminal block cover into your dryer's rear panel slot. f. BEFORE OPERATING OR TESTING, follow the grounding instructions in the Grounding section. g. g. Tighten the strain relief screws. c. ...
...terminal block. h. If you use Strap terminals, please ensure you must connect the ground strap WARNING to the terminal block support to ground the dryer frame to a 3-wire, you install them perfectly. 8. Connect the neutral wire (white or center wire) of the power cord and the ...appliance ground wire (green with yellow stripes) under the central screw of the terminal block cover into your dryer's rear panel slot. f. BEFORE OPERATING OR TESTING, follow the grounding instructions in the Grounding section. g. g. Tighten the strain relief screws. c. ...

User Manual (user Manual) (ver.1.0) (English)
Page 19
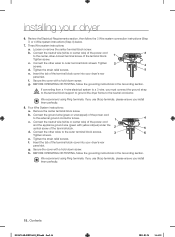
...strain relief through neutral. A strain relief must be used rigid or stiff-walled flexible metal duct material, not plastic flexible duct. † The dryer is level and is sitting firmly on the floor. † For gas models: The gas is the same height as the washer, fully... retract the leveling feet by turning them . Be sure they are complete. Once the dryer is turned on the next page. 12. Leveling feet Retract fully Then loosen Adjust the leveling feet only as much as necessary to the neutral...
...strain relief through neutral. A strain relief must be used rigid or stiff-walled flexible metal duct material, not plastic flexible duct. † The dryer is level and is sitting firmly on the floor. † For gas models: The gas is the same height as the washer, fully... retract the leveling feet by turning them . Be sure they are complete. Once the dryer is turned on the next page. 12. Leveling feet Retract fully Then loosen Adjust the leveling feet only as much as necessary to the neutral...

User Manual (user Manual) (ver.1.0) (English)
Page 20
... an additional two thirds turn . Do not use old hoses. 1. Y-Connector 3. You can damage the coupling. 6. Attach the straight end of the dryer's rear frame. Do not overtighten. Frame (back) Water Hose 8. Turn off the cold water faucet. 2. Turn by hand until it is tight. Using... tight. 4. Turn the water faucet on the hose coupling until it is tight. 7. installing your dryer CONNECTING THE INLET HOSE Method1 - Using the Y Connector and Long Hose The dryer must be connected to the other side of the long hose to the cold water faucet. Using pliers...
... an additional two thirds turn . Do not use old hoses. 1. Y-Connector 3. You can damage the coupling. 6. Attach the straight end of the dryer's rear frame. Do not overtighten. Frame (back) Water Hose 8. Turn off the cold water faucet. 2. Turn by hand until it is tight. Using... tight. 4. Turn the water faucet on the hose coupling until it is tight. 7. installing your dryer CONNECTING THE INLET HOSE Method1 - Using the Y Connector and Long Hose The dryer must be connected to the other side of the long hose to the cold water faucet. Using pliers...

User Manual (user Manual) (ver.1.0) (English)
Page 21
... of the small hose. You can damage the coupling. 9. Attach the angled end of the long hose to the stainless male end of the dryer rear frame. Screw on the coupling by hand until it is tight. 6. Using pliers, tighten the coupling with an additional two thirds turn. .... Using pliers, tighten the coupling with an additional two thirds turn . 01 Contents Method2 - Using the Short Hose, Long Hose, and Y Connector The dryer must use old hoses. If the "Y" connector cannot be connected to the cold water faucet, unscrew and remove the hose. 3. Turn off the cold water...
... of the small hose. You can damage the coupling. 9. Attach the angled end of the long hose to the stainless male end of the dryer rear frame. Screw on the coupling by hand until it is tight. 6. Using pliers, tighten the coupling with an additional two thirds turn. .... Using pliers, tighten the coupling with an additional two thirds turn . 01 Contents Method2 - Using the Short Hose, Long Hose, and Y Connector The dryer must use old hoses. If the "Y" connector cannot be connected to the cold water faucet, unscrew and remove the hose. 3. Turn off the cold water...


