
User Manual Ver.0 (English, French, Spanish)
Page 14
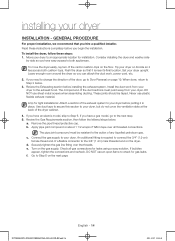
... If you begin the installation. b. Connect the gas supply to Step 6 on its final location. e. Set your dryer Installation - Review the Gas Requirements section, then follow these instructions completely before installing the exhaust system. The pipe joint compound must point away from your ...enough room around the dryer so you have an electric model, skip to the 3/8" (1 cm) male threaded end on page 19. Review the Exhausting section before you have a gas model, go to both cushion-tops. These joints should be resistant to check for installation. ...
... If you begin the installation. b. Connect the gas supply to Step 6 on its final location. e. Set your dryer Installation - Review the Gas Requirements section, then follow these instructions completely before installing the exhaust system. The pipe joint compound must point away from your ...enough room around the dryer so you have an electric model, skip to the 3/8" (1 cm) male threaded end on page 19. Review the Exhausting section before you have a gas model, go to both cushion-tops. These joints should be resistant to check for installation. ...
User Manual Ver.0 (English, French, Spanish)
Page 15
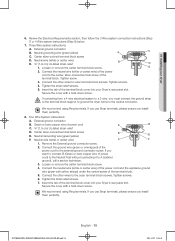
... a service technician. 3. Tighten screws. 6. Connect the other wires to the outer terminal block screws. If you use Strap terminals, please ensure you install them perfectly. 8. Review the Electrical Requirements section, then follow the 3 Wire system connection instructions (Step 7) or 4 Wire system instructions (Step 8) below. 7. Center silver-colored terminal block screw D. Tighten...
... a service technician. 3. Tighten screws. 6. Connect the other wires to the outer terminal block screws. If you use Strap terminals, please ensure you install them perfectly. 8. Review the Electrical Requirements section, then follow the 3 Wire system connection instructions (Step 7) or 4 Wire system instructions (Step 8) below. 7. Center silver-colored terminal block screw D. Tighten...