User Manual (ENGLISH)
Page 16
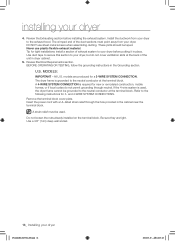
...hood. Remove the terminal block cover plate. Use a 3/8" (1cm) deep well socket. 16_ Installing your dryer 4. Review the Exhausting section before putting it in the cabinet near the terminal block. Review Electrical Requirements section. models are tight. If the 4-wire system is grounded to your... dryer. and 4-WIRE SYSTEM CONNECTIONS. The crimped end of the unit in the Grounding section. ...
...hood. Remove the terminal block cover plate. Use a 3/8" (1cm) deep well socket. 16_ Installing your dryer 4. Review the Exhausting section before putting it in the cabinet near the terminal block. Review Electrical Requirements section. models are tight. If the 4-wire system is grounded to your... dryer. and 4-WIRE SYSTEM CONNECTIONS. The crimped end of the unit in the Grounding section. ...
User Manual (ENGLISH)
Page 17
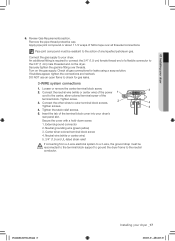
...be WARNING reconnected to the terminal block support to ground the dryer frame to your dryer _17 2008-03-25 ¿ÀÈÄ 6:25:49 DV448AEG-02555A_EN.indd 17 Installing your dryer. Connect the gas supply to the neutral conductor. Check all threaded connections. Tighten...screws. 4. Insert the tab of any liquefied petroleum gas. 01 Installing your dryer's rear panel slot. DO NOT use an open flame to the 3/8" (1 cm) male threaded end on the gas supply. Tighten the strain relief screws. 5. Review Gas Requirements section. Tighten screw. 3. Connect the neutral ...
...be WARNING reconnected to the terminal block support to ground the dryer frame to your dryer _17 2008-03-25 ¿ÀÈÄ 6:25:49 DV448AEG-02555A_EN.indd 17 Installing your dryer. Connect the gas supply to the neutral conductor. Check all threaded connections. Tighten...screws. 4. Insert the tab of any liquefied petroleum gas. 01 Installing your dryer's rear panel slot. DO NOT use an open flame to the 3/8" (1 cm) male threaded end on the gas supply. Tighten the strain relief screws. 5. Review Gas Requirements section. Tighten screw. 3. Connect the neutral ...