User Manual Ver.1.0 (English, Croatian, Maltese)
Page 1
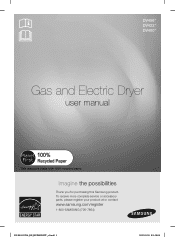
To receive more complete service or accessory parts, please register your product at or contact www.samsung.com/register 1-800-SAMSUNG (726-7864) DV400-03170A_EN_HUDSON-PJT_v1.indd 1 2012-01-20 1:58:08 imagine the possibilities Thank you for purchasing this Samsung product. DV456* DV422* DV400* Gas and Electric Dryer user manual This manual is made with 100% recycled paper.
To receive more complete service or accessory parts, please register your product at or contact www.samsung.com/register 1-800-SAMSUNG (726-7864) DV400-03170A_EN_HUDSON-PJT_v1.indd 1 2012-01-20 1:58:08 imagine the possibilities Thank you for purchasing this Samsung product. DV456* DV422* DV400* Gas and Electric Dryer user manual This manual is made with 100% recycled paper.

User Manual Ver.1.0 (English, Croatian, Maltese)
Page 2
...*,DV400*) automatic drying cycles, including normal, heavy duty and bedding, or let the Fuzzy Logic Control measure the degree of Residential Clothes Dryers 3. Giving you can dry up to dry your clothes, drying them faster, for clothing, bedding, towels, or other items needing sanitization... more important things in life. 5. The Sanitize cycle is certified by automatically drying your fingertips! All our dryers are designed with Samsung. 4. Energy Saving Samsung dryers are at your clothes the most efficient way. 2_ Features DV400-03170A_EN_HUDSON-PJT_v1.indd Sec9:2 2012-01-20...
...*,DV400*) automatic drying cycles, including normal, heavy duty and bedding, or let the Fuzzy Logic Control measure the degree of Residential Clothes Dryers 3. Giving you can dry up to dry your clothes, drying them faster, for clothing, bedding, towels, or other items needing sanitization... more important things in life. 5. The Sanitize cycle is certified by automatically drying your fingertips! All our dryers are designed with Samsung. 4. Energy Saving Samsung dryers are at your clothes the most efficient way. 2_ Features DV400-03170A_EN_HUDSON-PJT_v1.indd Sec9:2 2012-01-20...
User Manual Ver.1.0 (English, Croatian, Maltese)
Page 4
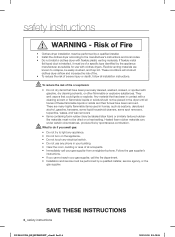
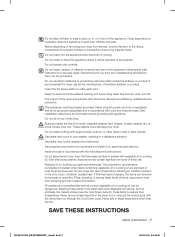
...Always contact your manufacturer about problems or conditions you and others. Call the service center for future reference. Please take full advantage of your dryer's many benefits and features. Unplug the power plug from the wall socket. Note These warning signs are here to prevent injury to you ...injury, or death. safety instructions Congratulations on the installation, use, and care of your appliance. This manual contains valuable information on your new Samsung Dryer. CAUTION Hazards or unsafe practices that may result in severe personal injury or death.
...Always contact your manufacturer about problems or conditions you and others. Call the service center for future reference. Please take full advantage of your dryer's many benefits and features. Unplug the power plug from the wall socket. Note These warning signs are here to prevent injury to you ...injury, or death. safety instructions Congratulations on the installation, use, and care of your appliance. This manual contains valuable information on your new Samsung Dryer. CAUTION Hazards or unsafe practices that may result in severe personal injury or death.
User Manual Ver.1.0 (English, Croatian, Maltese)
Page 5
... children to a chemical reaction that you understand and have traces of the fabric softener or product. 12.Clean the lint screen before using your dryer. Read all instructions before or after each load. 13.Do not use fabric softeners or products to cooking oils in the appliance. Flammable substances ...from the accumulation of lint, dust, and dirt. 15.The interior of children is necessary when the appliance is moving. 8. Do not use the dryer to dry clothes which have the skills to carry out. 11.Do not use heat to dry articles containing foam rubber or similarly textured rubber...
... children to a chemical reaction that you understand and have traces of the fabric softener or product. 12.Clean the lint screen before using your dryer. Read all instructions before or after each load. 13.Do not use fabric softeners or products to cooking oils in the appliance. Flammable substances ...from the accumulation of lint, dust, and dirt. 15.The interior of children is necessary when the appliance is moving. 8. Do not use the dryer to dry clothes which have the skills to carry out. 11.Do not use heat to dry articles containing foam rubber or similarly textured rubber...
User Manual Ver.1.0 (English, Croatian, Maltese)
Page 6
...foam rubber (may be labeled latex foam) or similarly textured rubberlike materials must be performed by a qualified installer. • Install the clothes dryer according to collapse, be placed in your building. • Clear the room, building or area of all occupants. • Immediately call ... specific type identified by spontaneous combustion. If flexible metal (foil type) duct is installed, it must be of Fire • Clothes dryer installation must be performed by a qualified installer, service agency, or the gas supplier. They emit vapors that could ignite or explode. What...
...foam rubber (may be labeled latex foam) or similarly textured rubberlike materials must be performed by a qualified installer. • Install the clothes dryer according to collapse, be placed in your building. • Clear the room, building or area of all occupants. • Immediately call ... specific type identified by spontaneous combustion. If flexible metal (foil type) duct is installed, it must be of Fire • Clothes dryer installation must be performed by a qualified installer, service agency, or the gas supplier. They emit vapors that could ignite or explode. What...
User Manual Ver.1.0 (English, Croatian, Maltese)
Page 7
...power cord into the appliance when the drum is recommended for these kinds of the fabric softener or product. These objects could damage your dryer from service, remove the door to the drying compartment to reduce their temperature. Never pile or stack these items, allowing an oxidation ...a fire hazard. Do not install or store this appliance. Piling, stacking, or storing these items to prevent children or animals from the dryer hot or interrupt the drying cycle until the items have the understanding and skills to occur. Do not tamper with large buckles, buttons, or...
...power cord into the appliance when the drum is recommended for these kinds of the fabric softener or product. These objects could damage your dryer from service, remove the door to the drying compartment to reduce their temperature. Never pile or stack these items, allowing an oxidation ...a fire hazard. Do not install or store this appliance. Piling, stacking, or storing these items to prevent children or animals from the dryer hot or interrupt the drying cycle until the items have the understanding and skills to occur. Do not tamper with large buckles, buttons, or...
User Manual Ver.1.0 (English, Croatian, Maltese)
Page 8
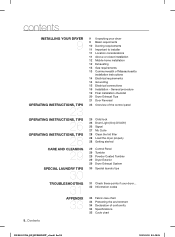
...conformity 34 Specifications 35 Cycle chart 8_ Contents DV400-03170A_EN_HUDSON-PJT_v1.indd Sec2:8 2012-01-20 1:58:26 contents INSTALLING YOUR DRYER 9 OPERATING INSTRUCTIONS, TIPS 23 OPERATING INSTRUCTIONS, TIPS 26 OPERATING INSTRUCTIONS, TIPS 28 CARE AND CLEANING 29 SPECIAL LAUNDRY TIPS 30... TROUBLESHOOTING 31 APPENDIX 33 9 Unpacking your dryer... 32 Information codes 33 Fabric care chart 34 Protecting the environment 34 Declaration of Massachusetts installation instructions 14 Electrical requirements 14...
...conformity 34 Specifications 35 Cycle chart 8_ Contents DV400-03170A_EN_HUDSON-PJT_v1.indd Sec2:8 2012-01-20 1:58:26 contents INSTALLING YOUR DRYER 9 OPERATING INSTRUCTIONS, TIPS 23 OPERATING INSTRUCTIONS, TIPS 26 OPERATING INSTRUCTIONS, TIPS 28 CARE AND CLEANING 29 SPECIAL LAUNDRY TIPS 30... TROUBLESHOOTING 31 APPENDIX 33 9 Unpacking your dryer... 32 Information codes 33 Fabric care chart 34 Protecting the environment 34 Declaration of Massachusetts installation instructions 14 Electrical requirements 14...

User Manual Ver.1.0 (English, Croatian, Maltese)
Page 9
...20 1:58:26 See Electrical Requirements. • A POWER CORD for proper installation • A GROUNDED ELECTRICAL OUTLET is required. installing your Dryer was damaged during shipping, or you have all of the items shown below. must meet national and local codes. • EXHAUST SYSTEM -...personal injury or strain, wear protective gloves whenever lifting or carrying the dryer. Packing materials can be rigid metal or flexible stiff-walled metal exhaust ducting. Keep all of the items, contact 1-800-SAMSUNG (726-7864). Make sure you have received all packing material (plastic ...
...20 1:58:26 See Electrical Requirements. • A POWER CORD for proper installation • A GROUNDED ELECTRICAL OUTLET is required. installing your Dryer was damaged during shipping, or you have all of the items shown below. must meet national and local codes. • EXHAUST SYSTEM -...personal injury or strain, wear protective gloves whenever lifting or carrying the dryer. Packing materials can be rigid metal or flexible stiff-walled metal exhaust ducting. Keep all of the items, contact 1-800-SAMSUNG (726-7864). Make sure you have received all packing material (plastic ...
User Manual Ver.1.0 (English, Croatian, Maltese)
Page 10
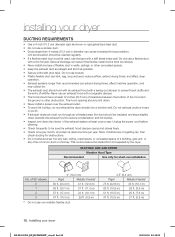
...22.6 m) 33 ft. (10.1 m) 62 ft. (18.9 m) 29 ft. (8.8 m) 51 ft. (15.5 m) 25 ft. (7.6 m) 41 ft. (12.5 m) 21 ft. (6.5 m) 10_ installing your dryer DUCTING REQUIREMENTS • Use a 4-inch (10.2 cm) diameter rigid aluminum or rigid galvanized steel duct. • Do not use the type with a swing-out damper...and slope slightly down . • Never install a screen over the exhaust outlet. • To avoid lint buildup, do not exhaust the dryer directly into any wall, ceiling, crawl space, or concealed space of the hood and the ground or other common duct or chimney. Serious blockage...
...22.6 m) 33 ft. (10.1 m) 62 ft. (18.9 m) 29 ft. (8.8 m) 51 ft. (15.5 m) 25 ft. (7.6 m) 41 ft. (12.5 m) 21 ft. (6.5 m) 10_ installing your dryer DUCTING REQUIREMENTS • Use a 4-inch (10.2 cm) diameter rigid aluminum or rigid galvanized steel duct. • Do not use the type with a swing-out damper...and slope slightly down . • Never install a screen over the exhaust outlet. • To avoid lint buildup, do not exhaust the dryer directly into any wall, ceiling, crawl space, or concealed space of the hood and the ground or other common duct or chimney. Serious blockage...
User Manual Ver.1.0 (English, Croatian, Maltese)
Page 11
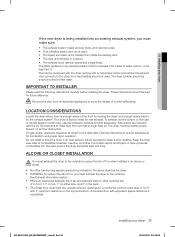
... reduce the risk of fi re, you must not exceed 0.83 inches of water column, or be less than 0. Do not install or store the dryer in an area where it will be exposed to make sure: • The exhaust system meets all local, state, and national codes. • That a ...flexible plastic duct is not used . DV400-03170A_EN_HUDSON-PJT_v1.indd Sec3:11 installing your dryer If the new dryer is being installed into an existing exhaust system, you must be located where there is no -heat setting should be used . • To Inspect...
... reduce the risk of fi re, you must not exceed 0.83 inches of water column, or be less than 0. Do not install or store the dryer in an area where it will be exposed to make sure: • The exhaust system meets all local, state, and national codes. • That a ...flexible plastic duct is not used . DV400-03170A_EN_HUDSON-PJT_v1.indd Sec3:11 installing your dryer If the new dryer is being installed into an existing exhaust system, you must be located where there is no -heat setting should be used . • To Inspect...

User Manual Ver.1.0 (English, Croatian, Maltese)
Page 12
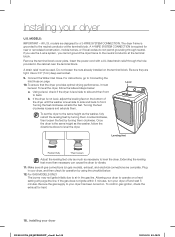
...terminate underneath the mobile home. In Canada: • Use only those foil-type fl exible ducts, if any , specifically identified for Clothes Dryer Transition Duct, Subject 2158A. • Do not assemble the duct with the exhaust duct termination securely fastened to the outside will not support ...Sec3:12 2012-01-20 1:58:28 See Exhausting section for information on purchasing the Floor Anchoring Kit as an accessory. Call 1-800-SAMSUNG(726-7864) for more information. You must conform to the Manufactured Home Construction and Safety Standard Title 24 CFR, Part 3280 {formerly ...
...terminate underneath the mobile home. In Canada: • Use only those foil-type fl exible ducts, if any , specifically identified for Clothes Dryer Transition Duct, Subject 2158A. • Do not assemble the duct with the exhaust duct termination securely fastened to the outside will not support ...Sec3:12 2012-01-20 1:58:28 See Exhausting section for information on purchasing the Floor Anchoring Kit as an accessory. Call 1-800-SAMSUNG(726-7864) for more information. You must conform to the Manufactured Home Construction and Safety Standard Title 24 CFR, Part 3280 {formerly ...
User Manual Ver.1.0 (English, Croatian, Maltese)
Page 13
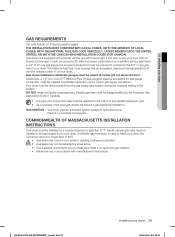
... Gas leaks may not be detected by smell alone. • Gas suppliers recommend you plan to the 3/8" (1 cm) gas line on your dryer _13 2012-01-20 1:58:28 The National Fuel Gas Code requires that an accessible, approved manual gas shut-off valve be installed within 6" ...gas supply pipe system during any liquefied petroleum gas. • As a courtesy, most local gas utilities will inspect a gas appliance installation. Gas dryers are equipped with a burner vent for test gauge connection, must be installed immediately upstream of the system. If you purchase and install a UL-approved...
... Gas leaks may not be detected by smell alone. • Gas suppliers recommend you plan to the 3/8" (1 cm) gas line on your dryer _13 2012-01-20 1:58:28 The National Fuel Gas Code requires that an accessible, approved manual gas shut-off valve be installed within 6" ...gas supply pipe system during any liquefied petroleum gas. • As a courtesy, most local gas utilities will inspect a gas appliance installation. Gas dryers are equipped with a burner vent for test gauge connection, must be installed immediately upstream of the system. If you purchase and install a UL-approved...
User Manual Ver.1.0 (English, Croatian, Maltese)
Page 14
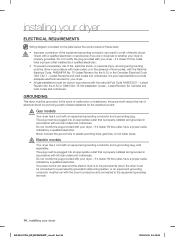
...and grounded in the absence of local codes, with an equipment-grounding conductor and a grounding plug. Electric models WARNING Your dryer has a cord with your dryer - Do not modify the plug provided with an equipment-grounding conductor and a grounding plug, sold separately. To prevent unnecessary... be done in accordance with local codes, or in accordance with the circuit conductors and connected to provide adequate electrical services for your dryer - if it doesn't fit the outlet, have a proper outlet installed by a qualified electrician. The plug must be plugged into ...
...and grounded in the absence of local codes, with an equipment-grounding conductor and a grounding plug. Electric models WARNING Your dryer has a cord with your dryer - Do not modify the plug provided with an equipment-grounding conductor and a grounding plug, sold separately. To prevent unnecessary... be done in accordance with local codes, or in accordance with the circuit conductors and connected to provide adequate electrical services for your dryer - if it doesn't fit the outlet, have a proper outlet installed by a qualified electrician. The plug must be plugged into ...
User Manual Ver.1.0 (English, Croatian, Maltese)
Page 15
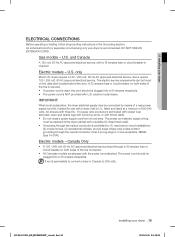
...A 120 volt, 60 Hz AC approved electrical service, with the power cord attached. electric model dryers. DO NOT USE AN EXTENSION CORD. only Most U.S. IMPORTANT: When local codes allow, the dryer electrical supply may be connected by means of the line is prohibited for (1) new branch-circuit ...provided with tinned leads. • Do not reuse a power supply cord from an old dryer. DV400-03170A_EN_HUDSON-PJT_v1.indd Sec3:15 installing your dryer _15 2012-01-20 1:58:28 Electric models - dryers require a 120 / 240 volt, 60 Hz AC approved electrical service. The electric service...
...A 120 volt, 60 Hz AC approved electrical service, with the power cord attached. electric model dryers. DO NOT USE AN EXTENSION CORD. only Most U.S. IMPORTANT: When local codes allow, the dryer electrical supply may be connected by means of the line is prohibited for (1) new branch-circuit ...provided with tinned leads. • Do not reuse a power supply cord from an old dryer. DV400-03170A_EN_HUDSON-PJT_v1.indd Sec3:15 installing your dryer _15 2012-01-20 1:58:28 Electric models - dryers require a 120 / 240 volt, 60 Hz AC approved electrical service. The electric service...
User Manual Ver.1.0 (English, Croatian, Maltese)
Page 16
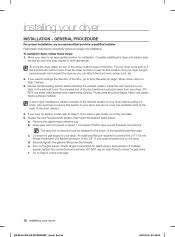
...installation, we recommend that it is required to connect the 3/4" (1.9 cm) female thread end of a flexible connector to the next step. 5. Push the dryer so that you need to change the direction of the door, go to the 3/8" (1 cm) male threaded end on page . Use duct tape to ...return to an appropriate location for leaks using a soap solution. The crimped end of any liquefied petroleum gas. These joints should be resistant to your dryer. A tip for gas leaks. b. Connect the gas supply to the action of the duct sections must be taped. An additional fitting is near ...
...installation, we recommend that it is required to connect the 3/4" (1.9 cm) female thread end of a flexible connector to the next step. 5. Push the dryer so that you need to change the direction of the door, go to the 3/8" (1 cm) male threaded end on page . Use duct tape to ...return to an appropriate location for leaks using a soap solution. The crimped end of any liquefied petroleum gas. These joints should be resistant to your dryer. A tip for gas leaks. b. Connect the gas supply to the action of the duct sections must be taped. An additional fitting is near ...
User Manual Ver.1.0 (English, Croatian, Maltese)
Page 17
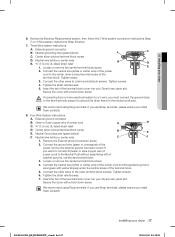
.... 5. Remove the External ground connector screw. 2. If you install them perfectly. 8. DV400-03170A_EN_HUDSON-PJT_v1.indd Sec3:17 installing your dryer 6. Review the Electrical Requirements section, then follow the 3 Wire system connection instructions (Step 7) or 4 Wire system instructions (Step ...8) below. 7. Insert the tab of the terminal block cover into your Dryer's rear panel slot. Three Wire system instructions: A. External ground connector B. Neutral wire (white or center wire) E. ¾" (1.9 cm)...
.... 5. Remove the External ground connector screw. 2. If you install them perfectly. 8. DV400-03170A_EN_HUDSON-PJT_v1.indd Sec3:17 installing your dryer 6. Review the Electrical Requirements section, then follow the 3 Wire system connection instructions (Step 7) or 4 Wire system instructions (Step ...8) below. 7. Insert the tab of the terminal block cover into your Dryer's rear panel slot. Three Wire system instructions: A. External ground connector B. Neutral wire (white or center wire) E. ¾" (1.9 cm)...
User Manual Ver.1.0 (English, Croatian, Maltese)
Page 18
...WIRE SYSTEM CONNECTION. Insert the power cord with a UL-listed strain relief through neutral. Use a 3/8" (1cm) deep well socket. 9. To level the dryer, follow the directions above to the same height as the washer, follow the lettered steps below . 12. If the gas does not ignite within 5 minutes...installed on gas models), exhaust, and electrical connections are complete. To confirm gas ignition, check the exhaust for heat. 18_ installing your dryer has been turned on. Turning the feet clockwise loosens and extends them clockwise. Be sure the gas supply to air in the cabinet ...
...WIRE SYSTEM CONNECTION. Insert the power cord with a UL-listed strain relief through neutral. Use a 3/8" (1cm) deep well socket. 9. To level the dryer, follow the directions above to the same height as the washer, follow the lettered steps below . 12. If the gas does not ignite within 5 minutes...installed on gas models), exhaust, and electrical connections are complete. To confirm gas ignition, check the exhaust for heat. 18_ installing your dryer has been turned on. Turning the feet clockwise loosens and extends them clockwise. Be sure the gas supply to air in the cabinet ...
User Manual Ver.1.0 (English, Croatian, Maltese)
Page 19
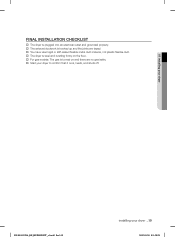
FINAL INSTALLATION CHECKLIST † The dryer is plugged into an electrical outlet and grounded properly. † The exhaust ductwork is hooked up and the joints are taped. † You have used rigid or stiff-walled flexible metal duct material, not plastic flexible duct. † The dryer is level and is sitting firmly on the floor. † For gas models: The gas is turned on and there are no gas leaks. † Start your dryer to confirm that it runs, heats, and shuts off. 01 installing your dryer DV400-03170A_EN_HUDSON-PJT_v1.indd Sec3:19 installing your dryer _19 2012-01-20 1:58:29
FINAL INSTALLATION CHECKLIST † The dryer is plugged into an electrical outlet and grounded properly. † The exhaust ductwork is hooked up and the joints are taped. † You have used rigid or stiff-walled flexible metal duct material, not plastic flexible duct. † The dryer is level and is sitting firmly on the floor. † For gas models: The gas is turned on and there are no gas leaks. † Start your dryer to confirm that it runs, heats, and shuts off. 01 installing your dryer DV400-03170A_EN_HUDSON-PJT_v1.indd Sec3:19 installing your dryer _19 2012-01-20 1:58:29

User Manual Ver.1.0 (English, Croatian, Maltese)
Page 20
...2 2. Wall DUCT EXHAUST TAPE 4. Use unnecessarily long ducts that have many elbows. 4. installing your dryer is installed properly so it exhausts air easily. Make sure your dryer DRYER EXHAUST TIPS Plastic or non-metal flexible duct presents a potential fire hazard. Be sure the vent flap... opens and closes freely. Restrict your new dryer. Dryer 2. Use 4" diameter rigid metal duct. Clean all joints, including at the dryer. Don't let a poor exhaust system slow drying by: 1. DUCT 3. Keep ducts as straight...
...2 2. Wall DUCT EXHAUST TAPE 4. Use unnecessarily long ducts that have many elbows. 4. installing your dryer is installed properly so it exhausts air easily. Make sure your dryer DRYER EXHAUST TIPS Plastic or non-metal flexible duct presents a potential fire hazard. Be sure the vent flap... opens and closes freely. Restrict your new dryer. Dryer 2. Use 4" diameter rigid metal duct. Clean all joints, including at the dryer. Don't let a poor exhaust system slow drying by: 1. DUCT 3. Keep ducts as straight...
User Manual Ver.1.0 (English, Croatian, Maltese)
Page 21
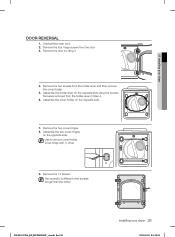
Use to remove cover-holder, cover-hinge with (-) driver 9. Remove the door by lifting it 01 installing your dryer _21 2012-01-20 1:58:29 Remove the two screws from the door 3. Remove the two cover-hinges. 8. Two screw(L) is different other screws. (...longer than the other.) L DV400-03170A_EN_HUDSON-PJT_v1.indd Sec3:21 installing your dryer 4. Assemble the holder-lever on the opposite side. 7. Unplug the power cord. 2. Assemble the cover-holder on the opposite side using the screws that were...
Use to remove cover-holder, cover-hinge with (-) driver 9. Remove the door by lifting it 01 installing your dryer _21 2012-01-20 1:58:29 Remove the two screws from the door 3. Remove the two cover-hinges. 8. Two screw(L) is different other screws. (...longer than the other.) L DV400-03170A_EN_HUDSON-PJT_v1.indd Sec3:21 installing your dryer 4. Assemble the holder-lever on the opposite side. 7. Unplug the power cord. 2. Assemble the cover-holder on the opposite side using the screws that were...


