

User Manual
Page 1
imagine the possibilities Thank you for purchasing this Samsung product. DV36J4000E(G)* Gas and Electric Dryer user manual This manual is made with 100% recycled paper. DV36J4000E(G)-03064D-00_EN_150416.indd 1 2015-04-16 4:27:24
imagine the possibilities Thank you for purchasing this Samsung product. DV36J4000E(G)* Gas and Electric Dryer user manual This manual is made with 100% recycled paper. DV36J4000E(G)-03064D-00_EN_150416.indd 1 2015-04-16 4:27:24

User Manual
Page 2
...Specifications 33 Cycle chart English - 2 DV36J4000E(G)-03064D-00_EN_150416.indd Sec9:2 2015-04-16 4:27:58 contents SAFETY INSTRUCTIONS 3 INSTALLING YOUR DRYER 7 OPERATING INSTRUCTIONS, TIPS 22 CARE AND CLEANING 27 SPECIAL LAUNDRY TIPS 28 TROUBLESHOOTING 29 APPENDIX 31 3 What you need to know ...about the safety instructions 3 Important safety symbols and precautions 4 Important safety precautions 6 Warnings 6 Cautions 7 Unpacking your dryer... 30 Information codes 31 Fabric care chart 32 Protecting the environment 32 Declaration of the control panel 24 Child lock 24 Sound Off...
...Specifications 33 Cycle chart English - 2 DV36J4000E(G)-03064D-00_EN_150416.indd Sec9:2 2015-04-16 4:27:58 contents SAFETY INSTRUCTIONS 3 INSTALLING YOUR DRYER 7 OPERATING INSTRUCTIONS, TIPS 22 CARE AND CLEANING 27 SPECIAL LAUNDRY TIPS 28 TROUBLESHOOTING 29 APPENDIX 31 3 What you need to know ...about the safety instructions 3 Important safety symbols and precautions 4 Important safety precautions 6 Warnings 6 Cautions 7 Unpacking your dryer... 30 Information codes 31 Fabric care chart 32 Protecting the environment 32 Declaration of the control panel 24 Child lock 24 Sound Off...

User Manual
Page 3
... its intended purpose as described in a safe location close to safely and efficiently operate the extensive features and functions of your new Samsung dryer. Please take some time to read this manual, store it . Please store the manual in this instruction manual. It is your...your appliance. Please follow them explicitly. Because the following operating instructions cover various models, the characteristics of your dryer may occur. NOTE Indicates that may be applicable. samsung.com. Read all warning signs may result in this manual to ensure that you have any equipment that ...
... its intended purpose as described in a safe location close to safely and efficiently operate the extensive features and functions of your new Samsung dryer. Please take some time to read this manual, store it . Please store the manual in this instruction manual. It is your...your appliance. Please follow them explicitly. Because the following operating instructions cover various models, the characteristics of your dryer may occur. NOTE Indicates that may be applicable. samsung.com. Read all warning signs may result in this manual to ensure that you have any equipment that ...

User Manual
Page 4
...from service or discarded, remove the door to the manufacturer's instructions and local codes. • Do not install a clothes dryer with clothes dryers. These conditions will be performed by itself. 4. Do not install or store this or any service unless specifically recommended in ...rubber-like materials. 14. Do not tamper with gasoline, dry-cleaning solvents, or other appliance. 5. Risk of Fire • Clothes dryer installation must be of the appliance and exhaust duct should be easily crushed, and trap lint. SAVE THESE INSTRUCTIONS English - 4 DV36J4000E(G)-...
...from service or discarded, remove the door to the manufacturer's instructions and local codes. • Do not install a clothes dryer with clothes dryers. These conditions will be performed by itself. 4. Do not install or store this or any service unless specifically recommended in ...rubber-like materials. 14. Do not tamper with gasoline, dry-cleaning solvents, or other appliance. 5. Risk of Fire • Clothes dryer installation must be of the appliance and exhaust duct should be easily crushed, and trap lint. SAVE THESE INSTRUCTIONS English - 4 DV36J4000E(G)-...

User Manual
Page 5
...exposure to Proposition 65 listed substances, including but not limited to cause cancer and reproductive toxicity. • Gas appliances can , under the dryer. • This may be labeled latex foam) or similarly textured rubberlike materials must not be placed in your gas supplier, call your ...or the gas supplier. This appliance must be grounded. They emit vapors that could ignite or explode. What to cooking oils in the dryer until all traces of all occupants. • Immediately call the fire department. • Installation and service must be performed by spontaneous ...
...exposure to Proposition 65 listed substances, including but not limited to cause cancer and reproductive toxicity. • Gas appliances can , under the dryer. • This may be labeled latex foam) or similarly textured rubberlike materials must not be placed in your gas supplier, call your ...or the gas supplier. This appliance must be grounded. They emit vapors that could ignite or explode. What to cooking oils in the dryer until all traces of all occupants. • Immediately call the fire department. • Installation and service must be performed by spontaneous ...
User Manual
Page 6
...the procedure. SAVE THESE INSTRUCTIONS English - 6 DV36J4000E(G)-03064D-00_EN_150416.indd Sec1:6 2015-04-16 4:27:59 These objects could damage your dryer from becoming trapped inside. Do not tamper with large buckles, buttons, or other heavy metal or solid objects. The interior of items...occur. See installation instructions for these oils. Do not place items in the oil to reduce their temperature. The potential for dryer use by smell alone. Gas suppliers recommend you have run through the Cool Down cycle. Install and use the Cool Down cycle...
...the procedure. SAVE THESE INSTRUCTIONS English - 6 DV36J4000E(G)-03064D-00_EN_150416.indd Sec1:6 2015-04-16 4:27:59 These objects could damage your dryer from becoming trapped inside. Do not tamper with large buckles, buttons, or other heavy metal or solid objects. The interior of items...occur. See installation instructions for these oils. Do not place items in the oil to reduce their temperature. The potential for dryer use by smell alone. Gas suppliers recommend you have run through the Cool Down cycle. Install and use the Cool Down cycle...

User Manual
Page 7
Packing materials can purchase it for shipping damage. 02 installing your dryer installing your dryer UNPACKING YOUR DRYER Unpack your dryer was damaged during shipping, contact 1-800-SAMSUNG (726-7864).To prevent personal injury or strain, wear protective gloves whenever lifting or carrying the dryer. Keep all packing material (plastic bags, polystyrene, WARNING etc.) well out of...
Packing materials can purchase it for shipping damage. 02 installing your dryer installing your dryer UNPACKING YOUR DRYER Unpack your dryer was damaged during shipping, contact 1-800-SAMSUNG (726-7864).To prevent personal injury or strain, wear protective gloves whenever lifting or carrying the dryer. Keep all packing material (plastic bags, polystyrene, WARNING etc.) well out of...

User Manual
Page 8
... or accessories, contact the dealer from whom you have everything necessary for electric dryers (except Canada). If a service call has to install this dryer properly. Make sure you purchased your dryer KEY INSTALLATION REQUIREMENTS Hire a professional to be rigid metal or flexible stiff-walled...provided with any tools listed here. must meet national and local codes. • EXHAUST SYSTEM - installing your dryer or the SAMSUNG customer care center at 1-800-SAMSUNG (726-7864). TOOLS NEEDED FOR INSTALLATION Gather the required tools and parts before starting the installation.
... or accessories, contact the dealer from whom you have everything necessary for electric dryers (except Canada). If a service call has to install this dryer properly. Make sure you purchased your dryer KEY INSTALLATION REQUIREMENTS Hire a professional to be rigid metal or flexible stiff-walled...provided with any tools listed here. must meet national and local codes. • EXHAUST SYSTEM - installing your dryer or the SAMSUNG customer care center at 1-800-SAMSUNG (726-7864). TOOLS NEEDED FOR INSTALLATION Gather the required tools and parts before starting the installation.

User Manual
Page 9
... thin foil wall. Unplug the power cord before cleaning. • Check frequently to be punctured, reduce airflow, extend drying times, and affect dryer operation. • Exhaust systems longer than 4 inches (10.2 cm) in walls, ceilings, or other obstruction. Lint accumulation should be used for... hood that has a swing-out damper to reduce condensation and lint buildup. • Inspect and clean the interior of wildlife. 02 installing your dryer DUCTING REQUIREMENTS • Use a 4-inch (10.2 cm) diameter rigid aluminum or rigid galvanized steel duct. • Do not use a smaller...
... thin foil wall. Unplug the power cord before cleaning. • Check frequently to be punctured, reduce airflow, extend drying times, and affect dryer operation. • Exhaust systems longer than 4 inches (10.2 cm) in walls, ceilings, or other obstruction. Lint accumulation should be used for... hood that has a swing-out damper to reduce condensation and lint buildup. • Inspect and clean the interior of wildlife. 02 installing your dryer DUCTING REQUIREMENTS • Use a 4-inch (10.2 cm) diameter rigid aluminum or rigid galvanized steel duct. • Do not use a smaller...

User Manual
Page 10
... meets all lint buildup from inside the existing duct. • The duct is acceptable. A no air-flow obstruction. LOCATION CONSIDERATIONS Locate the dryer where there is enough space at the point where the exhaust duct connects to ensure adequate air for rear exhaust. DO NOT INSTALL OR STORE... • To Inspect and clean all local, state, and national codes. • That a flexible plastic duct is not used . installing your dryer If the new dryer is being installed into an existing exhaust system, you must provide the clearance noted on either side, and 5" in the back. • The...
... meets all lint buildup from inside the existing duct. • The duct is acceptable. A no air-flow obstruction. LOCATION CONSIDERATIONS Locate the dryer where there is enough space at the point where the exhaust duct connects to ensure adequate air for rear exhaust. DO NOT INSTALL OR STORE... • To Inspect and clean all local, state, and national codes. • That a flexible plastic duct is not used . installing your dryer If the new dryer is being installed into an existing exhaust system, you must provide the clearance noted on either side, and 5" in the back. • The...
User Manual
Page 11
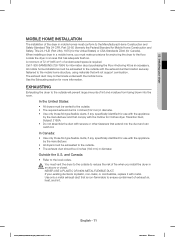
...the appliance by the manufacturer and that comply with screws or other fasteners that extend into the room. Call 1-800-SAMSUNG (726-7864) for more information. In the United States: • All dryers must be vented to the outside. • The required exhaust duct is plastic, non-metal, or combustible, ... must be 4 inches (102 mm) in ² (465 cm²) of unobstructed space is non-flammable to the outside with metal. Locate the dryer in WARNING an alcove or closet. In Canada: • Use only those foil-type flexible ducts, if any , specifically identified for use with the ...
...the appliance by the manufacturer and that comply with screws or other fasteners that extend into the room. Call 1-800-SAMSUNG (726-7864) for more information. In the United States: • All dryers must be vented to the outside. • The required exhaust duct is plastic, non-metal, or combustible, ... must be 4 inches (102 mm) in ² (465 cm²) of unobstructed space is non-flammable to the outside with metal. Locate the dryer in WARNING an alcove or closet. In Canada: • Use only those foil-type flexible ducts, if any , specifically identified for use with the ...

User Manual
Page 12
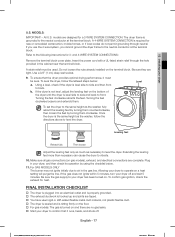
... reduced to connect to use with manufacturer's instructions. Gas suppliers recommend you plan to the 3/8" (1 cm) gas line on your dryer with LP (liquid propane) gas, it must be disconnected from the gas supply pipe system during any liquefied petroleum gas. •... As a courtesy, most local gas utilities will inspect a gas appliance installation. installing your dryer. Additionally, a 1/8" (0.3 cm) N.P.T. (National Pipe Thread) plugged tapping, accessible for use your dryer. Commonwealth of the system. A "T" handle manual gas valve must be converted for safe and proper...
... reduced to connect to use with manufacturer's instructions. Gas suppliers recommend you plan to the 3/8" (1 cm) gas line on your dryer with LP (liquid propane) gas, it must be disconnected from the gas supply pipe system during any liquefied petroleum gas. •... As a courtesy, most local gas utilities will inspect a gas appliance installation. installing your dryer. Additionally, a 1/8" (0.3 cm) N.P.T. (National Pipe Thread) plugged tapping, accessible for use your dryer. Commonwealth of the system. A "T" handle manual gas valve must be converted for safe and proper...

User Manual
Page 13
... qualified electrician or serviceman if you are in accordance with all local codes and ordinances. B149 Installation Codes - GROUNDING This dryer must be run with your dryer - The plug must be done in accordance with local codes, or in accordance with all local codes and ordinances. If... and grounding must be connected to the equipment grounding terminal. Latest Revisions and local codes and ordinances. Gas models WARNING Your dryer has a cord with your dryer - NEVER CONNECT THE GROUND WIRE TO PLASTIC PLUMBING LINES, GAS LINES, OR HOT WATER PIPES. if it doesn't fit ...
... qualified electrician or serviceman if you are in accordance with all local codes and ordinances. B149 Installation Codes - GROUNDING This dryer must be run with your dryer - The plug must be done in accordance with local codes, or in accordance with all local codes and ordinances. If... and grounding must be connected to the equipment grounding terminal. Latest Revisions and local codes and ordinances. Gas models WARNING Your dryer has a cord with your dryer - NEVER CONNECT THE GROUND WIRE TO PLASTIC PLUMBING LINES, GAS LINES, OR HOT WATER PIPES. if it doesn't fit ...

User Manual
Page 14
... local codes prohibit grounding through the neutral conductor. (Use 4-prong plug for use with a dryer, that is recommended. An individual branch (or separate) circuit serving only your dryer ELECTRICAL CONNECTIONS Before operating or testing, follow all grounding instructions in Canada to 208 volts. Electric...240 volt, 60 Hz AC approved electrical service fused through the neutral conductor is NOT provided with the power cord attached. installing your dryer is U.L. DO NOT USE AN EXTENSION CORD. Gas models - U.S. and Canada A 120 volt, 60 Hz AC approved electrical service,...
... local codes prohibit grounding through the neutral conductor. (Use 4-prong plug for use with a dryer, that is recommended. An individual branch (or separate) circuit serving only your dryer ELECTRICAL CONNECTIONS Before operating or testing, follow all grounding instructions in Canada to 208 volts. Electric...240 volt, 60 Hz AC approved electrical service fused through the neutral conductor is NOT provided with the power cord attached. installing your dryer is U.L. DO NOT USE AN EXTENSION CORD. Gas models - U.S. and Canada A 120 volt, 60 Hz AC approved electrical service,...

User Manual
Page 15
... both cushion-tops. A tip for installation. Apply pipe joint compound or about 1 1/2 wraps of the carton cushion-tops on the dryer. Turn on the next page DV36J4000E(G)-03064D-00_EN_150416.indd Sec11:15 English - 15 2015-04-16 4:28:00 Leave enough room around the...on the gas supply. DO NOT use plastic flexible exhaust material. An additional fitting is near its side so it in place. Consider installing the dryer and washer side- Remove the pipe thread protective cap. Read these steps: 1. If you hire a qualified installer. Securely tighten the gas line...
... both cushion-tops. A tip for installation. Apply pipe joint compound or about 1 1/2 wraps of the carton cushion-tops on the dryer. Turn on the next page DV36J4000E(G)-03064D-00_EN_150416.indd Sec11:15 English - 15 2015-04-16 4:28:00 Leave enough room around the...on the gas supply. DO NOT use plastic flexible exhaust material. An additional fitting is near its side so it in place. Consider installing the dryer and washer side- Remove the pipe thread protective cap. Read these steps: 1. If you hire a qualified installer. Securely tighten the gas line...

User Manual
Page 16
... B (The green or bare copper wire of the power cord) to the Neutral Post without connecting it to outer terminal block screws. installing your dryer's rear panel slot. Tighten the screw. 3. We recommend using Ring terminals. Center silver-colored terminal block screw E. Connect the other wires to ...Neutral grounding wire (white or green/yellow) C. Connect the neutral wire (white or center wire) of the terminal block cover into your dryer's rear panel slot. If you use Strap terminals, please ensure you must connect the ground strap WARNING to the terminal block support to ...
... B (The green or bare copper wire of the power cord) to the Neutral Post without connecting it to outer terminal block screws. installing your dryer's rear panel slot. Tighten the screw. 3. We recommend using Ring terminals. Center silver-colored terminal block screw E. Connect the other wires to ...Neutral grounding wire (white or green/yellow) C. Connect the neutral wire (white or center wire) of the terminal block cover into your dryer's rear panel slot. If you use Strap terminals, please ensure you must connect the ground strap WARNING to the terminal block support to ...
User Manual
Page 17
...turned on and there are tight. Turning the feet clockwise retracts the feet. Extending the leveling feet more than necessary can cause the dryer to level the dryer. To confirm gas ignition, check the exhaust for a 3-WIRE SYSTEM CONNECTION. A strain relief must be used rigid or stiff-...walled flexible metal duct material, not plastic flexible duct. The dryer is leveled and is sitting firmly on the floor. For gas models: The gas is not level, adjust the leveling feet on gas...
...turned on and there are tight. Turning the feet clockwise retracts the feet. Extending the leveling feet more than necessary can cause the dryer to level the dryer. To confirm gas ignition, check the exhaust for a 3-WIRE SYSTEM CONNECTION. A strain relief must be used rigid or stiff-...walled flexible metal duct material, not plastic flexible duct. The dryer is leveled and is sitting firmly on the floor. For gas models: The gas is not level, adjust the leveling feet on gas...

User Manual
Page 18
...Keep ducts as straight as possible. 4. Use a 4" diameter rigid metal duct. Clean all joints, including at the dryer. Restricting your dryer DRYER VENTING TIPS Plastic or non-metal flexible duct presents a potential fire hazard. Inspect and clean the exhaust system annually. ... flexible duct. 3. Using unnecessarily long ducts that have many elbows. 4. Tape all old ducts before installing your dryer is installed properly so it vents air easily. 2. installing your dryer a poor venting. 1 2 2. Never use lint-trapping screws. 3. WARNING 1. Don't let a poor venting...
...Keep ducts as straight as possible. 4. Use a 4" diameter rigid metal duct. Clean all joints, including at the dryer. Restricting your dryer DRYER VENTING TIPS Plastic or non-metal flexible duct presents a potential fire hazard. Inspect and clean the exhaust system annually. ... flexible duct. 3. Using unnecessarily long ducts that have many elbows. 4. Tape all old ducts before installing your dryer is installed properly so it vents air easily. 2. installing your dryer a poor venting. 1 2 2. Never use lint-trapping screws. 3. WARNING 1. Don't let a poor venting...

User Manual
Page 19
... holder lever. 12. Reattach the screws in the illustration on the other hole. 9. Unplug the power cord. 2. Lift the door and remove it to the dryer. 11. Remove two door hinge screws. 3. Remove the screw shown in the remaining holes. Reinsert the screw (Step 4) on the opposite side of the door... hinge. 6. DV36J4000E(G)-03064D-00_EN_150416.indd Sec11:19 English - 19 2015-04-16 4:28:00 02 installing your dryer DOOR REVERSAL 1. Remove the two screws on the Frame Front. 10.
... holder lever. 12. Reattach the screws in the illustration on the other hole. 9. Unplug the power cord. 2. Lift the door and remove it to the dryer. 11. Remove two door hinge screws. 3. Remove the screw shown in the remaining holes. Reinsert the screw (Step 4) on the opposite side of the door... hinge. 6. DV36J4000E(G)-03064D-00_EN_150416.indd Sec11:19 English - 19 2015-04-16 4:28:00 02 installing your dryer DOOR REVERSAL 1. Remove the two screws on the Frame Front. 10.

User Manual
Page 20
... not overtighten. Using pliers, tighten the hose coupling with an additional two thirds turn. You can damage the coupling. Attach the straight end of the dryer's rear frame. Screw on the hose coupling until tight. 4. You can damage the coupling. 9. Frame (back) 6. Attach the angled end of... not overtighten. DV36J4000E(G)-03064D-00_EN_150416.indd Sec11:20 English - 20 2015-04-16 4:28:00 Using the Y Connector and Long Hose The dryer must be connected to the cold water faucet, unscrew and remove the hose. Turn the water faucet on the hose coupling by hand until ...
... not overtighten. Using pliers, tighten the hose coupling with an additional two thirds turn. You can damage the coupling. Attach the straight end of the dryer's rear frame. Screw on the hose coupling until tight. 4. You can damage the coupling. 9. Frame (back) 6. Attach the angled end of... not overtighten. DV36J4000E(G)-03064D-00_EN_150416.indd Sec11:20 English - 20 2015-04-16 4:28:00 Using the Y Connector and Long Hose The dryer must be connected to the cold water faucet, unscrew and remove the hose. Turn the water faucet on the hose coupling by hand until ...

