
Leaflet
Page 2
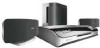
.... and share them with family and friends. DVD home theater system DivX Ultra Highlights HTS6500/37 SonoWave The SonoWave surround sound system, powered by simply plugging in your portable MP3 player to the built-in absolute clarity, without loss of your Philips Home Theatre System while playing your favorite music from fewer speakers. HDMI is produced and experienced in the comfort...
.... and share them with family and friends. DVD home theater system DivX Ultra Highlights HTS6500/37 SonoWave The SonoWave surround sound system, powered by simply plugging in your portable MP3 player to the built-in absolute clarity, without loss of your Philips Home Theatre System while playing your favorite music from fewer speakers. HDMI is produced and experienced in the comfort...
Leaflet
Page 3
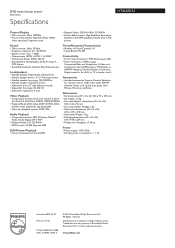
...home theater system DivX Ultra Specifications HTS6500...Speaker: Magnetically shielded front • Satellite speaker drivers: 3 x 3" full range woofer • Satellite speaker freq range: 120-20000 Hz • Satellite speaker impedance: 8 ohm • Subwoofer driver: 8" high efficiency woofer • Subwoofer freq range: 30-120 Hz • Subwoofer impedance: 4 ohm Video Playback • Compression formats: DivX 3.11, DivX 4.x, DivX 5.x, DivX 6.0, DivX Ultra...13188 UPC: 6 09585 11423 4 © 2010 Koninklijke Philips Electronics N.V. Specifications are the property of Preset Channels: 40...
...home theater system DivX Ultra Specifications HTS6500...Speaker: Magnetically shielded front • Satellite speaker drivers: 3 x 3" full range woofer • Satellite speaker freq range: 120-20000 Hz • Satellite speaker impedance: 8 ohm • Subwoofer driver: 8" high efficiency woofer • Subwoofer freq range: 30-120 Hz • Subwoofer impedance: 4 ohm Video Playback • Compression formats: DivX 3.11, DivX 4.x, DivX 5.x, DivX 6.0, DivX Ultra...13188 UPC: 6 09585 11423 4 © 2010 Koninklijke Philips Electronics N.V. Specifications are the property of Preset Channels: 40...

User manual
Page 6
...20 Connecting audio from TV ...19 Connecting audio from an audio/video device 19 Mounting the speakers on the wall ...20 Basic Setup Getting Started ...21-25 Step 1: Turning on the DVD system ...21 Turning off to Eco Power standby mode 21 Step 2: Finding the correct viewing channel...language for DVD playback 22-23 Step 4: Setting the TV Display...23 Step 5: Setting up Progressive Scan feature 24 Step 6: Setting the SonoWave speakers ...25 Disc Playback Disc Operations ...26-33 Playable discs ...26 Playing a disc ...26 Basic playback controls...27 Selecting various repeat/shuffle functions ...
...20 Connecting audio from TV ...19 Connecting audio from an audio/video device 19 Mounting the speakers on the wall ...20 Basic Setup Getting Started ...21-25 Step 1: Turning on the DVD system ...21 Turning off to Eco Power standby mode 21 Step 2: Finding the correct viewing channel...language for DVD playback 22-23 Step 4: Setting the TV Display...23 Step 5: Setting up Progressive Scan feature 24 Step 6: Setting the SonoWave speakers ...25 Disc Playback Disc Operations ...26-33 Playable discs ...26 Playing a disc ...26 Basic playback controls...27 Selecting various repeat/shuffle functions ...
User manual
Page 8
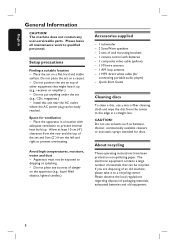
... loop antenna - 1 MP3 direct white cable (for ventilation - Do not position the set on the apparatus (e.g., liquid filled objects, lighted candles.) Accessories supplied - 1 subwoofer - 2 SonoWave speakers - 2 sets of an old machine, please take it up . Avoid high temperatures, moisture, water and dust - Apparatus must not be easily reached. Quick Start Guide...
... loop antenna - 1 MP3 direct white cable (for ventilation - Do not position the set on the apparatus (e.g., liquid filled objects, lighted candles.) Accessories supplied - 1 subwoofer - 2 SonoWave speakers - 2 sets of an old machine, please take it up . Avoid high temperatures, moisture, water and dust - Apparatus must not be easily reached. Quick Start Guide...

User manual
Page 9
... Front view 10 98 a STANDBY ON 2 - TUNER: press and hold this button to search backward/forward. - f SonoWave - i MP3 Direct - Turns on the SonoWave speakers to multi-channel mode or turns off to stereo mode. b PLAY PAUSE u - PREV . / NEXT > - c SOURCE - Selects the relevant active source mode: DISC,.../AM,) TV or AUX/DI. d EJECT ç - Ejects the disc from the disc slot. Adjusts the volume level. Turns on the system or turns off to Eco Power standby mode. Selects a predefined sound effect. h USB port - Phono input for connecting to the headphone out jack on ...
... Front view 10 98 a STANDBY ON 2 - TUNER: press and hold this button to search backward/forward. - f SonoWave - i MP3 Direct - Turns on the SonoWave speakers to multi-channel mode or turns off to stereo mode. b PLAY PAUSE u - PREV . / NEXT > - c SOURCE - Selects the relevant active source mode: DISC,.../AM,) TV or AUX/DI. d EJECT ç - Ejects the disc from the disc slot. Adjusts the volume level. Turns on the system or turns off to Eco Power standby mode. Selects a predefined sound effect. h USB port - Phono input for connecting to the headphone out jack on ...

User manual
Page 10
...connected speakers system. Selects an audio language (DVD) or an audio channel (CD.) e SETUP - i TV VOL +- Turns off repeat mode. TUNER: toggles between AUX and DIGITAL IN external source mode. 10 c ZOOM - f DISPLAY - h STOP Ç - l VOCAL / KARAOKE - Enters or exits the system setup... menu. Exits an operation. - DISC: stops playback. - turns off to eject the disc. - DISC: starts playback. Enters a track/title number of a preset radio station. AUX/DI: toggles between FM and AM band. DISC: press and hold this model. Adjusts TV volume (Philips...
...connected speakers system. Selects an audio language (DVD) or an audio channel (CD.) e SETUP - i TV VOL +- Turns off repeat mode. TUNER: toggles between AUX and DIGITAL IN external source mode. 10 c ZOOM - f DISPLAY - h STOP Ç - l VOCAL / KARAOKE - Enters or exits the system setup... menu. Exits an operation. - DISC: stops playback. - turns off to eject the disc. - DISC: starts playback. Enters a track/title number of a preset radio station. AUX/DI: toggles between FM and AM band. DISC: press and hold this model. Adjusts TV volume (Philips...

User manual
Page 11
... station. DISC: pauses playback. Mutes or restores the volume. TUNER: press and hold this button to tune the radio frequency up/down to enter SonoWave speaker settings mode. 11 For DVD, enter or exit disc contents menu. - p W X S T - Adjusts the volume level. w PROGRAM - Selects multi-channel surround or stereo mode. DISC: selects...
... station. DISC: pauses playback. Mutes or restores the volume. TUNER: press and hold this button to tune the radio frequency up/down to enter SonoWave speaker settings mode. 11 For DVD, enter or exit disc contents menu. - p W X S T - Adjusts the volume level. w PROGRAM - Selects multi-channel surround or stereo mode. DISC: selects...

User manual
Page 13
... 1: Placing the speakers The Philips Home Theater System is simple to mount the SonoWave speakers on the wall.' Mounting the SonoWave speakers on the wall, see 'Getting Started - You may find other placement choices that will provide great system performance. Step 6: Setting the SonoWave speakers.' 13 If you...and face straight ahead towards the listening area. Keep at the corner of the room. For SonoWave speakers setting, see section 'Optional Connections - However, proper system placement is only a guideline that are more suitable for your TV. - Helpful Hints: - ...
... 1: Placing the speakers The Philips Home Theater System is simple to mount the SonoWave speakers on the wall.' Mounting the SonoWave speakers on the wall, see 'Getting Started - You may find other placement choices that will provide great system performance. Step 6: Setting the SonoWave speakers.' 13 If you...and face straight ahead towards the listening area. Keep at the corner of the room. For SonoWave speakers setting, see section 'Optional Connections - However, proper system placement is only a guideline that are more suitable for your TV. - Helpful Hints: - ...

User manual
Page 14
...FM/AM ANTENNA AM FM 75 Ensure this portion is fully inserted into the jack. Step 2: Connecting the SonoWave speakers and subwoofer Connect the SonoWave speakers to the DVD system, AC power adapter, TV or any connections, make sure that all the devices are disconnected from the power outlet.... 14 To prevent unwanted noise, do not place the SonoWave speakers too close to the matching speaker jacks at the rear of the DVD system. To disconnect the SonoWave speakers, press down the catch before pulling out the cable. English Basic Connections (continued) ...
...FM/AM ANTENNA AM FM 75 Ensure this portion is fully inserted into the jack. Step 2: Connecting the SonoWave speakers and subwoofer Connect the SonoWave speakers to the DVD system, AC power adapter, TV or any connections, make sure that all the devices are disconnected from the power outlet.... 14 To prevent unwanted noise, do not place the SonoWave speakers too close to the matching speaker jacks at the rear of the DVD system. To disconnect the SonoWave speakers, press down the catch before pulling out the cable. English Basic Connections (continued) ...

User manual
Page 19
...cable (not supplied) to connect the DIGITAL IN jack on this Home Theater Audio System, you will enable you want to the sound, press TV on the connected device. It will have the sound of the TV output on all the speakers. Use an audio cable (red/white - TIPS: Refer to enjoy...as the sound source that you to the DIGITAL OUT jack on the TV. not supplied) to connect the AUX IN jacks on this Home Theater Audio System in order to the respective connected device's user manual for other possible connections. 19 Connecting audio from an audio/video device (e.g. Optional ...
...cable (not supplied) to connect the DIGITAL IN jack on this Home Theater Audio System, you will enable you want to the sound, press TV on the connected device. It will have the sound of the TV output on all the speakers. Use an audio cable (red/white - TIPS: Refer to enjoy...as the sound source that you to the DIGITAL OUT jack on the TV. not supplied) to connect the AUX IN jacks on this Home Theater Audio System in order to the respective connected device's user manual for other possible connections. 19 Connecting audio from an audio/video device (e.g. Optional ...

User manual
Page 20
... the wall. DO NOT do it yourself in order to secure the connections at the bottom of the speakers. Philips accepts absolutely no liability for other possible connections. 20 Mount the rubber wall plugs and screws (not supplied) to drill and insert the mounting screws (...not supplied) on the wall. D Hook the speakers firmly onto the screws, by ensuring that they fit into the brackets at the bottom of the speakers and remove the base covers. A Loosen the screws at the rear of the...
... the wall. DO NOT do it yourself in order to secure the connections at the bottom of the speakers. Philips accepts absolutely no liability for other possible connections. 20 Mount the rubber wall plugs and screws (not supplied) to drill and insert the mounting screws (...not supplied) on the wall. D Hook the speakers firmly onto the screws, by ensuring that they fit into the brackets at the bottom of the speakers and remove the base covers. A Loosen the screws at the rear of the...

User manual
Page 25
.../glass walls. { SOFT } for optimum performance. Press SETUP to adjust the FRONT L TV SonoWave speakers: Room Acoustics, Speaker Distance and Listening Position. There are now completed and the system will exit the setting automatically. B Use W X keys to the main SonoWave speaker settings selection, press S or T key. C Use W X keys to select the condition of the...
.../glass walls. { SOFT } for optimum performance. Press SETUP to adjust the FRONT L TV SonoWave speakers: Room Acoustics, Speaker Distance and Listening Position. There are now completed and the system will exit the setting automatically. B Use W X keys to the main SonoWave speaker settings selection, press S or T key. C Use W X keys to select the condition of the...

User manual
Page 47
... 4 Ω Speaker drivers: 203 mm (8") woofer Frequency response: 30 Hz - 120 Hz Dimensions: 220 x 370 x 470 (mm) (w x h x d) Weight: 7 kg DISC SECTION Laser Type Semiconductor Disc Diametre 12cm / 8cm Video Decoding MPEG-1 / MPEG-2 / / DivX 3/4/5/6, Ultra Video DAC 12 Bits Signal System PAL / NTSC ...: 100 W Eco Standby power: < 1 W Dimensions: 340 x 70 x 330 (mm) (w x h x d) Weight: 3.5 kg SonoWave SPEAKERS System: Full range satellite closed- AUX In : 1000 mV - English Specifications AMPLIFIER Output power: 500 W / 200 W FTC* Frequency Response: 20 Hz...
... 4 Ω Speaker drivers: 203 mm (8") woofer Frequency response: 30 Hz - 120 Hz Dimensions: 220 x 370 x 470 (mm) (w x h x d) Weight: 7 kg DISC SECTION Laser Type Semiconductor Disc Diametre 12cm / 8cm Video Decoding MPEG-1 / MPEG-2 / / DivX 3/4/5/6, Ultra Video DAC 12 Bits Signal System PAL / NTSC ...: 100 W Eco Standby power: < 1 W Dimensions: 340 x 70 x 330 (mm) (w x h x d) Weight: 3.5 kg SonoWave SPEAKERS System: Full range satellite closed- AUX In : 1000 mV - English Specifications AMPLIFIER Output power: 500 W / 200 W FTC* Frequency Response: 20 Hz...

User manual
Page 48
...as below before pressing the function button (X, ./ >.) - If you try to play (for example, DISC/ USB or TUNER) before taking the system for the auto recovery or turn on the remote control. Check the video connection. - No sound or distorted sound. - The remote control does ...power cord is recorded or broadcast in surround sound (DTS, Dolby Digital, etc.). Adjust the volume. - Check the speaker connections and settings. - button to your dealer or Philips for help. Press the 2(STANDBY ON) on the front of picture distortion may appear. Refer to select a correct ...
...as below before pressing the function button (X, ./ >.) - If you try to play (for example, DISC/ USB or TUNER) before taking the system for the auto recovery or turn on the remote control. Check the video connection. - No sound or distorted sound. - The remote control does ...power cord is recorded or broadcast in surround sound (DTS, Dolby Digital, etc.). Adjust the volume. - Check the speaker connections and settings. - button to your dealer or Philips for help. Press the 2(STANDBY ON) on the front of picture distortion may appear. Refer to select a correct ...

User manual
Page 53
...Some discs are formatted to a structure of realism by looking at the product label. Multichannel: DVDs are compatible with a sound data compression system. This unit will be played only in each sound track constitute one sound field. By using menu screens recorded on the back of your ...unit by arranging multiple speakers around the listener. Parental control: Limits Disc play discs that have each country. By using the MP3 format, one CD-R or CD...
...Some discs are formatted to a structure of realism by looking at the product label. Multichannel: DVDs are compatible with a sound data compression system. This unit will be played only in each sound track constitute one sound field. By using menu screens recorded on the back of your ...unit by arranging multiple speakers around the listener. Parental control: Limits Disc play discs that have each country. By using the MP3 format, one CD-R or CD...

Quick start guide
Page 1
... and fix the claw into the AM/MW jacks. 2 Set up the SonoWave speakers A Press and hold SOUND on the remote control to get the sound output from TV to DVD system (optional) To hear the TV audio through this home theater system, use the red and white audio cables (not supplied) to connect the... TV IN (R/L) jacks on this DVD system to your TV. B Plug in to select the correct viewing channel ...
... and fix the claw into the AM/MW jacks. 2 Set up the SonoWave speakers A Press and hold SOUND on the remote control to get the sound output from TV to DVD system (optional) To hear the TV audio through this home theater system, use the red and white audio cables (not supplied) to connect the... TV IN (R/L) jacks on this DVD system to your TV. B Plug in to select the correct viewing channel ...

Quick start guide
Page 2
... DVD HOME THEATER SYSTEM HTS6500 Quick Start Guide What's in place. Playback from the SonoWave speakers, press SONOWAVE (or SURR on the remote control) to turn on your portable audio/HDD player to 'DISC' mode. Playback from the power outlet for portable audio player 2 sets of Philips Electronics ... output jack on the screen. User Manual See the user manual that cames with the disc label facing up 3 Enjoy DVD system 2 SonoWave speakers and subwoofer Remote Control and 2 batteries Composite video cable MP3 direct cable for a few minutes. B Press MP3 DIRECT on ...
... DVD HOME THEATER SYSTEM HTS6500 Quick Start Guide What's in place. Playback from the SonoWave speakers, press SONOWAVE (or SURR on the remote control) to turn on your portable audio/HDD player to 'DISC' mode. Playback from the power outlet for portable audio player 2 sets of Philips Electronics ... output jack on the screen. User Manual See the user manual that cames with the disc label facing up 3 Enjoy DVD system 2 SonoWave speakers and subwoofer Remote Control and 2 batteries Composite video cable MP3 direct cable for a few minutes. B Press MP3 DIRECT on ...


