

Owner's Manual
Page 2
Owner's Manual
Page 5
...center for its intended use an electric appliance, basic safety precautions should never be pulled into a tub or sink. Never operate this manual. 3. Do not operate where aerosol (spray) products are being administered. 8. Do not unplug by the manufacturer as threading needle,...or injury to break. 1 3. Switch the sewing machine off ("0") position, then remove plug from outlet. 9. SAVE THESE INSTRUCTIONS Always unplug this manual. Replace bulb with any opening. 6. Do not allow to off ("0") when making any adjustments in . Keep ventilation openings of electric shock: ...
...center for its intended use an electric appliance, basic safety precautions should never be pulled into a tub or sink. Never operate this manual. 3. Do not operate where aerosol (spray) products are being administered. 8. Do not unplug by the manufacturer as threading needle,...or injury to break. 1 3. Switch the sewing machine off ("0") position, then remove plug from outlet. 9. SAVE THESE INSTRUCTIONS Always unplug this manual. Replace bulb with any opening. 6. Do not allow to off ("0") when making any adjustments in . Keep ventilation openings of electric shock: ...

Owner's Manual
Page 46
... the info menu Reverse sewing This key has the following functions: • when pressed, will reverse sew • manual finish of a buttonhole • programming the buttonhole determines the length of the darning program (model 2040) • sewing on lace while tapering automatically (see page 1 26 on> 45 Info key The info key...
... the info menu Reverse sewing This key has the following functions: • when pressed, will reverse sew • manual finish of a buttonhole • programming the buttonhole determines the length of the darning program (model 2040) • sewing on lace while tapering automatically (see page 1 26 on> 45 Info key The info key...

Owner's Manual
Page 81
manual finish Manual buttonhole Buttonholes with gimp thread Tips for a perfect buttonhole Page 86 Page 87 Page 87 Page 88 Page 89 Page 90- 91 Page 92 Page 93 Page 94 85 Contents General notes on buttonholes Inserting the buttonhole guide Inserting the buttonhole foot Types of buttonholes Fully automatic buttonhole Semi-automatic buttonhole!
manual finish Manual buttonhole Buttonholes with gimp thread Tips for a perfect buttonhole Page 86 Page 87 Page 87 Page 88 Page 89 Page 90- 91 Page 92 Page 93 Page 94 85 Contents General notes on buttonholes Inserting the buttonhole guide Inserting the buttonhole foot Types of buttonholes Fully automatic buttonhole Semi-automatic buttonhole!

Owner's Manual
Page 82
Perfect buttonholes can be sewn on plush, knitted fabrics and heavy knits. fully automatically - semi-automatically - The tiptronic uses buttonhole guide No. 1 0 and accurately. manual The values for a semi-automatic and manual buttonhole are entered during the sewing operation. 86 _'/ I'fl - : Buttonholes dYbiuofftuterorentinhptotrbloeunstitcoonnhhajaoscltekhseetso,pneptrahfneectstmb(oturdotetuolsne2hr0so)3l,e0b)floogruiveseevseyrooyurfrasthbrraeintccdha-nmfdaabdgreiacrsgm,a4ermndteifW nfet rhtehenetthepbrruotyftooeusnshwiooinlseahsl to ensure...
Perfect buttonholes can be sewn on plush, knitted fabrics and heavy knits. fully automatically - semi-automatically - The tiptronic uses buttonhole guide No. 1 0 and accurately. manual The values for a semi-automatic and manual buttonhole are entered during the sewing operation. 86 _'/ I'fl - : Buttonholes dYbiuofftuterorentinhptotrbloeunstitcoonnhhajaoscltekhseetso,pneptrahfneectstmb(oturdotetuolsne2hr0so)3l,e0b)floogruiveseevseyrooyurfrasthbrraeintccdha-nmfdaabdgreiacrsgm,a4ermndteifW nfet rhtehenetthepbrruotyftooeusnshwiooinlseahsl to ensure...

Owner's Manual
Page 86
When the left side of the buttonhole press the "reverse sewing" key (33) once again. 90 Semi-automatic buttonhole You can also finish a buttonhole manually by pressing the "reverse sewing" key (33) one time after you have started sewing the button hole. Before the left side of the buttonhole is desired. IF 00 The word "man" appears in the dspIay, indicating a manual finish of the buttonhole is the same length as the right side of the buttonhole ends, the machine will slow down.
When the left side of the buttonhole press the "reverse sewing" key (33) once again. 90 Semi-automatic buttonhole You can also finish a buttonhole manually by pressing the "reverse sewing" key (33) one time after you have started sewing the button hole. Before the left side of the buttonhole is desired. IF 00 The word "man" appears in the dspIay, indicating a manual finish of the buttonhole is the same length as the right side of the buttonhole ends, the machine will slow down.

Owner's Manual
Page 88
... once again. sewing. the The desired buttonhole. The word "auto" appears on the display. Note: the programming of the buttonhole while the "reverse sewing" key. Manual buttonhole I - . . The machine will sew the second bartack and complete the buttonhole. kFF - The word "man" appears previously, disappears. Select on the dspiay. Before the...
... once again. sewing. the The desired buttonhole. The word "auto" appears on the display. Note: the programming of the buttonhole while the "reverse sewing" key. Manual buttonhole I - . . The machine will sew the second bartack and complete the buttonhole. kFF - The word "man" appears previously, disappears. Select on the dspiay. Before the...

Owner's Manual
Page 118
... other stabilizer under fabric. - Zigzag stitch 3 is used when a center (B) needle position motif is desired. - Set needle thread tension to 3. Set needle thread tension to 3. Manual change ! Set stitch length to left needle position, the stitch width only changes in one direction. 1 24 Note: If you have selected the right or... right or left needle position or zigzag stitch 3 for motifs with a center needle position. - Irregular pattern - Apply iron-on backing or other stabilizer under fabric. - Manual change ! I A!! Regular pattern -
... other stabilizer under fabric. - Zigzag stitch 3 is used when a center (B) needle position motif is desired. - Set needle thread tension to 3. Set needle thread tension to 3. Manual change ! Set stitch length to left needle position, the stitch width only changes in one direction. 1 24 Note: If you have selected the right or... right or left needle position or zigzag stitch 3 for motifs with a center needle position. - Irregular pattern - Apply iron-on backing or other stabilizer under fabric. - Manual change ! I A!! Regular pattern -
Owner's Manual
Page 134
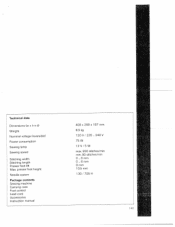
presser foot height Needle system Package contents Sewing machine Carrying case Foot control Lead cord Accessories Instruction manual 408 x 290 x 1 87 mm 8.3 kg 120V/220... 240V 75W 12V/5W max. 950 stitches/mm mm. 80 stitches/mm O...6mm 0..6mm 8mm 10.5mm 1 30 / 705 H 141 Technical data Dimensions (w x h x d) Weight Nominal voltage (reversible) Power consumption Sewing lamp Sewing speed Stitching width Stitching length Presser foot lift Max.
presser foot height Needle system Package contents Sewing machine Carrying case Foot control Lead cord Accessories Instruction manual 408 x 290 x 1 87 mm 8.3 kg 120V/220... 240V 75W 12V/5W max. 950 stitches/mm mm. 80 stitches/mm O...6mm 0..6mm 8mm 10.5mm 1 30 / 705 H 141 Technical data Dimensions (w x h x d) Weight Nominal voltage (reversible) Power consumption Sewing lamp Sewing speed Stitching width Stitching length Presser foot lift Max.


