
MC-CG917 Owner's Manual (Multi-Language)
Page 2
...SAFETY INSTRUCTIONS 7 PARTS IDENTIFICATION...10-12 FEATURE CHART ...13 ASSEMBLY...14 Power Nozzle ...14 Canister...14 Hood ...14 Hose ...16 Tool Storage ...16 Air Turbine and Caddy...18 TO OPERATE VACUUM CLEANER 20 Power Cord ...20 On/Off Switch ...22 Telescopic Wand Adjustments 22 Handle Adjustments...Protector...30 Hose Swivel ...32 Suction Control ...32 Power Nozzle Storage...32 Edge Cleaner ...34 Thermal Protector ...34 ROUTINE CARE OF VACUUM CLEANER 36 Changing Dust Bag...36 Motor Safety Filter Changing ...38 Exhaust Filter Changing...40 Cleaning Exterior and Tools...42 POWER NOZZLE CARE...
...SAFETY INSTRUCTIONS 7 PARTS IDENTIFICATION...10-12 FEATURE CHART ...13 ASSEMBLY...14 Power Nozzle ...14 Canister...14 Hood ...14 Hose ...16 Tool Storage ...16 Air Turbine and Caddy...18 TO OPERATE VACUUM CLEANER 20 Power Cord ...20 On/Off Switch ...22 Telescopic Wand Adjustments 22 Handle Adjustments...Protector...30 Hose Swivel ...32 Suction Control ...32 Power Nozzle Storage...32 Edge Cleaner ...34 Thermal Protector ...34 ROUTINE CARE OF VACUUM CLEANER 36 Changing Dust Bag...36 Motor Safety Filter Changing ...38 Exhaust Filter Changing...40 Cleaning Exterior and Tools...42 POWER NOZZLE CARE...

MC-CG917 Owner's Manual (Multi-Language)
Page 16
...rapide de la poignée Botón de liberación rápida del mango Hose ➢ Line up the hose latch tab and notch in canister hood and insert hose into wand until it snaps in place. To Remove: ➢ Press handle quick release and pull up on hose. ➢ Insert... handle into canister until lock button snaps in place. ➢ Be sure the hose is fully inserted and snapped in place. NOTE: The vacuum cleaner will not start unless hose is not twisted.
...rapide de la poignée Botón de liberación rápida del mango Hose ➢ Line up the hose latch tab and notch in canister hood and insert hose into wand until it snaps in place. To Remove: ➢ Press handle quick release and pull up on hose. ➢ Insert... handle into canister until lock button snaps in place. ➢ Be sure the hose is fully inserted and snapped in place. NOTE: The vacuum cleaner will not start unless hose is not twisted.

MC-CG917 Owner's Manual (Multi-Language)
Page 20
If it is pushed. ➢ Plug cord into 120-volt outlet located near the floor. TO REWIND: ➢ Unplug the vacuum cleaner. ➢ Hold the plug while rewinding to install the proper outlet. Always unplug from the moving cord. ➢ Push cord rewind bar. Only use ... touch the agitator when vacuum cleaner is wider than the other injuries. This plug will not rewind until cord rewind button is rotating can cut, bruise or cause other . Cord Rewind Bar Barre de rappel du cordon Almacenamiento del cordon eléctrico ➢ Pull cord out of canister to desired length...
If it is pushed. ➢ Plug cord into 120-volt outlet located near the floor. TO REWIND: ➢ Unplug the vacuum cleaner. ➢ Hold the plug while rewinding to install the proper outlet. Always unplug from the moving cord. ➢ Push cord rewind bar. Only use ... touch the agitator when vacuum cleaner is wider than the other injuries. This plug will not rewind until cord rewind button is rotating can cut, bruise or cause other . Cord Rewind Bar Barre de rappel du cordon Almacenamiento del cordon eléctrico ➢ Pull cord out of canister to desired length...

MC-CG917 Owner's Manual (Multi-Language)
Page 30
...Plug in and turn on top of the POWER NOZZLE should be changed to point into the next section to be cleaned without moving the canister. ➢ Carpeted stairs need to run. TO CORRECT PROBLEM: ➢ Unplug electrical cord. ➢ Check brush and brush support areas ...for excessive lint build-up or jamming. ➢ Clean jammed area. This pattern should be vacuumed regularly. ➢ For best cleaning results, fully close the suction control. NOTE: Canister motor will continue to be pushed straight away from you and pulled straight back.
...Plug in and turn on top of the POWER NOZZLE should be changed to point into the next section to be cleaned without moving the canister. ➢ Carpeted stairs need to run. TO CORRECT PROBLEM: ➢ Unplug electrical cord. ➢ Check brush and brush support areas ...for excessive lint build-up or jamming. ➢ Clean jammed area. This pattern should be vacuumed regularly. ➢ For best cleaning results, fully close the suction control. NOTE: Canister motor will continue to be pushed straight away from you and pulled straight back.

MC-CG917 Owner's Manual (Multi-Language)
Page 32
...Disminuir aspiración Suction Control - Increase Suction Augmentation de l'aspiration Aumentar aspiración ➢ Suction control allows you to change vacuum cleaner suction for different fabric and carpet weight. ➢ Opening control decreases suction for draperies and lightweight rugs. ➢ Closing control... increases suction for twisting before pulling canister. Use the handle release pedal to place it in this feature to be in the flat position as it is helpful ...
...Disminuir aspiración Suction Control - Increase Suction Augmentation de l'aspiration Aumentar aspiración ➢ Suction control allows you to change vacuum cleaner suction for different fabric and carpet weight. ➢ Opening control decreases suction for draperies and lightweight rugs. ➢ Closing control... increases suction for twisting before pulling canister. Use the handle release pedal to place it in this feature to be in the flat position as it is helpful ...
MC-CG917 Owner's Manual (Multi-Language)
Page 34
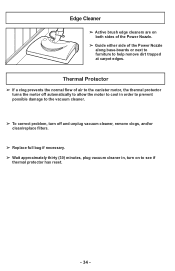
... 34 - Edge Cleaner ➢ Active brush edge cleaners are on both sides of the Power Nozzle. ➢ Guide either side of air to the canister motor, the thermal protector turns the motor off automatically to allow the motor to cool in order to prevent possible damage to the... vacuum cleaner. ➢ To correct problem, turn off and unplug vacuum cleaner, remove clogs, and/or clean/replace filters. ➢ Replace full bag if necessary. ➢ Wait approximately thirty ...
... 34 - Edge Cleaner ➢ Active brush edge cleaners are on both sides of the Power Nozzle. ➢ Guide either side of air to the canister motor, the thermal protector turns the motor off automatically to allow the motor to cool in order to prevent possible damage to the... vacuum cleaner. ➢ To correct problem, turn off and unplug vacuum cleaner, remove clogs, and/or clean/replace filters. ➢ Replace full bag if necessary. ➢ Wait approximately thirty ...

MC-CG917 Owner's Manual (Multi-Language)
Page 36
...not to lock in place and dirt may be purchased through any authorized Panasonic dealer or ordered from service company. ➢ Unplug cord from wall outlet. ➢ Pull hood release out and up, then lift canister hood. ➢ Lift bag caddy out of the red bag mount...10146; Insert bag caddy into canister. ➢ Close and latch canister hood. ➢ Plug cord into wall outlet. ➢ NEVER REUSE A DUST BAG. - 36 - ROUTINE CARE OF VACUUM CLEANER Changing Dust Bag Always operate vacuum cleaner with genuine Panasonic dust bag type C-19 installed. Panasonic dust bags may not all go...
...not to lock in place and dirt may be purchased through any authorized Panasonic dealer or ordered from service company. ➢ Unplug cord from wall outlet. ➢ Pull hood release out and up, then lift canister hood. ➢ Lift bag caddy out of the red bag mount...10146; Insert bag caddy into canister. ➢ Close and latch canister hood. ➢ Plug cord into wall outlet. ➢ NEVER REUSE A DUST BAG. - 36 - ROUTINE CARE OF VACUUM CLEANER Changing Dust Bag Always operate vacuum cleaner with genuine Panasonic dust bag type C-19 installed. Panasonic dust bags may not all go...

MC-CG917 Owner's Manual (Multi-Language)
Page 52
.... Poor job of dirt pick-up moveable rugs -or- Light won 't start. Wrong pile height setting. 5. Canister hood open. 1. Tripped thermal protector in electric shock or personal injury from vacuum cleaner suddenly starting. Wrong vacuuming pattern. 1. Reconnect hose ends. 1. Clear airflow passages. 3. See REMOVING BELT and REPLACING BELT. 4. Adjust setting. 2. Change light bulb...
.... Poor job of dirt pick-up moveable rugs -or- Light won 't start. Wrong pile height setting. 5. Canister hood open. 1. Tripped thermal protector in electric shock or personal injury from vacuum cleaner suddenly starting. Wrong vacuuming pattern. 1. Reconnect hose ends. 1. Clear airflow passages. 3. See REMOVING BELT and REPLACING BELT. 4. Adjust setting. 2. Change light bulb...


