
Instruction Manual
Page 1
INSTRUCTION MANUAL 7 series Blood Pressure Monitor with ComFitTM Cuff Model BP760 ESPAÑOL ENGLISH
INSTRUCTION MANUAL 7 series Blood Pressure Monitor with ComFitTM Cuff Model BP760 ESPAÑOL ENGLISH

Instruction Manual
Page 2
TABLE OF CONTENTS Before Using the Monitor Introduction 4 Safety Information 5 Operating the Device 5 Risk of Electrical Shock 7 Care and Maintenance 7 Before Taking a Measurement 8 Operating Instructions Know Your Unit 9 Unit Display 11 Display Symbols 12 Irregular Heartbeat Symbol 12 Movement Error Symbol 12 Morning Hypertension Symbol 13 Heartbeat Symbol 14 Average Value Symbol 14 Morning Average Symbol 14 Evening Average Symbol 14 Cuff Wrap Guide Symbol 14 Using the AC Adapter 15 Battery Installation 17 Setting the Date and Time 19 Applying the Arm Cuff 23 2
TABLE OF CONTENTS Before Using the Monitor Introduction 4 Safety Information 5 Operating the Device 5 Risk of Electrical Shock 7 Care and Maintenance 7 Before Taking a Measurement 8 Operating Instructions Know Your Unit 9 Unit Display 11 Display Symbols 12 Irregular Heartbeat Symbol 12 Movement Error Symbol 12 Morning Hypertension Symbol 13 Heartbeat Symbol 14 Average Value Symbol 14 Morning Average Symbol 14 Evening Average Symbol 14 Cuff Wrap Guide Symbol 14 Using the AC Adapter 15 Battery Installation 17 Setting the Date and Time 19 Applying the Arm Cuff 23 2
Instruction Manual
Page 4
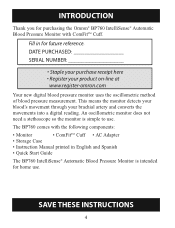
...; AC Adapter • Storage Case • Instruction Manual printed in for purchasing the Omron® BP760 IntelliSense® Automatic Blood Pressure Monitor with ComFitTM Cuff. An oscillometric monitor does not need a stethoscope so the monitor is intended for home use . DATE PURCHASED SERIAL NUMBER • Staple your purchase receipt here • Register your brachial artery and...
...; AC Adapter • Storage Case • Instruction Manual printed in for purchasing the Omron® BP760 IntelliSense® Automatic Blood Pressure Monitor with ComFitTM Cuff. An oscillometric monitor does not need a stethoscope so the monitor is intended for home use . DATE PURCHASED SERIAL NUMBER • Staple your purchase receipt here • Register your brachial artery and...

Instruction Manual
Page 10
KNOW YOUR UNIT Components: Air Tube Housing Cord Air Plug (Connects to Air Jack) Arm Cuff AC Adapter INSTRUCTION MANUAL 7 series Blood Pressure Monitor with ComFitTM Cuff Model BP760 ESPAÑOL ENGLISH Storage Case Instruction Manual Quick Start Guide 10
KNOW YOUR UNIT Components: Air Tube Housing Cord Air Plug (Connects to Air Jack) Arm Cuff AC Adapter INSTRUCTION MANUAL 7 series Blood Pressure Monitor with ComFitTM Cuff Model BP760 ESPAÑOL ENGLISH Storage Case Instruction Manual Quick Start Guide 10

Instruction Manual
Page 12
.... 12 MOVEMENT ERROR SYMBOL ( ) The Movement Error Symbol is displayed if you consult your body during the measurement. Please remove the arm cuff, and wait 2-3 minutes. DISPLAY SYMBOLS IRREGULAR HEARTBEAT SYMBOL ( ) When the monitor detects an irregular rhythm two or more than the Blood average rhythm detected while the... monitor pressure is measuring the systolic and diastolic blood pressure. Take another measurement, remain still during the measurement, the Irregular Heartbeat Symbol ( ) will ...
.... 12 MOVEMENT ERROR SYMBOL ( ) The Movement Error Symbol is displayed if you consult your body during the measurement. Please remove the arm cuff, and wait 2-3 minutes. DISPLAY SYMBOLS IRREGULAR HEARTBEAT SYMBOL ( ) When the monitor detects an irregular rhythm two or more than the Blood average rhythm detected while the... monitor pressure is measuring the systolic and diastolic blood pressure. Take another measurement, remain still during the measurement, the Irregular Heartbeat Symbol ( ) will ...

Instruction Manual
Page 27
... when a higher inflation may be necessary, the monitor automatically re-inflates the cuff up to the section "Applying the Arm Cuff", reapply the cuff and take another measurement. 27 CUFF WRAP GUIDE This monitor checks whether the arm cuff is displayed, refer to 30 mmHg higher than the... applied correctly during the inflation. Follow the instructions of your physician or licensed healthcare provider. When the cuff is applied correctly, is displayed. If the cuff is not applied correctly, is displayed while taking a measurement or using measured results may be dangerous. Self...
... when a higher inflation may be necessary, the monitor automatically re-inflates the cuff up to the section "Applying the Arm Cuff", reapply the cuff and take another measurement. 27 CUFF WRAP GUIDE This monitor checks whether the arm cuff is displayed, refer to 30 mmHg higher than the... applied correctly during the inflation. Follow the instructions of your physician or licensed healthcare provider. When the cuff is applied correctly, is displayed. If the cuff is not applied correctly, is displayed while taking a measurement or using measured results may be dangerous. Self...

Instruction Manual
Page 28
... the pulse during inflation. Inflation stops automatically and the measurement is completed. As the cuff inflates, the monitor automatically determines your arm and remain still until the entire measurement process is started. NOTE: To stop inflating, start... deflating and will stop the inflation or measurement, press the START/STOP button. As the cuff deflates, decreasing numbers appear on the display. All symbols appear on the display. The monitor will turn off. 2. TAKING A MEASUREMENT 1. Do not move your ideal inflation level. The Heartbeat Symbol...
... the pulse during inflation. Inflation stops automatically and the measurement is completed. As the cuff inflates, the monitor automatically determines your arm and remain still until the entire measurement process is started. NOTE: To stop inflating, start... deflating and will stop the inflation or measurement, press the START/STOP button. As the cuff deflates, decreasing numbers appear on the display. All symbols appear on the display. The monitor will turn off. 2. TAKING A MEASUREMENT 1. Do not move your ideal inflation level. The Heartbeat Symbol...

Instruction Manual
Page 29
... the START/STOP button to diagnose and treat High Blood Pressure. Follow the instructions of your physician or licensed healthcare provider. WARNING The monitor is complete, the arm cuff completely deflates. Your blood pressure and pulse rate are displayed. 4. When the measurement is not intended to be dangerous. WARNING DO NOT adjust...
... the START/STOP button to diagnose and treat High Blood Pressure. Follow the instructions of your physician or licensed healthcare provider. WARNING The monitor is complete, the arm cuff completely deflates. Your blood pressure and pulse rate are displayed. 4. When the measurement is not intended to be dangerous. WARNING DO NOT adjust...

Instruction Manual
Page 30
If your systolic pressure is known to be more pressure than necessary. • The monitor will not inflate above 299 mmHg. Your blood pressure and pulse rate are displayed. 30 NOTES: • Do not apply more than 220 mmHg, press and hold the START/STOP button until the monitor inflates 30 to a higher pressure than necessary may result in bruising where the cuff is complete, the arm cuff completely deflates. When the measurement is applied. TAKING A MEASUREMENT SPECIAL CONDITIONS CAUTION Inflating to 40 mmHg higher than your expected systolic pressure.
If your systolic pressure is known to be more pressure than necessary. • The monitor will not inflate above 299 mmHg. Your blood pressure and pulse rate are displayed. 30 NOTES: • Do not apply more than 220 mmHg, press and hold the START/STOP button until the monitor inflates 30 to a higher pressure than necessary may result in bruising where the cuff is complete, the arm cuff completely deflates. When the measurement is applied. TAKING A MEASUREMENT SPECIAL CONDITIONS CAUTION Inflating to 40 mmHg higher than your expected systolic pressure.

Instruction Manual
Page 37
... submerge the device or any abrasive or volatile cleaners. Do not use . Do not subject the monitor to clean the cuff. Care and Maintenance CARE AND MAINTENANCE To keep your digital blood pressure monitor in the best condition and protect the unit from damage, follow the directions listed below: Keep the... the floor. CAUTION Store the device and the components in water. Do not fold tightly. Clean the monitor with new ones at the same time. 37 Do not forcefully bend the arm cuff or air tube. Always replace all the batteries with a soft dry cloth. Make sure the AC adapter...
... submerge the device or any abrasive or volatile cleaners. Do not use . Do not subject the monitor to clean the cuff. Care and Maintenance CARE AND MAINTENANCE To keep your digital blood pressure monitor in the best condition and protect the unit from damage, follow the directions listed below: Keep the... the floor. CAUTION Store the device and the components in water. Do not fold tightly. Clean the monitor with new ones at the same time. 37 Do not forcefully bend the arm cuff or air tube. Always replace all the batteries with a soft dry cloth. Make sure the AC adapter...

Instruction Manual
Page 42
... our option, repair or replace without charge any monitor or arm cuff covered by calling 1-800-634-4350 for the address of Purchase. LIMITED WARRANTIES Your Omron® BP760 IntelliSense® Automatic Blood Pressure Monitor, excluding the arm cuff, is warranted to be free from defects in ...materials and workmanship appearing within 5 years from the date of purchase when the monitor is used in accordance with the...
... our option, repair or replace without charge any monitor or arm cuff covered by calling 1-800-634-4350 for the address of Purchase. LIMITED WARRANTIES Your Omron® BP760 IntelliSense® Automatic Blood Pressure Monitor, excluding the arm cuff, is warranted to be free from defects in ...materials and workmanship appearing within 5 years from the date of purchase when the monitor is used in accordance with the...


