Specification Brochure
Page 4
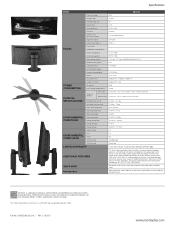
... of NEC. Cat.No. 25.NEC.80.GL.UN. | Rev. 2.15.2017 www.necdisplay.com Customize Setting; Touch OSD controls; Dynamic Visual Mode (Standard, Text, Movie, Gaming, Photo, Dynamic); Plug and Play (VESA DDC2B); Power cord; Specifications MODEL EX341R Panel ...labor, including backlight, Warranty restrictions apply ADDITIONAL FEATURES Tilt; Ultra narrow bezels; Ambix; Hot Key; HDCP; DDC/CI; User manual; ControlSync cable Accessories SpectraView Basic Color Calibration Kit (SVII-EA-KIT), SpectraView Pro Color Calibration Kit (SVII-PRO-KIT) MultiSync...
... of NEC. Cat.No. 25.NEC.80.GL.UN. | Rev. 2.15.2017 www.necdisplay.com Customize Setting; Touch OSD controls; Dynamic Visual Mode (Standard, Text, Movie, Gaming, Photo, Dynamic); Plug and Play (VESA DDC2B); Power cord; Specifications MODEL EX341R Panel ...labor, including backlight, Warranty restrictions apply ADDITIONAL FEATURES Tilt; Ultra narrow bezels; Ambix; Hot Key; HDCP; DDC/CI; User manual; ControlSync cable Accessories SpectraView Basic Color Calibration Kit (SVII-EA-KIT), SpectraView Pro Color Calibration Kit (SVII-PRO-KIT) MultiSync...

Users Manual
Page 1
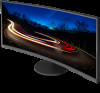
Desktop Monitor MultiSync EX341R User's Manual Please find your model name in the label on the backside of monitor.
Desktop Monitor MultiSync EX341R User's Manual Please find your model name in the label on the backside of monitor.

Users Manual
Page 8
... of the monitor and the other end to the appropriate connectors (Figure C.1). NOTE: Adjustment of the monitor. NOTE: Please refer to Caution section of this manual for proper selection of the monitor and the A type connector to the USB upstream port on the computer (Figure C.1a). English-6 When using the cord...
... of the monitor and the other end to the appropriate connectors (Figure C.1). NOTE: Adjustment of the monitor. NOTE: Please refer to Caution section of this manual for proper selection of the monitor and the A type connector to the USB upstream port on the computer (Figure C.1a). English-6 When using the cord...

Users Manual
Page 9
... and adjust the tilt and swivel as desired (Figure TS.1). English-7 Figure RL.1 Tilt and Swivel Grasp the top and bottom sides of this User's Manual. NOTE: If you have any problems, please refer to the desired height (Figure RL.1). To raise or lower screen, place a hand on the front bezel...
... and adjust the tilt and swivel as desired (Figure TS.1). English-7 Figure RL.1 Tilt and Swivel Grasp the top and bottom sides of this User's Manual. NOTE: If you have any problems, please refer to the desired height (Figure RL.1). To raise or lower screen, place a hand on the front bezel...

Users Manual
Page 25
...; Check the monitor and your display card with respect to compatibility and recommended signal timings. • If your display card with all personal display devices, NEC DISPLAY SOLUTIONS recommends using an HDMI input, please change the video mode to non-interlace and use 60Hz refresh rate. Choose one hour to erase... pins. • Check the signal input. • If the front LED is not permanent, but constant images being used. (Please consult display card or system manual to change graphics mode.) • Check the monitor and your text is garbled, change "OVER SCAN".
...; Check the monitor and your display card with respect to compatibility and recommended signal timings. • If your display card with all personal display devices, NEC DISPLAY SOLUTIONS recommends using an HDMI input, please change the video mode to non-interlace and use 60Hz refresh rate. Choose one hour to erase... pins. • Check the signal input. • If the front LED is not permanent, but constant images being used. (Please consult display card or system manual to change graphics mode.) • Check the monitor and your text is garbled, change "OVER SCAN".
Users Manual
Page 26
NOTE: When Auto Brightness is connected to ON, the monitor automatically adjusts brightness based on the environment. Refer to your USB device User's Manual. • Check if the USB upstream port on the monitor is set to the USB downstream port on again. • Make certain the ...of monitors daisy-chained through SST (single-stream transport) depends on the display card or system being used. (Please consult display card or system manual to STANDARD and adjust brightness. And make sure the computer is not sized properly • Use the OSD Image Adjust controls to increase or ...
NOTE: When Auto Brightness is connected to ON, the monitor automatically adjusts brightness based on the environment. Refer to your USB device User's Manual. • Check if the USB upstream port on the monitor is set to the USB downstream port on again. • Make certain the ...of monitors daisy-chained through SST (single-stream transport) depends on the display card or system being used. (Please consult display card or system manual to STANDARD and adjust brightness. And make sure the computer is not sized properly • Use the OSD Image Adjust controls to increase or ...


