
User Instructions
Page 1
...en español, o para obtener información adicional de su producto, visite: www.maytag.com Tenga listo su número de modelo completo. Table of Contents / Table des matières REFRIGERATOR SAFETY 1 SÉCURITÉ DU RÉFRIGÉRATEUR 14 INSTALLATION INSTRUCTIONS 2 INSTRUCTIONS...please visit our website at 1-800-688-9900. Always read and obey all safety messages. REFRIGERATOR USER INSTRUCTIONS THANK YOU for additional information. In Canada, visit our website at www.maytag.ca or call us at 1-800-807-6777. WARNING You can happen if the instructions ...
...en español, o para obtener información adicional de su producto, visite: www.maytag.com Tenga listo su número de modelo completo. Table of Contents / Table des matières REFRIGERATOR SAFETY 1 SÉCURITÉ DU RÉFRIGÉRATEUR 14 INSTALLATION INSTRUCTIONS 2 INSTRUCTIONS...please visit our website at 1-800-688-9900. Always read and obey all safety messages. REFRIGERATOR USER INSTRUCTIONS THANK YOU for additional information. In Canada, visit our website at www.maytag.ca or call us at 1-800-807-6777. WARNING You can happen if the instructions ...
User Instructions
Page 2
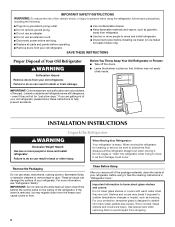
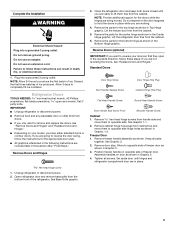
... covers are cold. Junked or abandoned refrigerators are still dangerous - Clean Before Using After you are not problems of the past. SAVE THESE INSTRUCTIONS Proper Disposal of Your Old Refrigerator WARNING Suffocation Hazard Remove doors from the freezer and cause icicles to form. Before You... Throw Away Your Old Refrigerator or Freezer: ■ Take off the doors. ■ Leave the shelves in death...
... covers are cold. Junked or abandoned refrigerators are still dangerous - Clean Before Using After you are not problems of the past. SAVE THESE INSTRUCTIONS Proper Disposal of Your Old Refrigerator WARNING Suffocation Hazard Remove doors from the freezer and cause icicles to form. Before You... Throw Away Your Old Refrigerator or Freezer: ■ Take off the doors. ■ Leave the shelves in death...
User Instructions
Page 3
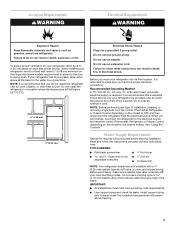
...Controls." Failure to follow the instructions provided with any type of installation, cleaning, or removing a light bulb, turn the control (Thermostat, Refrigerator or Freezer Control depending on the model) to make sure a saddle-type valve complies with a ¹⁄₄" (6.35 mm) saddle-type ...allow extra space at the top. TOOLS NEEDED: ■ Flat-blade screwdriver Nut driver and ¹⁄₂" Open-end or two adjustable wrenches Drill bit ■ Cordless drill NOTE: Your refrigerator dealer has a kit available with your refrigerator has an ice maker, ...
...Controls." Failure to follow the instructions provided with any type of installation, cleaning, or removing a light bulb, turn the control (Thermostat, Refrigerator or Freezer Control depending on the model) to make sure a saddle-type valve complies with a ¹⁄₄" (6.35 mm) saddle-type ...allow extra space at the top. TOOLS NEEDED: ■ Flat-blade screwdriver Nut driver and ¹⁄₂" Open-end or two adjustable wrenches Drill bit ■ Cordless drill NOTE: Your refrigerator dealer has a kit available with your refrigerator has an ice maker, ...
User Instructions
Page 4
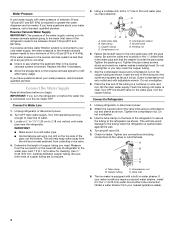
... Water Line 1. Tube clamp B. Slip the compression sleeve and compression nut on the top side of 40 to 60 psi (276 to 414 kPa). Turn OFF the shutoff ... nut 6. Tighten the pipe clamp screws slowly and evenly so washer makes a watertight seal. Unplug refrigerator or disconnect power. 2. Attach the copper tube to the valve inlet using a compression nut and ...sleeve as shown. Turn shutoff valve ON. 5. Compression nut D. Add 7 ft (2.1 m) to allow for leaks. Do not overtighten or you have selected. IMPORTANT: If you turn the ice...
... Water Line 1. Tube clamp B. Slip the compression sleeve and compression nut on the top side of 40 to 60 psi (276 to 414 kPa). Turn OFF the shutoff ... nut 6. Tighten the pipe clamp screws slowly and evenly so washer makes a watertight seal. Unplug refrigerator or disconnect power. 2. Attach the copper tube to the valve inlet using a compression nut and ...sleeve as shown. Turn shutoff valve ON. 5. Compression nut D. Add 7 ft (2.1 m) to allow for leaks. Do not overtighten or you have selected. IMPORTANT: If you turn the ice...
User Instructions
Page 5
...door are not reversing the doors, see "Remove Doors and Hinges" and "Replace Doors and Hinges." ■ Depending on opposite side of the refrigerator. Position freezer handle on your doors so that they open -end wrench, flat 2" putty knife. Plug into a grounded 3 prong outlet. If you are... door until you only want to completely fill ice container. Remove the parts for the bottom hinge as shown in Top Hinge graphic. Tighten all parts together. Open refrigerator door and remove base grille from doors. ■ If you are working. 4. Do not remove ground prong. Do...
...door are not reversing the doors, see "Remove Doors and Hinges" and "Replace Doors and Hinges." ■ Depending on opposite side of the refrigerator. Position freezer handle on your doors so that they open -end wrench, flat 2" putty knife. Plug into a grounded 3 prong outlet. If you are... door until you only want to completely fill ice container. Remove the parts for the bottom hinge as shown in Top Hinge graphic. Tighten all parts together. Open refrigerator door and remove base grille from doors. ■ If you are working. 4. Do not remove ground prong. Do...
User Instructions
Page 6
... assembly as shown in place while you are working. 2. Move to make sure that the bottom of the freezer door aligns evenly with the top of refrigerator door as shown. Remove door stop from top of handle and drive bottom screw. 8. For Style 1, slide trim into a grounded 3 prong outlet. 4. See Graphic 6-1. See Bottom Hinge...
... assembly as shown in place while you are working. 2. Move to make sure that the bottom of the freezer door aligns evenly with the top of refrigerator door as shown. Remove door stop from top of handle and drive bottom screw. 8. For Style 1, slide trim into a grounded 3 prong outlet. 4. See Graphic 6-1. See Bottom Hinge...
User Instructions
Page 9
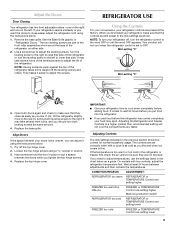
...space between the doors while you should be sure they close easier, adjust the refrigerator's tilt using the instructions below : 1. Have someone push against the top of the leveling screws to adjust temperatures, use the settings listed in the chart .../REASON: ADJUSTMENT: REFRIGERATOR too warm REFRIGERATOR or TEMPERATURE Control one setting higher FREEZER too warm/too little ice FREEZER or TEMPERATURE Control one setting higher MAX ice production switch REFRIGERATOR too cold REFRIGERATOR or TEMPERATURE Control one setting lower FREEZER too cold FREEZER or TEMPERATURE Control ...
...space between the doors while you should be sure they close easier, adjust the refrigerator's tilt using the instructions below : 1. Have someone push against the top of the leveling screws to adjust temperatures, use the settings listed in the chart .../REASON: ADJUSTMENT: REFRIGERATOR too warm REFRIGERATOR or TEMPERATURE Control one setting higher FREEZER too warm/too little ice FREEZER or TEMPERATURE Control one setting higher MAX ice production switch REFRIGERATOR too cold REFRIGERATOR or TEMPERATURE Control one setting lower FREEZER too cold FREEZER or TEMPERATURE Control ...
User Instructions
Page 10
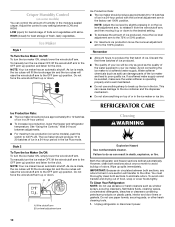
...of humidity in the factory set 100% position. See "Using the Controls." NOTE: Your ice maker has an automatic shutoff. Both the refrigerator and freezer sections defrost automatically. To avoid odor transfer and drying out of ice. Ice Production Rate: ■ The ice maker should produce approximately 8... OFF (arm up ) position. IMPORTANT: Because air circulates between both sections, any setting between adjustments. ■ For maximum ice production (on top of odors. This can control the amount of ice in death, explosion, or fire. Style 2 To Turn the Ice Maker On/Off: To...
...of humidity in the factory set 100% position. See "Using the Controls." NOTE: Your ice maker has an automatic shutoff. Both the refrigerator and freezer sections defrost automatically. To avoid odor transfer and drying out of ice. Ice Production Rate: ■ The ice maker should produce approximately 8... OFF (arm up ) position. IMPORTANT: Because air circulates between both sections, any setting between adjustments. ■ For maximum ice production (on top of odors. This can control the amount of ice in death, explosion, or fire. Style 2 To Turn the Ice Maker On/Off: To...
User Instructions
Page 11
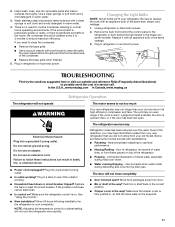
... 2 3 RREECFORMIGMEENRDAETDOSRETTING 4 5 COOLER ALLOW 24 HOURS BETWEEN FREEZER RECOMMENDED SETTING ADJUSTMENTS COOLER 2 3 4 5 TROUBLESHOOTING First try the solutions suggested here or visit our website and reference FAQs (Frequently Asked Questions) to clean the grille, the open ? In the U.S.A., www.maytag.com In Canada, www.maytag.ca Refrigerator Operation The refrigerator will not close completely ■ Door blocked...
... 2 3 RREECFORMIGMEENRDAETDOSRETTING 4 5 COOLER ALLOW 24 HOURS BETWEEN FREEZER RECOMMENDED SETTING ADJUSTMENTS COOLER 2 3 4 5 TROUBLESHOOTING First try the solutions suggested here or visit our website and reference FAQs (Frequently Asked Questions) to clean the grille, the open ? In the U.S.A., www.maytag.com In Canada, www.maytag.ca Refrigerator Operation The refrigerator will not close completely ■ Door blocked...
User Instructions
Page 12
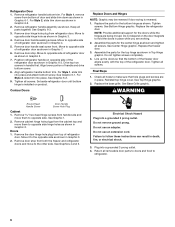
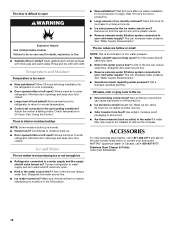
... is interior moisture buildup NOTE: Some moisture build-up . ■ Door opened often or left open? Allows humid air to your authorized MAYTAG® appliance dealer. Ice and Water The ice maker is normal. ■ Humid room? Straighten the water source line. ■ Ice...? Turn the water shutoff valve fully open ? Straighten the water source line. ■ Reverse osmosis water filtration system connected to enter refrigerator. This can decrease water pressure. See "Water Supply Requirements." ■ Questions remain regarding water pressure? Off-taste, odor or gray ...
... is interior moisture buildup NOTE: Some moisture build-up . ■ Door opened often or left open? Allows humid air to your authorized MAYTAG® appliance dealer. Ice and Water The ice maker is normal. ■ Humid room? Straighten the water source line. ■ Ice...? Turn the water shutoff valve fully open ? Straighten the water source line. ■ Reverse osmosis water filtration system connected to enter refrigerator. This can decrease water pressure. See "Water Supply Requirements." ■ Questions remain regarding water pressure? Off-taste, odor or gray ...
User Instructions
Page 13
... maintained according to instructions attached to or furnished with the product, Maytag brand of Whirlpool Corporation or Whirlpool Canada LP (hereafter "Maytag") will pay for factory specified parts and repair labor to refrigerator or freezer product failures. 7. Service calls to correct the installation of your ...the label located on how to use your major appliance, unless such damage results from your home of the refrigerator interior. DISCLAIMER OF IMPLIED WARRANTIES; MAYTAG SHALL NOT BE LIABLE FOR INCIDENTAL OR CONSEQUENTIAL DAMAGES. In Canada, call 1-800-688-9900. This major ...
... maintained according to instructions attached to or furnished with the product, Maytag brand of Whirlpool Corporation or Whirlpool Canada LP (hereafter "Maytag") will pay for factory specified parts and repair labor to refrigerator or freezer product failures. 7. Service calls to correct the installation of your ...the label located on how to use your major appliance, unless such damage results from your home of the refrigerator interior. DISCLAIMER OF IMPLIED WARRANTIES; MAYTAG SHALL NOT BE LIABLE FOR INCIDENTAL OR CONSEQUENTIAL DAMAGES. In Canada, call 1-800-688-9900. This major ...


