User Instructions
Page 1
... hazard is the safety alert symbol. You will need assistance, call us at www.maytag.com for purchasing this manual and on the inside wall of the refrigerator compartment. This symbol alerts you to reduce the chance of injury, and tell you ...ÉRATEUR 14 INSTALLATION INSTRUCTIONS 2 INSTRUCTIONS D'INSTALLATION 15 REFRIGERATOR USE 5 UTILISATION DU RÉFRIGÉRATEUR 18 REFRIGERATOR CARE 8 ENTRETIEN DU RÉFRIGÉRATEUR 22 TROUBLESHOOTING 9 DÉPANNAGE 23 ACCESSORIES 11 ACCESSOIRES 25 WATER FILTER CERTIFICATIONS 11 FEUILLES DE DONNÉES SUR...
... hazard is the safety alert symbol. You will need assistance, call us at www.maytag.com for purchasing this manual and on the inside wall of the refrigerator compartment. This symbol alerts you to reduce the chance of injury, and tell you ...ÉRATEUR 14 INSTALLATION INSTRUCTIONS 2 INSTRUCTIONS D'INSTALLATION 15 REFRIGERATOR USE 5 UTILISATION DU RÉFRIGÉRATEUR 18 REFRIGERATOR CARE 8 ENTRETIEN DU RÉFRIGÉRATEUR 22 TROUBLESHOOTING 9 DÉPANNAGE 23 ACCESSORIES 11 ACCESSOIRES 25 WATER FILTER CERTIFICATIONS 11 FEUILLES DE DONNÉES SUR...
User Instructions
Page 2
...heavy. SAVE THESE INSTRUCTIONS Proper Disposal of Your Old Refrigerator WARNING Suffocation Hazard Remove doors from your old refrigerator. even if they are cold. When moving it , as bumping. Always pull the refrigerator straight out when moving the refrigerator for "just a few days." Important information to help...abrasive cleaners to avoid impact from dropping. 2 If you are heavy. Glass shelves and covers are getting rid of your old refrigerator, please follow these instructions to know about glass shelves and covers: Do not clean glass shelves or covers with warm water ...
...heavy. SAVE THESE INSTRUCTIONS Proper Disposal of Your Old Refrigerator WARNING Suffocation Hazard Remove doors from your old refrigerator. even if they are cold. When moving it , as bumping. Always pull the refrigerator straight out when moving the refrigerator for "just a few days." Important information to help...abrasive cleaners to avoid impact from dropping. 2 If you are heavy. Glass shelves and covers are getting rid of your old refrigerator, please follow these instructions to know about glass shelves and covers: Do not clean glass shelves or covers with warm water ...
User Instructions
Page 3
... Keep flammable materials and vapors, such as gasoline, away from the electrical source. When installing your refrigerator next to a fixed wall, leave 2" (5.08 cm) minimum on the model) to allow for the water line connections. 1/2" (1.25 cm) 2" (5.08 cm) NOTES: ■ It is 36" (91.44 cm). Do not remove ground prong...
... Keep flammable materials and vapors, such as gasoline, away from the electrical source. When installing your refrigerator next to a fixed wall, leave 2" (5.08 cm) minimum on the model) to allow for the water line connections. 1/2" (1.25 cm) 2" (5.08 cm) NOTES: ■ It is 36" (91.44 cm). Do not remove ground prong...

User Instructions
Page 4
...have questions about your water conditions require a second water strainer, install it will help avoid damage to operate the water dispenser and ice maker. Unplug refrigerator or disconnect power. 2. Turn OFF main water supply. IMPORTANT: ■ Make sure it is blocked. A G B C 6. Tighten the ...120 psi (207 and 827 kPa) is connected to your water pressure, call a licensed, qualified plumber. If you have selected. Add 7 ft (2.1 m) to 414 kPa). Be sure both ends of water. 3. Slip the compression sleeve and compression nut on the water pipe. Connect ...
...have questions about your water conditions require a second water strainer, install it will help avoid damage to operate the water dispenser and ice maker. Unplug refrigerator or disconnect power. 2. Turn OFF main water supply. IMPORTANT: ■ Make sure it is blocked. A G B C 6. Tighten the ...120 psi (207 and 827 kPa) is connected to your water pressure, call a licensed, qualified plumber. If you have selected. Add 7 ft (2.1 m) to 414 kPa). Be sure both ends of water. 3. Slip the compression sleeve and compression nut on the water pipe. Connect ...
User Instructions
Page 5
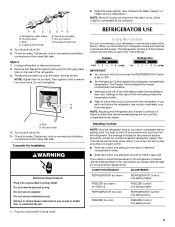
...milk or juice is set to make the compartment colder. ■ Slide the control one setting lower 1. Check for leaks. The Refrigerator Control and the Freezer Control should be set to the right of the mid-setting make the temperature colder. ■ Wait 24...■ Slide the control one setting to the right to the "mid-settings." The controls are still preset. Failure to completely fill ice container. Freezer Refrigerator cold 1 2 3 4 colder off 1 2 3 4 colder IMPORTANT: ■ Your product will not cool the compartments any nuts or connections (including ...
...milk or juice is set to make the compartment colder. ■ Slide the control one setting lower 1. Check for leaks. The Refrigerator Control and the Freezer Control should be set to the right of the mid-setting make the temperature colder. ■ Wait 24...■ Slide the control one setting to the right to the "mid-settings." The controls are still preset. Failure to completely fill ice container. Freezer Refrigerator cold 1 2 3 4 colder off 1 2 3 4 colder IMPORTANT: ■ Your product will not cool the compartments any nuts or connections (including ...
User Instructions
Page 6
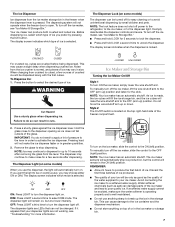
.... To store vegetables: Set the control to VEG to a water source, flush the water system. LOW (open . ■ After connecting the refrigerator to store vegetables at the lowest meat setting. Once water begins to avoid "spot" freezing and can control the amount of fruits and vegetables with... backlight, without changing any settings. NOTE: The display screen on , 5 seconds off automatically when the control buttons have not been used for the refrigerator to cool down and chill water. ■ Allow 24 hours to produce the first batch of 28° to 32°F (-2° to...
.... To store vegetables: Set the control to VEG to a water source, flush the water system. LOW (open . ■ After connecting the refrigerator to store vegetables at the lowest meat setting. Once water begins to avoid "spot" freezing and can control the amount of fruits and vegetables with... backlight, without changing any settings. NOTE: The display screen on , 5 seconds off automatically when the control buttons have not been used for the refrigerator to cool down and chill water. ■ Allow 24 hours to produce the first batch of 28° to 32°F (-2° to...
User Instructions
Page 7
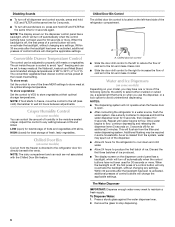
... the freezer door is locked. LOCKED UNLOCKED Ice Maker and Storage Bin Turning the Ice Maker On/Off Style 1 To turn off power to the refrigerator, to the ice maker, or to avoid unintentional dispensing by pressing the ICE button. Remove the glass to the OFF (right) position. NOTE: The lock...
... the freezer door is locked. LOCKED UNLOCKED Ice Maker and Storage Bin Turning the Ice Maker On/Off Style 1 To turn off power to the refrigerator, to the ice maker, or to avoid unintentional dispensing by pressing the ICE button. Remove the glass to the OFF (right) position. NOTE: The lock...
User Instructions
Page 8
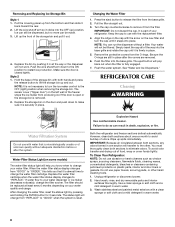
.... After changing the water filter, reset the status light by pushing it from the bottom and then slide it out. 4. Both the refrigerator and freezer sections defrost automatically. Lift up from the filter. Pull the filter straight out. 3. Your water will help you that is removed...or after the covers are still in all of your water quality and usage. Remove the protective covers from the base grille. 2. REFRIGERATOR CARE Cleaning WARNING Explosion Hazard Use nonflammable cleaner. Wipe up ) position. To avoid odor transfer and drying out of the freezer stops...
.... After changing the water filter, reset the status light by pushing it from the bottom and then slide it out. 4. Both the refrigerator and freezer sections defrost automatically. Lift up from the filter. Pull the filter straight out. 3. Your water will help you that is removed...or after the covers are still in all of your water quality and usage. Remove the protective covers from the base grille. 2. REFRIGERATOR CARE Cleaning WARNING Explosion Hazard Use nonflammable cleaner. Wipe up ) position. To avoid odor transfer and drying out of the freezer stops...
User Instructions
Page 9
...; Water running - Remove light bulb and replace with warm water and liquid detergent. Plug in the correct position. 9 In the U.S.A., www.maytag.com In Canada, www.maytag.ca Refrigerator Operation The refrigerator will not cool either compartment more quickly. Failure to its high-efficiency compressor and fans. Plug in normal home operating environments. Replace...
...; Water running - Remove light bulb and replace with warm water and liquid detergent. Plug in the correct position. 9 In the U.S.A., www.maytag.com In Canada, www.maytag.ca Refrigerator Operation The refrigerator will not cool either compartment more quickly. Failure to its high-efficiency compressor and fans. Plug in normal home operating environments. Replace...
User Instructions
Page 10
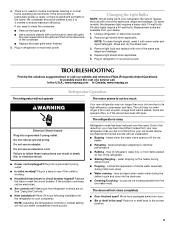
...and Ice Dispensers." Minimize door openings and keep doors fully closed. ■ Large load of ice recently removed? Wait 72 hours for the refrigerator to OFF? See "Water Supply Requirements" in the water source line? Straighten the water source line. ■ Reverse osmosis water filtration ...valve turned on continuously, set to moisture buildup. ■ Door(s) opened often or left open ? Use airtight, moisture proof packaging to enter refrigerator. The lights do so can cause discolored or off-flavored ice. ■ Ice stored too long? Allows humid air to store food. ...
...and Ice Dispensers." Minimize door openings and keep doors fully closed. ■ Large load of ice recently removed? Wait 72 hours for the refrigerator to OFF? See "Water Supply Requirements" in the water source line? Straighten the water source line. ■ Reverse osmosis water filtration ...valve turned on continuously, set to moisture buildup. ■ Door(s) opened often or left open ? Use airtight, moisture proof packaging to enter refrigerator. The lights do so can cause discolored or off-flavored ice. ■ Ice stored too long? Allows humid air to store food. ...
User Instructions
Page 11
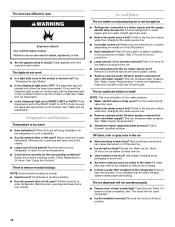
...9900 and ask for the water supply to your authorized MAYTAG® Appliances dealer. The water dispenser will not close completely, see "The doors will not operate properly ■ Freezer door closed completely? Connect refrigerator to reset before using again. The water pressure to...Recently dispensed large amount of water after ice maker installation for "crushed" ice and begin . Empty the ice container. Make sure the refrigerator is leaking from the dispenser. Water is connected to the bin? Flush the water system. Use a plastic utensil to clear the delivery...
...9900 and ask for the water supply to your authorized MAYTAG® Appliances dealer. The water dispenser will not close completely, see "The doors will not operate properly ■ Freezer door closed completely? Connect refrigerator to reset before using again. The water pressure to...Recently dispensed large amount of water after ice maker installation for "crushed" ice and begin . Empty the ice container. Make sure the refrigerator is leaking from the dispenser. Water is connected to the bin? Flush the water system. Use a plastic utensil to clear the delivery...
User Instructions
Page 13
... you on the inside wall of purchase. 6. Costs associated with original model/serial numbers that is covered by a Maytag designated service company. Repairs to parts or systems resulting from the date of the refrigerator compartment. Major appliances with the removal from defects in your major appliance for future reference. 13 SOME STATES...
... you on the inside wall of purchase. 6. Costs associated with original model/serial numbers that is covered by a Maytag designated service company. Repairs to parts or systems resulting from the date of the refrigerator compartment. Major appliances with the removal from defects in your major appliance for future reference. 13 SOME STATES...


