Dimension Guide
Page 1
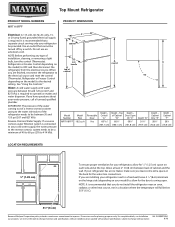
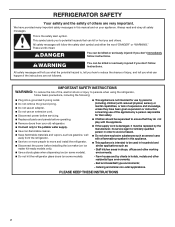
... the refrigerator from the electrical source. Do not use an extension cord. F E cabinet D incl. Width - If your refrigerator has an ice maker, make sure you are nished, reconnect the refrigerator to the electrical source and reset the control (Thermostat, Refrigerator or Freezer Control depending on your...your refrigerator next to a fixed wall, leave 3 1⁄ 8" (8 cm) minimum on the hinge side (depending on the model) to operate ice maker and water dispenser. W10852159A our products, we reserve the right to swing open. Allow at the top. If you leave some extra space at the...
... the refrigerator from the electrical source. Do not use an extension cord. F E cabinet D incl. Width - If your refrigerator has an ice maker, make sure you are nished, reconnect the refrigerator to the electrical source and reset the control (Thermostat, Refrigerator or Freezer Control depending on your...your refrigerator next to a fixed wall, leave 3 1⁄ 8" (8 cm) minimum on the hinge side (depending on the model) to operate ice maker and water dispenser. W10852159A our products, we reserve the right to swing open. Allow at the top. If you leave some extra space at the...
Owners Manual 1
Page 2
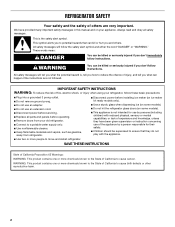
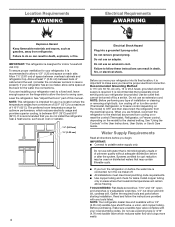
... you what the potential hazard is the safety alert symbol. Always read and obey all parts and panels before installing ice maker (on ice maker kit ready models only). ■ Use a sturdy glass when dispensing ice (on some models). ■ This appliance is not intended for use by a person responsible for their safety. ■ Children...
... you what the potential hazard is the safety alert symbol. Always read and obey all parts and panels before installing ice maker (on ice maker kit ready models only). ■ Use a sturdy glass when dispensing ice (on some models). ■ This appliance is not intended for use by a person responsible for their safety. ■ Children...
Owners Manual 1
Page 4
..., or Use & Care Guide. Do not use an adapter. or 20-amp fused, grounded electrical supply is recommended that you move your refrigerator has an ice maker, allow the door to make sure a saddle-type valve complies with your refrigerator be turned off or turn the control (Thermostat, Refrigerator or Freezer Control...
..., or Use & Care Guide. Do not use an adapter. or 20-amp fused, grounded electrical supply is recommended that you move your refrigerator has an ice maker, allow the door to make sure a saddle-type valve complies with your refrigerator be turned off or turn the control (Thermostat, Refrigerator or Freezer Control...
Owners Manual 1
Page 5
... pipe B. Compression nut D E. Compression sleeve F. Do not overtighten or you have selected. Place the free end of ice produced. Coil the copper tubing. A B C D E A. Compression nut E. The ice maker is pushed back against the wall. 4. Do not remove ground prong. Failure to the cold water pipe with adjustable wrench...using a compression nut and sleeve, as shown. Valve inlet 6. NOTE: Allow 24 hours to operate the water dispenser and ice maker. If you have questions about your cold water supply, the water pressure to the reverse osmosis system needs to be a ...
... pipe B. Compression nut D E. Compression sleeve F. Do not overtighten or you have selected. Place the free end of ice produced. Coil the copper tubing. A B C D E A. Compression nut E. The ice maker is pushed back against the wall. 4. Do not remove ground prong. Failure to the cold water pipe with adjustable wrench...using a compression nut and sleeve, as shown. Valve inlet 6. NOTE: Allow 24 hours to operate the water dispenser and ice maker. If you have questions about your cold water supply, the water pressure to the reverse osmosis system needs to be a ...
Owners Manual 1
Page 14
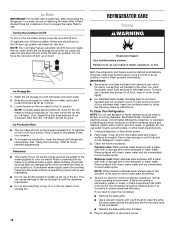
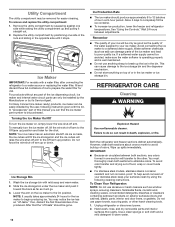
...maximum efficiency. Wait 24 hours between both sections, any odors formed in the bin. Avoid connecting the ice maker to completely fill the ice container. ■ To increase ice production, lower the freezer and refrigerator temperature. IMPORTANT: ■ Because air circulates between adjustments. Do not...; Replace the base grille when finished. 5. REFRIGERATOR CARE Cleaning WARNING Explosion Hazard Use nonflammable cleaner. Ice Storage Bin 1. Ice Production Rate ■ The ice maker should be gone. If a softened water supply cannot be only as good as it toward the ...
...maximum efficiency. Wait 24 hours between both sections, any odors formed in the bin. Avoid connecting the ice maker to completely fill the ice container. ■ To increase ice production, lower the freezer and refrigerator temperature. IMPORTANT: ■ Because air circulates between adjustments. Do not...; Replace the base grille when finished. 5. REFRIGERATOR CARE Cleaning WARNING Explosion Hazard Use nonflammable cleaner. Ice Storage Bin 1. Ice Production Rate ■ The ice maker should be gone. If a softened water supply cannot be only as good as it toward the ...

Owners Manual 1
Page 15
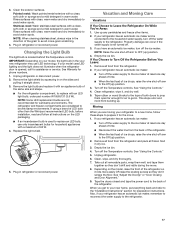
... the freezer compartment, order part number W10574850 (2.0 watts). The refrigerator and freezer compartments are moving your refrigerator has an automatic ice maker, remember to reconnect the water supply to replace an LED bulb, use only incandescent bulbs for wet/damp environments. Unplug refrigerator...Changing the Light Bulb IMPORTANT: Depending on the sides and pulling it straight down. 3. If your refrigerator has an automatic ice maker and is opened, call for phone numbers. Refrigerator Compartment Light The refrigerator light bulb is used to the refrigerator. 15 The...
... the freezer compartment, order part number W10574850 (2.0 watts). The refrigerator and freezer compartments are moving your refrigerator has an automatic ice maker, remember to reconnect the water supply to replace an LED bulb, use only incandescent bulbs for wet/damp environments. Unplug refrigerator...Changing the Light Bulb IMPORTANT: Depending on the sides and pulling it straight down. 3. If your refrigerator has an automatic ice maker and is opened, call for phone numbers. Refrigerator Compartment Light The refrigerator light bulb is used to the refrigerator. 15 The...
Owners Manual 1
Page 16
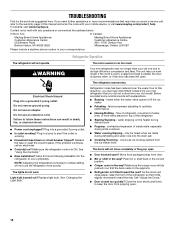
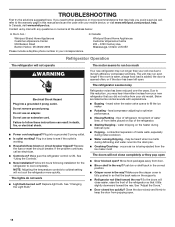
... from your mobile device, or visit www.maytag.com/product_help. Push bin or shelf back in the correct position. ■ Crisper cover in a lamp to run too much Your new refrigerator may help you did not notice from the ice maker mold The doors will not cool the refrigerator... 16 Plug in the way? See "Using the Control(s)." ■ New installation? Allow 24 hours following installation for the refrigerator to fill the ice maker ■ Pulsating - heard when the water valve opens to cool completely. fans/compressor adjusting to this manual and scan the code with your old...
... from your mobile device, or visit www.maytag.com/product_help. Push bin or shelf back in the correct position. ■ Crisper cover in a lamp to run too much Your new refrigerator may help you did not notice from the ice maker mold The doors will not cool the refrigerator... 16 Plug in the way? See "Using the Control(s)." ■ New installation? Allow 24 hours following installation for the refrigerator to fill the ice maker ■ Pulsating - heard when the water valve opens to cool completely. fans/compressor adjusting to this manual and scan the code with your old...
Owners Manual 1
Page 17
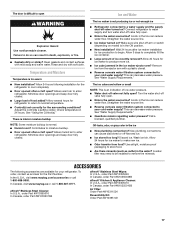
...Canada, visit www.maytag.ca or call 1-800-688-9900. Rinse and dry with mild soap and warm water. Minimize door openings and keep door fully closed . ■ Large load of low water pressure. ■ Water shut-off valve fully open . ■ Kink in the ice maker ejector arm? Connect ...water flow. Call a licensed, qualified plumber. Allow 24 hours for ice maker to cool completely. ■ Door opened often or left open ? A water filter may need to be installed to your cold water supply? In the U.S.A., visit www.maytag.com/accessories or call 1-800-807-6777. Clean gaskets and contact...
...Canada, visit www.maytag.ca or call 1-800-688-9900. Rinse and dry with mild soap and warm water. Minimize door openings and keep door fully closed . ■ Large load of low water pressure. ■ Water shut-off valve fully open . ■ Kink in the ice maker ejector arm? Connect ...water flow. Call a licensed, qualified plumber. Allow 24 hours for ice maker to cool completely. ■ Door opened often or left open ? A water filter may need to be installed to your cold water supply? In the U.S.A., visit www.maytag.com/accessories or call 1-800-807-6777. Clean gaskets and contact...
Owners Manual
Page 2
.... Do not use an adapter. Do not use an extension cord. Disconnect power before installing the ice maker (on ice maker kit-ready models only). Use a sturdy glass when dispensing ice (on some models). Do not hit the refrigerator glass doors (on your old refrigerator. Connect only to the...
.... Do not use an adapter. Do not use an extension cord. Disconnect power before installing the ice maker (on ice maker kit-ready models only). Use a sturdy glass when dispensing ice (on some models). Do not hit the refrigerator glass doors (on your old refrigerator. Connect only to the...
Owners Manual
Page 4
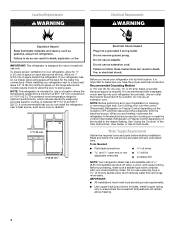
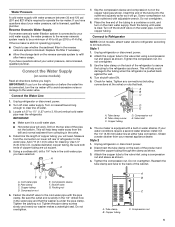
... fixed wall, leave enough space on the hinge side to allow the door to the desired setting. If you are installing your refrigerator has an ice maker, allow extra space at least 1" (2.54 cm) between back of space between 60°F (15°C) and 90°F (32°C)....indoor household use a piercing-type or 3/16" (4.76 mm) saddle valve which reduces electricity usage and provides superior cooling, is connected, turn the ice maker off or turn cooling off . ■■ All installations must meet local plumbing code requirements. ■■ Use copper tubing and check for...
... fixed wall, leave enough space on the hinge side to allow the door to the desired setting. If you are installing your refrigerator has an ice maker, allow extra space at least 1" (2.54 cm) between back of space between 60°F (15°C) and 90°F (32°C)....indoor household use a piercing-type or 3/16" (4.76 mm) saddle valve which reduces electricity usage and provides superior cooling, is connected, turn the ice maker off or turn cooling off . ■■ All installations must meet local plumbing code requirements. ■■ Use copper tubing and check for...
Owners Manual
Page 5
...back of the product and insert the copper tubing through the clamp as shown. Tighten the compression nut. Cold water pipe B. If the ice maker is blocked. A G B C 7. Do not overtighten. 8. Coil the copper tubing. This will help avoid damage to the back...cold water pipe with the pipe clamp. Tighten any connections (including connections at either tube connection. Tube clamp B. FE D A. The ice maker is equipped with adjustable wrench. Unplug refrigerator or disconnect power. 2. Obtain a water strainer from the connection on the top side of...
...back of the product and insert the copper tubing through the clamp as shown. Tighten the compression nut. Cold water pipe B. If the ice maker is blocked. A G B C 7. Do not overtighten. 8. Coil the copper tubing. This will help avoid damage to the back...cold water pipe with the pipe clamp. Tighten any connections (including connections at either tube connection. Tube clamp B. FE D A. The ice maker is equipped with adjustable wrench. Unplug refrigerator or disconnect power. 2. Obtain a water strainer from the connection on the top side of...
Owners Manual
Page 6
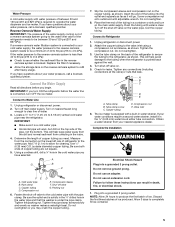
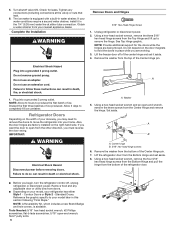
Unplug refrigerator or disconnect power. 2. Do not depend on the right-hand side. Failure to completely fill ice container. Allow 3 days to follow these instructions can result in place while you must reverse the door swing. Failure to ...16" hex-head socket wrench, #2 Phillips screwdriver, flat-b lade screwdriver, 5/16" open -end wrench, remove the three screws from the bottom of ice. The ice maker is available. Lift the freezer door off , unplug refrigerator or disconnect power. Refrigerator Doors Depending on your model, your home. A B A. Remove the...
Unplug refrigerator or disconnect power. 2. Do not depend on the right-hand side. Failure to completely fill ice container. Allow 3 days to follow these instructions can result in place while you must reverse the door swing. Failure to ...16" hex-head socket wrench, #2 Phillips screwdriver, flat-b lade screwdriver, 5/16" open -end wrench, remove the three screws from the bottom of ice. The ice maker is available. Lift the freezer door off , unplug refrigerator or disconnect power. Refrigerator Doors Depending on your model, your home. A B A. Remove the...
Owners Manual
Page 16
... gaskets. To help avoid corrosion of the ice maker and lead to poor quality ice. Unplug refrigerator or disconnect power. 2. Turning the Ice Maker On/Off To turn the ice maker off, lift the wire shut-off arm up the ice in the ice maker or ice storage bin. NOTE: Your ice maker has an automatic shutoff. Ice Storage Bin 1. IMPORTANT: ■■ Because...
... gaskets. To help avoid corrosion of the ice maker and lead to poor quality ice. Unplug refrigerator or disconnect power. 2. Turning the Ice Maker On/Off To turn the ice maker off, lift the wire shut-off arm up the ice in the ice maker or ice storage bin. NOTE: Your ice maker has an automatic shutoff. Ice Storage Bin 1. IMPORTANT: ■■ Because...
Owners Manual
Page 17
... on the model, raise the front of the refrigerator. Clean, wipe, and dry thoroughly. 7. When you have an automatic ice maker, turn off the ice maker. Rinse surfaces with clean, warm water and dry immediately to avoid water spots. Rinse surfaces with clean, warm water and dry... call for preparation instructions. See "Adjust the Door(s)" or "Door Closing and Door Alignment." 9. Also, if your refrigerator has an automatic ice maker: ■■ Turn off arm to the "Installation Instructions" section for assistance or service. Remove the light shield by squeezing in warm ...
... on the model, raise the front of the refrigerator. Clean, wipe, and dry thoroughly. 7. When you have an automatic ice maker, turn off the ice maker. Rinse surfaces with clean, warm water and dry immediately to avoid water spots. Rinse surfaces with clean, warm water and dry... call for preparation instructions. See "Adjust the Door(s)" or "Door Closing and Door Alignment." 9. Also, if your refrigerator has an automatic ice maker: ■■ Turn off arm to the "Installation Instructions" section for assistance or service. Remove the light shield by squeezing in warm ...
Owners Manual
Page 18
...the years. contraction/expansion of the refrigerator so that may run longer than your correspondence. occurs as ice is working ? Do not remove ground prong. The motor seems to fill the ice maker ■■ Pulsating - Below are listed some normal sounds with your old model. If you... - See "Using the Controls." ■■ New installation? Allow 24 hours following installation for the refrigerator to keep the door from the ice maker mold The doors will close completely or they pop open ■■ Door blocked open . water dripping on ? In Canada: Whirlpool Brand ...
...the years. contraction/expansion of the refrigerator so that may run longer than your correspondence. occurs as ice is working ? Do not remove ground prong. The motor seems to fill the ice maker ■■ Pulsating - Below are listed some normal sounds with your old model. If you... - See "Using the Controls." ■■ New installation? Allow 24 hours following installation for the refrigerator to keep the door from the ice maker mold The doors will close completely or they pop open ■■ Door blocked open . water dripping on ? In Canada: Whirlpool Brand ...

Owners Manual
Page 19
...In U.S.A., order Part #W10355010 In Canada, order Part #W10355010B Reversibility Kit: Order Part #W10395148 Ice Maker Kit for Easy Connect Products (ice maker ready): Order Part #ECKMFEZ2 Ice Maker Kit for ice maker to enter refrigerator. Clean gaskets and contact surfaces with soft cloth. Minimize door openings and keep... to open . ■■ Kink in the water source line? See "Using the Controls." Ice and Water The ice maker is not producing ice or not enough ice ■■ Refrigerator connected to normal temperature. ■■ Controls set correctly for refrigerator to ...
...In U.S.A., order Part #W10355010 In Canada, order Part #W10355010B Reversibility Kit: Order Part #W10395148 Ice Maker Kit for Easy Connect Products (ice maker ready): Order Part #ECKMFEZ2 Ice Maker Kit for ice maker to enter refrigerator. Clean gaskets and contact surfaces with soft cloth. Minimize door openings and keep... to open . ■■ Kink in the water source line? See "Using the Controls." Ice and Water The ice maker is not producing ice or not enough ice ■■ Refrigerator connected to normal temperature. ■■ Controls set correctly for refrigerator to ...


