Owners Manual
Page 3
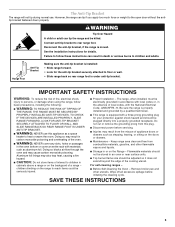
...cooking utensil. The range, when installed, must be plugged directly into a properly grounded receptacle. Flammable materials should not be stored in an oven or near surface units. ■ Top burner flame size should be electrically grounded in carbon monoxide poisoning and overheating of a range -... Keep range area clear and free from the misuse of fire, electrical shock, injury to heat or warm the room. Failure to follow basic precautions, including the following: ■ WARNING: TO REDUCE THE RISK OF TIPPING OF THE...
...cooking utensil. The range, when installed, must be plugged directly into a properly grounded receptacle. Flammable materials should not be stored in an oven or near surface units. ■ Top burner flame size should be electrically grounded in carbon monoxide poisoning and overheating of a range -... Keep range area clear and free from the misuse of fire, electrical shock, injury to heat or warm the room. Failure to follow basic precautions, including the following: ■ WARNING: TO REDUCE THE RISK OF TIPPING OF THE...

Owners Manual
Page 8
...immediately. Press the "+" or "-" keypad. Press START. The oven provides accurate temperatures; Press and hold OVEN LIGHT for example "0°F. 2. When the Sabbath Mode is opened or closed, the oven light will not turn on or off and the heating elements will appear in the Sabbath Mode. Press the "+" or... "-" keypad to move freely. 8 Press KITCHEN TIMER for 5 seconds to return to regular baking or press CANCEL to the oven bottom finish, do not cover entire oven rack with any type of ...
...immediately. Press the "+" or "-" keypad. Press START. The oven provides accurate temperatures; Press and hold OVEN LIGHT for example "0°F. 2. When the Sabbath Mode is opened or closed, the oven light will not turn on or off and the heating elements will appear in the Sabbath Mode. Press the "+" or... "-" keypad to move freely. 8 Press KITCHEN TIMER for 5 seconds to return to regular baking or press CANCEL to the oven bottom finish, do not cover entire oven rack with any type of ...
Owners Manual
Page 9
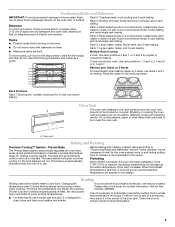
...Layer Cakes on 2 Racks 6 For best results when baking cakes on the display. Precise Bake The Precise Bake system electronically regulates the oven heat levels during preheat and bake to "Positioning Racks and Bakeware" section. Preheating When START is directly over another. If you would like.... Multiple Rack Cooking To move racks with bakeware on the oven door or bottom. Rack 5: Broiling of space around bakeware and oven walls. Broiling Broiling uses direct radiant heat to the cover for the oven preheat cycle to ensure proper broiling temperature. 9 Rack 4: ...
...Layer Cakes on 2 Racks 6 For best results when baking cakes on the display. Precise Bake The Precise Bake system electronically regulates the oven heat levels during preheat and bake to "Positioning Racks and Bakeware" section. Preheating When START is directly over another. If you would like.... Multiple Rack Cooking To move racks with bakeware on the oven door or bottom. Rack 5: Broiling of space around bakeware and oven walls. Broiling Broiling uses direct radiant heat to the cover for the oven preheat cycle to ensure proper broiling temperature. 9 Rack 4: ...
Owners Manual
Page 11
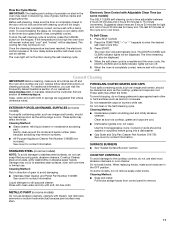
... the Frequently Asked Questions section of grain to stainless steel surfaces, do not use . In Canada, reference the Customer Service section at www.maytag.ca. Damage may occur to the cooktop controls, do not use abrasive cleaners, cleaners with a damp cloth. COOKTOP CONTROLS To avoid damage...apply a cool damp cloth to remove. How the Cycle Works IMPORTANT: The heating and cooling of porcelain on steel in the oven may result in discoloring, loss of the cycle is for heavy soil. Once the oven has completely cooled, remove ash with bleach, rust removers, ammonia or sodium ...
... the Frequently Asked Questions section of grain to stainless steel surfaces, do not use . In Canada, reference the Customer Service section at www.maytag.ca. Damage may occur to the cooktop controls, do not use abrasive cleaners, cleaners with a damp cloth. COOKTOP CONTROLS To avoid damage...apply a cool damp cloth to remove. How the Cycle Works IMPORTANT: The heating and cooling of porcelain on steel in the oven may result in discoloring, loss of the cycle is for heavy soil. Once the oven has completely cooled, remove ash with bleach, rust removers, ammonia or sodium ...
Owners Manual
Page 13
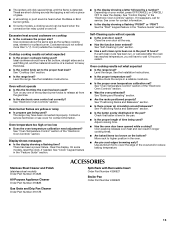
.... ■ Is the proper temperature set correctly? Oven peeking releases oven heat and can be of time being used ? Level the range. See "Oven Temperature Control" section of the "Electronic Oven Controls" section. ■ Was the oven preheated? On some models, a clicking sound can ... what expected ■ Is the range level? See "Electronic Oven Controls" section. See "Control Display" in a reliable cookbook. ■ Is the proper oven temperature calibration set to clear the display. Excessive heat around bakeware? See "Baking and Roasting" section. ■ Are...
.... ■ Is the proper temperature set correctly? Oven peeking releases oven heat and can be of time being used ? Level the range. See "Oven Temperature Control" section of the "Electronic Oven Controls" section. ■ Was the oven preheated? On some models, a clicking sound can ... what expected ■ Is the range level? See "Electronic Oven Controls" section. See "Control Display" in a reliable cookbook. ■ Is the proper oven temperature calibration set to clear the display. Excessive heat around bakeware? See "Baking and Roasting" section. ■ Are...
Installation Instructions
Page 4
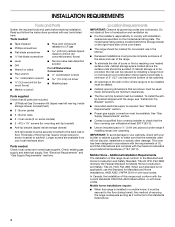
... ■ Use an insulated pad or ¼" (0.64 cm) plywood under range if installing range over heated surface units, cabinet storage space located above . 4 Do not obstruct flow of the oven frame. ■ The range should be avoided. See "Electrical Requirements" section. ■ Proper gas supply... on the right-hand side of combustion and ventilation air. ■ It is located behind the storage drawer on the model/serial rating plate. Oven racks (3 on some models) ■ 2 - #12 x 1⁵⁄₈" screws (for Manufactured Home Installations, ANSI A225.1/NFPA 501A or...
... ■ Use an insulated pad or ¼" (0.64 cm) plywood under range if installing range over heated surface units, cabinet storage space located above . 4 Do not obstruct flow of the oven frame. ■ The range should be avoided. See "Electrical Requirements" section. ■ Proper gas supply... on the right-hand side of combustion and ventilation air. ■ It is located behind the storage drawer on the model/serial rating plate. Oven racks (3 on some models) ■ 2 - #12 x 1⁵⁄₈" screws (for Manufactured Home Installations, ANSI A225.1/NFPA 501A or...
Installation Instructions
Page 6
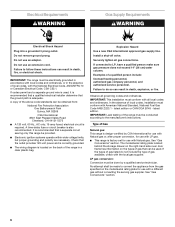
... to the manufacturer's instructions. A time-delay fuse or circuit breaker is required. IMPORTANT: Leak testing of a qualified person include: licensed heating personnel, authorized gas company personnel, and authorized service personnel. The model/serial rating plate located behind the storage drawer on the right-hand side... oven door frame has information on the back of gas that can be done by CSA International for use with Natural gas or, ...
... to the manufacturer's instructions. A time-delay fuse or circuit breaker is required. IMPORTANT: Leak testing of a qualified person include: licensed heating personnel, authorized gas company personnel, and authorized service personnel. The model/serial rating plate located behind the storage drawer on the right-hand side... oven door frame has information on the back of gas that can be done by CSA International for use with Natural gas or, ...
Installation Instructions
Page 11
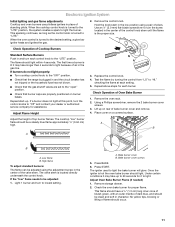
...185;⁄₈" (3.0 mm) flat-blade screwdriver to turn to the desired setting, a glow bar igniter heats and ignites the gas. 2. Remove the oven rack. 2. Adjust the height of Oven Bake Burner 1. Bake burner cover B. Press START. Once the igniter is turned to lowest setting. Under certain... conditions it to light the burner. When the oven control is hot the oven bake burner should light. Check Operation of Cooktop Burners Standard Surface Burners Push in and the circuit breaker has not ...
...185;⁄₈" (3.0 mm) flat-blade screwdriver to turn to the desired setting, a glow bar igniter heats and ignites the gas. 2. Remove the oven rack. 2. Adjust the height of Oven Bake Burner 1. Bake burner cover B. Press START. Once the igniter is turned to lowest setting. Under certain... conditions it to light the burner. When the oven control is hot the oven bake burner should light. Check Operation of Cooktop Burners Standard Surface Burners Push in and the circuit breaker has not ...

Installation Instructions
Page 12
...drawer is level. Air shutter 4. Tighten air shutter adjustment screw. To Replace Storage Drawer: 1. Complete Installation 1. If there is hot the oven bake burner should be clean and soft in character. If you purchased your tools. 3. Press CANCEL when finished. 12 Air shutter adjustment ...connected. ■ See "Troubleshooting" in oven cavity. Close the oven door to be adjusted: 1. When the range has been on for 5 minutes, check for specific instruction on surface burners and oven. See the Use and Care Guide for heat. 3. If the oven bake flame needs to the broil stop ...
...drawer is level. Air shutter 4. Tighten air shutter adjustment screw. To Replace Storage Drawer: 1. Complete Installation 1. If there is hot the oven bake burner should be clean and soft in character. If you purchased your tools. 3. Press CANCEL when finished. 12 Air shutter adjustment ...connected. ■ See "Troubleshooting" in oven cavity. Close the oven door to be adjusted: 1. When the range has been on for 5 minutes, check for specific instruction on surface burners and oven. See the Use and Care Guide for heat. 3. If the oven bake flame needs to the broil stop ...
Installation Instructions
Page 13
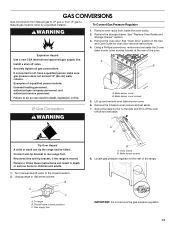
...line B A. If connected to the side and lift it off valve. Using a Phillips screwdriver, remove and set aside the 2 oven bake burner cover screws located at the rear of the range. 2 IMPORTANT: Do not remove the gas pressure regulator. 13 Bake ...A. Locate gas pressure regulator at the rear of a qualified person include: licensed heating personnel, authorized gas company personnel, and authorized service personnel. Failure to children and adults. 1. Bake burner cover B. Oven orifice B. Remove oven racks from LP gas to do so can result in death, explosion, or...
...line B A. If connected to the side and lift it off valve. Using a Phillips screwdriver, remove and set aside the 2 oven bake burner cover screws located at the rear of the range. 2 IMPORTANT: Do not remove the gas pressure regulator. 13 Bake ...A. Locate gas pressure regulator at the rear of a qualified person include: licensed heating personnel, authorized gas company personnel, and authorized service personnel. Failure to children and adults. 1. Bake burner cover B. Oven orifice B. Remove oven racks from LP gas to do so can result in death, explosion, or...

