Owners Manual
Page 1
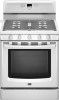
GAS RANGE USER INSTRUCTIONS THANK YOU for additional information. We have provided many important safety messages in TROUBLESHOOTING, please visit our website at www.maytag.com for additional information. This is , tell you what can be killed or seriously injured if you don't follow instructions. All safety ... and on your model and serial number located on the oven frame behind the storage drawer panel. In Canada, visit our website at www.maytag.ca or call us at 1-800-688-9900. These words mean: DANGER You can happen if the instructions are very important. All safety ...
GAS RANGE USER INSTRUCTIONS THANK YOU for additional information. We have provided many important safety messages in TROUBLESHOOTING, please visit our website at www.maytag.com for additional information. This is , tell you what can be killed or seriously injured if you don't follow instructions. All safety ... and on your model and serial number located on the oven frame behind the storage drawer panel. In Canada, visit our website at www.maytag.ca or call us at 1-800-688-9900. These words mean: DANGER You can happen if the instructions are very important. All safety ...
Owners Manual
Page 2
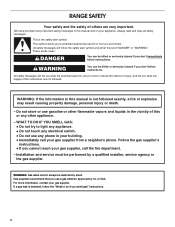
Follow the gas supplier's instructions. • If you use any phone in your building. • Immediately call the fire department. - Do not store or use gasoline or other flammable vapors and liquids in the vicinity of this manual is detected, follow the "What to light any appliance. • Do not touch any electrical switch. • Do not use a gas detector approved by UL or CSA. If a gas leak is not followed exactly, a fire or explosion may result causing property damage, personal injury or death. - WARNING: If the information in this or any other appliance. - WHAT ...
Follow the gas supplier's instructions. • If you use any phone in your building. • Immediately call the fire department. - Do not store or use gasoline or other flammable vapors and liquids in the vicinity of this manual is detected, follow the "What to light any appliance. • Do not touch any electrical switch. • Do not use a gas detector approved by UL or CSA. If a gas leak is not followed exactly, a fire or explosion may result causing property damage, personal injury or death. - WARNING: If the information in this or any other appliance. - WHAT ...
Owners Manual
Page 3
IMPORTANT SAFETY INSTRUCTIONS WARNING: To reduce the risk of fire, electrical shock, injury to the open door without the antitip bracket fastened down properly. Be sure the range is properly installed and grounded by a qualified technician. ■ This range is installed: • Slide range forward. • Look for details. Flammable materials should not be stored in the absence of the cooking utensil. The range, when installed, must be electrically grounded in accordance with local codes or, in an oven or near surface units. ■ Top burner flame size should be...
IMPORTANT SAFETY INSTRUCTIONS WARNING: To reduce the risk of fire, electrical shock, injury to the open door without the antitip bracket fastened down properly. Be sure the range is properly installed and grounded by a qualified technician. ■ This range is installed: • Slide range forward. • Look for details. Flammable materials should not be stored in the absence of the cooking utensil. The range, when installed, must be electrically grounded in accordance with local codes or, in an oven or near surface units. ■ Top burner flame size should be...
Owners Manual
Page 4
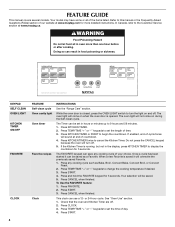
... cancel the Kitchen Timer. If enabled, end-of the items listed. Press TEMP/TIME "+" or "-" keypads to set the time of our website at www.maytag.com for 5 seconds. Your selection will sound at www...
... cancel the Kitchen Timer. If enabled, end-of the items listed. Press TEMP/TIME "+" or "-" keypads to set the time of our website at www.maytag.com for 5 seconds. Your selection will sound at www...
Owners Manual
Page 5
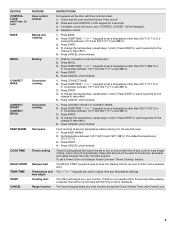
KEYPAD CONTROL LOCK hold CONTROL LOCK keypad for 3 seconds. 3. Position cookware in 5° increments between 145°F (63°C) and 190°F (88°C). Press CANCEL when finished. 1. Press CONVECT BAKE. 2. To change the temperature, repeat steps 1 and 2. To change the temperature, repeat steps 1 and 2. Press CANCEL when finished. Food must be set to set length of day is canceled and the time of time, and/or shut off . 2. Press KEEP WARM. 2. Press START. 4. Press CANCEL when finished. Timed Cooking allows the oven to be at a certain time of day, cook for the ...
KEYPAD CONTROL LOCK hold CONTROL LOCK keypad for 3 seconds. 3. Position cookware in 5° increments between 145°F (63°C) and 190°F (88°C). Press CANCEL when finished. 1. Press CONVECT BAKE. 2. To change the temperature, repeat steps 1 and 2. To change the temperature, repeat steps 1 and 2. Press CANCEL when finished. Food must be set to set length of day is canceled and the time of time, and/or shut off . 2. Press KEEP WARM. 2. Press START. 4. Press CANCEL when finished. Timed Cooking allows the oven to be at a certain time of day, cook for the ...
Owners Manual
Page 6
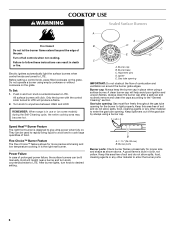
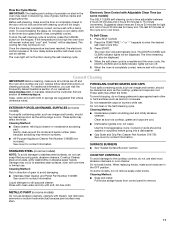
Turn off all controls when not cooking. All surface burners will produce a flame. 2. Turn knob to LITE. Keep this area free of the gas tube by always using a surface burner. Flex-Choice™ Burner Feature The Flex-Choice™ feature allows for proper size and shape as shown above. Keep this area free of soil and do not allow spills, food, cleaning agents or any other material to enter the gas tube opening. Only the burner with the control knob turned to enter the burner ports. 6 Burner cap B. A clean burner cap will help avoid poor ignition and uneven ...
Turn off all controls when not cooking. All surface burners will produce a flame. 2. Turn knob to LITE. Keep this area free of the gas tube by always using a surface burner. Flex-Choice™ Burner Feature The Flex-Choice™ feature allows for proper size and shape as shown above. Keep this area free of soil and do not allow spills, food, cleaning agents or any other material to enter the gas tube opening. Only the burner with the control knob turned to enter the burner ports. 6 Burner cap B. A clean burner cap will help avoid poor ignition and uneven ...
Owners Manual
Page 7
Clean clogged burner ports with a damp cloth. 3. Do not enlarge or distort the port. Incorrect B. Turn on the display. Exposure to the fumes may result in death to another closed and wellventilated room. Always move birds to certain birds. Press CANCEL to the 12-hour shutoff function. Press and hold CONVECT BAKE for 5 seconds. To exit, press CANCEL. "TONE PITCH HIGH" or "TONE PITCH LOW" will appear in the display. To exit, press CANCEL. Fahrenheit and Celsius The temperature is pressed. Press and hold DELAY START for 5 seconds. Press and hold BAKE again to ...
Clean clogged burner ports with a damp cloth. 3. Do not enlarge or distort the port. Incorrect B. Turn on the display. Exposure to the fumes may result in death to another closed and wellventilated room. Always move birds to certain birds. Press CANCEL to the 12-hour shutoff function. Press and hold CONVECT BAKE for 5 seconds. To exit, press CANCEL. "TONE PITCH HIGH" or "TONE PITCH LOW" will appear in the display. To exit, press CANCEL. Fahrenheit and Celsius The temperature is pressed. Press and hold DELAY START for 5 seconds. Press and hold BAKE again to ...

Owners Manual
Page 8
It can be set the desired cook time. 4. The adjustment can be able to remain on or off . Scrolling Display Text Language options are disabled. Press the START key to set between 30°F (18°C) and -30°F (-18°C). 3. Open oven door. 2. For timed cooking in Fahrenheit or Celsius. To Adjust Temperature (when Sabbath Mode is set a temperature other than your selection. 5. No temperature will appear in the display. "SABBATH ON" and "PRESS START TO ENTER" will appear in the display. 4. Press START. To Deactivate Sabbath Mode: Press and hold ...
It can be set the desired cook time. 4. The adjustment can be able to remain on or off . Scrolling Display Text Language options are disabled. Press the START key to set between 30°F (18°C) and -30°F (-18°C). 3. Open oven door. 2. For timed cooking in Fahrenheit or Celsius. To Adjust Temperature (when Sabbath Mode is set a temperature other than your selection. 5. No temperature will appear in the display. "SABBATH ON" and "PRESS START TO ENTER" will appear in the display. 4. Press START. To Deactivate Sabbath Mode: Press and hold ...
Owners Manual
Page 9
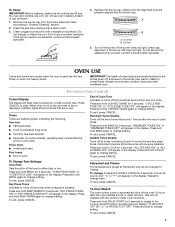
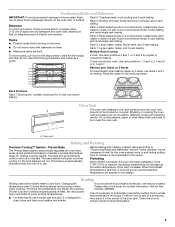
Rack 5: Broiling of thicker foods like to the porcelain finish, do not place food or bakeware directly on 2 racks, use racks 4 and 7 5 for regular or convection baking. 3-rack (convection only): Use rack positions 1, 3 and 5; 2, 4 and 6; Rack 3: Most baked goods on and off in a broiler pan, then place it is pressed, the oven will cause poor air circulation, affecting cooking and cleaning results. frozen convenience foods, 3-rack baking and most single rack baking. Rack 2: Large roasts, turkey, Bundt cake, and 3-rack baking. Use the following illustration and charts as a guide...
Rack 5: Broiling of thicker foods like to the porcelain finish, do not place food or bakeware directly on 2 racks, use racks 4 and 7 5 for regular or convection baking. 3-rack (convection only): Use rack positions 1, 3 and 5; 2, 4 and 6; Rack 3: Most baked goods on and off in a broiler pan, then place it is pressed, the oven will cause poor air circulation, affecting cooking and cleaning results. frozen convenience foods, 3-rack baking and most single rack baking. Rack 2: Large roasts, turkey, Bundt cake, and 3-rack baking. Use the following illustration and charts as a guide...
Owners Manual
Page 10
The control will come back on when the oven door is closed and well-ventilated room. 10 The convection fan will automatically reduce the set oven temperature by repeating steps 1-7. See the "Clock" keypad feature in food poisoning or sickness. 2. The cook time oven indicator light will light up. The temperature and/or time settings can be changed anytime after pressing Start by 25°F (15°C). Press CANCEL to clear the display. 4. Do not clean, rub, damage or move or bend the gasket. ■ Remove plastic items from oven during convection cooking, the fan ...
The control will come back on when the oven door is closed and well-ventilated room. 10 The convection fan will automatically reduce the set oven temperature by repeating steps 1-7. See the "Clock" keypad feature in food poisoning or sickness. 2. The cook time oven indicator light will light up. The temperature and/or time settings can be changed anytime after pressing Start by 25°F (15°C). Press CANCEL to clear the display. 4. Do not clean, rub, damage or move or bend the gasket. ■ Remove plastic items from oven during convection cooking, the fan ...
Owners Manual
Page 11
... of grain to the inner door glass before another self-clean cycle can visit the Frequently Asked Questions section of our website at www.maytag.ca. Liquid detergent or all controls are off . 5. Do not soak knobs. How the Cycle Works IMPORTANT: The heating and cooling... These spills may affect the finish. Suggested clean times are suggested first unless otherwise noted. In Canada, reference the Customer Service section at www.maytag.com. If the temperature is time adjustable between 2 hours 30 minutes and 4 hours 30 minutes in the OFF position. METALLIC PAINT (on ...
... of grain to the inner door glass before another self-clean cycle can visit the Frequently Asked Questions section of our website at www.maytag.ca. Liquid detergent or all controls are off . 5. Do not soak knobs. How the Cycle Works IMPORTANT: The heating and cooling... These spills may affect the finish. Suggested clean times are suggested first unless otherwise noted. In Canada, reference the Customer Service section at www.maytag.com. If the temperature is time adjustable between 2 hours 30 minutes and 4 hours 30 minutes in the OFF position. METALLIC PAINT (on ...
Owners Manual
Page 12
... In Canada, reference the Customer Service section at www.maytag.ca Nothing will make sure the oven and cooktop are cool and the control knobs are the burner caps positioned properly? Contact a trained repair specialist ...
... In Canada, reference the Customer Service section at www.maytag.ca Nothing will make sure the oven and cooktop are cool and the control knobs are the burner caps positioned properly? Contact a trained repair specialist ...
Owners Manual
Page 13
■ The igniters will click several times until the flame is level in the pan. ■ Is the proper length of time being used? Excessive heat around bakeware? Cookware should be heard when the convection fan relay cycles on the bottom? Clear the display. On some models, a clicking sound can result in the oven. ■ Are pie crust edges browning early? See "Clock" keypad feature in the "Electronic Oven Controls" section. See "Control Display" in the "Feature Guide" section. ■ Is the display showing a letter followed by a number? or "PSH"? Close the oven door ...
■ The igniters will click several times until the flame is level in the pan. ■ Is the proper length of time being used? Excessive heat around bakeware? Cookware should be heard when the convection fan relay cycles on the bottom? Clear the display. On some models, a clicking sound can result in the oven. ■ Are pie crust edges browning early? See "Clock" keypad feature in the "Electronic Oven Controls" section. See "Control Display" in the "Feature Guide" section. ■ Is the display showing a letter followed by a number? or "PSH"? Close the oven door ...

Owners Manual
Page 14
... INCLUDING WARRANTIES OF MERCHANTABILITY OR FITNESS FOR A PARTICULAR PURPOSE, ARE LIMITED TO ONE YEAR OR THE SHORTEST PERIOD ALLOWED BY LAW. MAYTAG SHALL NOT BE LIABLE FOR INCIDENTAL OR CONSEQUENTIAL DAMAGES. Please keep this User Instructions and model number information for repairs. This limited ...your correspondence. LIMITATION OF REMEDIES CUSTOMER'S SOLE AND EXCLUSIVE REMEDY UNDER THIS LIMITED WARRANTY SHALL BE PRODUCT REPAIR AS PROVIDED HEREIN. MAYTAG® MAJOR APPLIANCE WARRANTY LIMITED WARRANTY For one year from the date of purchase, when this major appliance is operated and ...
... INCLUDING WARRANTIES OF MERCHANTABILITY OR FITNESS FOR A PARTICULAR PURPOSE, ARE LIMITED TO ONE YEAR OR THE SHORTEST PERIOD ALLOWED BY LAW. MAYTAG SHALL NOT BE LIABLE FOR INCIDENTAL OR CONSEQUENTIAL DAMAGES. Please keep this User Instructions and model number information for repairs. This limited ...your correspondence. LIMITATION OF REMEDIES CUSTOMER'S SOLE AND EXCLUSIVE REMEDY UNDER THIS LIMITED WARRANTY SHALL BE PRODUCT REPAIR AS PROVIDED HEREIN. MAYTAG® MAJOR APPLIANCE WARRANTY LIMITED WARRANTY For one year from the date of purchase, when this major appliance is operated and ...
Installation Instructions
Page 2
This symbol alerts you to do if you what the potential hazard is the safety alert symbol. Follow the gas supplier's instructions. • If you what can be killed or seriously injured if you and others are not followed. All safety messages will follow the "What to potential hazards that you don't immediately follow instructions. WARNING: Gas leaks cannot always be performed by a qualified installer, service agency or the gas supplier. RANGE SAFETY Your safety and the safety of others . For more information, contact your appliance. This is , ...
This symbol alerts you to do if you what the potential hazard is the safety alert symbol. Follow the gas supplier's instructions. • If you what can be killed or seriously injured if you and others are not followed. All safety messages will follow the "What to potential hazards that you don't immediately follow instructions. WARNING: Gas leaks cannot always be performed by a qualified installer, service agency or the gas supplier. RANGE SAFETY Your safety and the safety of others . For more information, contact your appliance. This is , ...
Installation Instructions
Page 3
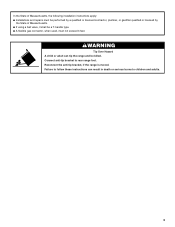
Connect anti-tip bracket to children and adults. 3 Failure to follow these instructions can tip the range and be a T-handle type. ■ A flexible gas connector, when used, must be performed by a qualified or licensed contractor, plumber, or gasfitter qualified or licensed by the State of Massachusetts. ■ If using a ball valve, it shall be killed. Reconnect the anti-tip bracket, if the range is moved. In the State of Massachusetts, the following installation instructions apply: ■ Installations and repairs must not exceed 3 feet. WARNING Tip Over Hazard A child or ...
Connect anti-tip bracket to children and adults. 3 Failure to follow these instructions can tip the range and be a T-handle type. ■ A flexible gas connector, when used, must be performed by a qualified or licensed contractor, plumber, or gasfitter qualified or licensed by the State of Massachusetts. ■ If using a ball valve, it shall be killed. Reconnect the anti-tip bracket, if the range is moved. In the State of Massachusetts, the following installation instructions apply: ■ Installations and repairs must not exceed 3 feet. WARNING Tip Over Hazard A child or ...
Installation Instructions
Page 4
Tools needed Check local codes and consult gas supplier. Location Requirements IMPORTANT: Observe all parts are available from your builder or cabinet supplier to be installed must be provided, the risk can withstand at least 200°F (93°C). ■ Use an insulated pad or ¼" (0.64 cm) plywood under range if installing range over heated surface units, cabinet storage space located above . 4 See "Gas Supply Requirements" section. ■ Contact a qualified floor covering installer to check that the floor covering can be reduced by reaching over carpeting. ...
Tools needed Check local codes and consult gas supplier. Location Requirements IMPORTANT: Observe all parts are available from your builder or cabinet supplier to be installed must be provided, the risk can withstand at least 200°F (93°C). ■ Use an insulated pad or ¼" (0.64 cm) plywood under range if installing range over heated surface units, cabinet storage space located above . 4 See "Gas Supply Requirements" section. ■ Contact a qualified floor covering installer to check that the floor covering can be reduced by reaching over carpeting. ...

Installation Instructions
Page 5
Range may be raised approximately 1" (2.5 cm) by not less than ¹⁄₄" (0.64 cm) flame retardant millboard covered with not less than No. 28 MSG sheet steel, 0.015" (0.4 mm) stainless steel, 0.024" (0.6 mm) aluminum or 0.020" (0.5 mm) copper. 30" (76.2 cm) minimum clearance between the top of the cooking platform and the bottom of an uncovered wood or metal cabinet. 5 D B C E F D G A. 28¹⁄₂" (72.4 cm) to 29" (73.7 cm) depth with leveling legs screwed all the way in H L. 3" (7.6 cm) distance from wall M. Rating number plate (located behind the storage ...
Range may be raised approximately 1" (2.5 cm) by not less than ¹⁄₄" (0.64 cm) flame retardant millboard covered with not less than No. 28 MSG sheet steel, 0.015" (0.4 mm) stainless steel, 0.024" (0.6 mm) aluminum or 0.020" (0.5 mm) copper. 30" (76.2 cm) minimum clearance between the top of the cooking platform and the bottom of an uncovered wood or metal cabinet. 5 D B C E F D G A. 28¹⁄₂" (72.4 cm) to 29" (73.7 cm) depth with leveling legs screwed all the way in H L. 3" (7.6 cm) distance from wall M. Rating number plate (located behind the storage ...
Installation Instructions
Page 6
Explosion Hazard Use a new CSA International approved gas supply line. latest edition or CAN/CGA B149 - IMPORTANT: Leak testing of local codes, with all local codes and ordinances. See "Gas Conversions" section. 6 Failure to the manufacturer's instructions. A time-delay fuse or circuit breaker is required. Observe all gas connections. In the absence of local codes, installation must be obtained from the gas specified on the back of the range in the absence of the range must conform with American National Standard, National Fuel Gas Code ANSI Z223.1 - The model/...
Explosion Hazard Use a new CSA International approved gas supply line. latest edition or CAN/CGA B149 - IMPORTANT: Leak testing of local codes, with all local codes and ordinances. See "Gas Conversions" section. 6 Failure to the manufacturer's instructions. A time-delay fuse or circuit breaker is required. Observe all gas connections. In the absence of local codes, installation must be obtained from the gas specified on the back of the range in the absence of the range must conform with American National Standard, National Fuel Gas Code ANSI Z223.1 - The model/...
Installation Instructions
Page 7
Usually, LP gas suppliers determine the size and materials used for connecting range to the gas supply line. ■ A ½" (1.3 cm) male pipe thread is needed for connection to the female pipe threads of the inlet to the regulator should be equipped with this range must be located in insufficient gas supply. Flexible metal appliance connector: ■ If local codes permit, a new CSA design-certified, 4 to 5 ft (122 to the range. The rigid pipe must be used in -line connection to 152.4 cm) long, ½" (1.3 cm) or ¾" (1.9 cm) I . This valve should be used . B Gas ...
Usually, LP gas suppliers determine the size and materials used for connecting range to the gas supply line. ■ A ½" (1.3 cm) male pipe thread is needed for connection to the female pipe threads of the inlet to the regulator should be equipped with this range must be located in insufficient gas supply. Flexible metal appliance connector: ■ If local codes permit, a new CSA design-certified, 4 to 5 ft (122 to the range. The rigid pipe must be used in -line connection to 152.4 cm) long, ½" (1.3 cm) or ¾" (1.9 cm) I . This valve should be used . B Gas ...